
Format Bentuk PowerPoint dalam C++
Pendahuluan
Di PowerPoint, Anda dapat menambahkan bentuk ke slide. Karena bentuk terdiri dari garis, Anda dapat memformatnya dengan mengubah atau menerapkan efek pada garis luar mereka. Selain itu, Anda dapat memformat bentuk dengan menentukan pengaturan yang mengontrol bagaimana bagian dalamnya diisi.
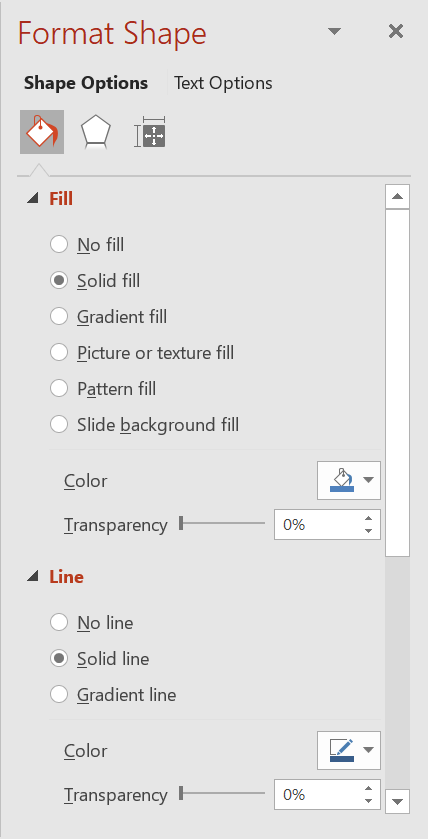
Aspose.Slides for C++ menyediakan antarmuka dan metode yang memungkinkan Anda memformat bentuk menggunakan opsi yang sama tersedia di PowerPoint.
Format Garis
Dengan Aspose.Slides, Anda dapat menentukan gaya garis khusus untuk sebuah bentuk. Langkah-langkah berikut menjelaskan prosedurnya:
- Buat sebuah instance dari kelas Presentation.
- Ambil referensi ke slide berdasarkan indeksnya.
- Tambahkan sebuah IAutoShape ke slide.
- Tetapkan line style pada bentuk.
- Tetapkan lebar garis.
- Tetapkan dash style pada garis.
- Tetapkan warna garis untuk bentuk.
- Simpan presentasi yang telah dimodifikasi sebagai file PPTX.
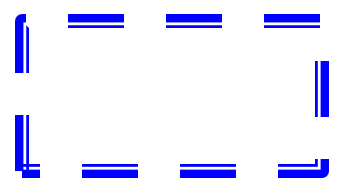
Kode berikut menunjukkan cara memformat sebuah AutoShape persegi panjang:
#include <DOM/FillType.h>
#include <DOM/IAutoShape.h>
#include <DOM/IColorFormat.h>
#include <DOM/IFillFormat.h>
#include <DOM/ILineFillFormat.h>
#include <DOM/ILineFormat.h>
#include <DOM/IShapeCollection.h>
#include <DOM/ISlide.h>
#include <DOM/LineDashStyle.h>
#include <DOM/LineStyle.h>
#include <DOM/Presentation.h>
#include <DOM/ShapeType.h>
#include <Export/SaveFormat.h>
#include <drawing/color.h>
#include <system/smart_ptr.h>
using namespace Aspose::Slides;
using namespace Aspose::Slides::Export;
using namespace System;
using namespace System::Drawing;

// Membuat instance kelas Presentation yang mewakili file presentasi.
auto presentation = MakeObject<Presentation>();

// Ambil slide pertama.
auto slide = presentation->get_Slide(0);

// Tambahkan auto shape tipe Rectangle.
auto shape = slide->get_Shapes()->AddAutoShape(ShapeType::Rectangle, 50, 150, 150, 75);

// Atur warna isian untuk shape persegi panjang.
shape->get_FillFormat()->set_FillType(FillType::NoFill);

// Terapkan pemformatan pada garis rectangle.
shape->get_LineFormat()->set_Style(LineStyle::ThickThin);
shape->get_LineFormat()->set_Width(7);
shape->get_LineFormat()->set_DashStyle(LineDashStyle::Dash);

// Atur warna untuk garis rectangle.
shape->get_LineFormat()->get_FillFormat()->set_FillType(FillType::Solid);
shape->get_LineFormat()->get_FillFormat()->get_SolidFillColor()->set_Color(Color::get_Blue());

// Simpan file PPTX ke disk.
presentation->Save(u"formatted_lines.pptx", SaveFormat::Pptx);
presentation->Dispose();
Hasil:
Terapkan Efek Sketsa pada Garis Bentuk
Efek sketsa membuat garis bentuk terlihat seperti digambar tangan. Gunakan IShape::get_LineFormat untuk mengakses pengaturan garis, ILineFormat::get_SketchFormat untuk mengakses pengaturan sketsa, dan ISketchFormat::set_SketchType untuk memilih nilai dari enumerasi LineSketchType.
Kode C++ berikut menunjukkan cara menerapkan efek LineSketchType::Curved, membaca nilai yang ditetapkan secara eksplisit, dan menghapus efek dengan LineSketchType::None:
auto presentation = MakeObject<Presentation>();

auto slide = presentation->get_Slide(0);
auto shape = slide->get_Shapes()->AddAutoShape(ShapeType::Rectangle, 50, 50, 200, 100);

// Access the shape's line format and its sketch format.
auto sketchFormat = shape->get_LineFormat()->get_SketchFormat();

// Apply a sketch effect.
sketchFormat->set_SketchType(LineSketchType::Curved);

// Read the sketch effect assigned directly to the shape.
auto explicitSketchType = sketchFormat->get_SketchType();
Console::WriteLine(u"Explicit sketch type: {0}", explicitSketchType);

// Remove the sketch effect.
sketchFormat->set_SketchType(LineSketchType::None);

presentation->Dispose();
Nilai yang dikembalikan oleh ISketchFormat::get_SketchType mewakili pengaturan yang ditetapkan langsung pada bentuk. Jika pemformatan garis dapat diwariskan dari tema, master slide, atau layout slide, gunakan ILineFormat::GetEffective, akses ILineFormatEffectiveData::get_SketchFormat, dan baca ISketchFormatEffectiveData::get_SketchType. Nilai efektif mencerminkan pemformatan yang sebenarnya diterapkan setelah pewarisan diselesaikan:
auto presentation = MakeObject<Presentation>(u"presentation.pptx");

auto shape = presentation->get_Slide(0)->get_Shape(0);
auto lineFormat = shape->get_LineFormat();

auto explicitSketchType = lineFormat->get_SketchFormat()->get_SketchType();
auto effectiveLineFormat = lineFormat->GetEffective();
auto effectiveSketchType = effectiveLineFormat->get_SketchFormat()->get_SketchType();

Console::WriteLine(u"Explicit sketch type: {0}", explicitSketchType);
Console::WriteLine(u"Effective sketch type: {0}", effectiveSketchType);

presentation->Dispose();
Format Gaya Sambungan
Berikut tiga opsi jenis sambungan:
- Bulat
- Miter
- Bevel
Secara default, ketika PowerPoint menggabungkan dua garis pada sudut (seperti pada sudut bentuk), ia menggunakan pengaturan Round. Namun, jika Anda menggambar bentuk dengan sudut tajam, Anda mungkin lebih memilih opsi Miter.
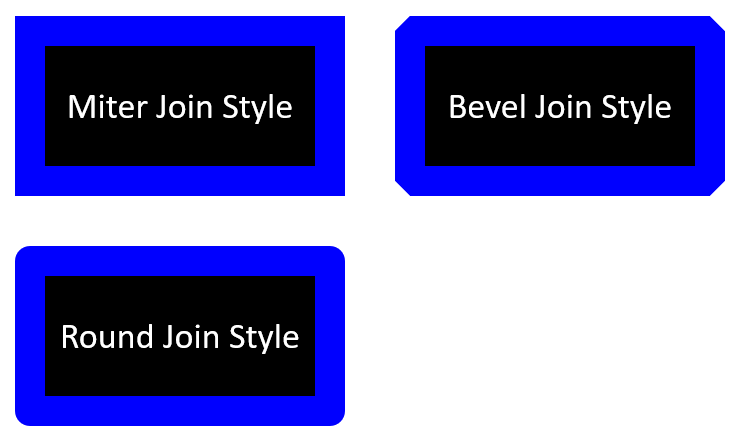
Contoh kode berikut menunjukkan cara membuat tiga persegi panjang (seperti pada gambar di atas) menggunakan pengaturan jenis sambungan Miter, Bevel, dan Round:
#include <DOM/FillType.h>
#include <DOM/IAutoShape.h>
#include <DOM/IColorFormat.h>
#include <DOM/IFillFormat.h>
#include <DOM/ILineFillFormat.h>
#include <DOM/ILineFormat.h>
#include <DOM/IShapeCollection.h>
#include <DOM/ISlide.h>
#include <DOM/ITextFrame.h>
#include <DOM/LineJoinStyle.h>
#include <DOM/Presentation.h>
#include <DOM/ShapeType.h>
#include <Export/SaveFormat.h>
#include <drawing/color.h>
#include <system/smart_ptr.h>
using namespace Aspose::Slides;
using namespace Aspose::Slides::Export;
using namespace System;
using namespace System::Drawing;

// Buat instance kelas Presentation yang mewakili file presentasi.
auto presentation = MakeObject<Presentation>();

// Ambil slide pertama.
auto slide = presentation->get_Slide(0);

// Tambahkan tiga auto shape tipe Rectangle.
auto shape1 = slide->get_Shapes()->AddAutoShape(ShapeType::Rectangle, 20, 20, 150, 75);
auto shape2 = slide->get_Shapes()->AddAutoShape(ShapeType::Rectangle, 210, 20, 150, 75);
auto shape3 = slide->get_Shapes()->AddAutoShape(ShapeType::Rectangle, 20, 135, 150, 75);

// Atur warna isian untuk setiap shape persegi panjang.
shape1->get_FillFormat()->set_FillType(FillType::Solid);
shape1->get_FillFormat()->get_SolidFillColor()->set_Color(Color::get_Black());
shape2->get_FillFormat()->set_FillType(FillType::Solid);
shape2->get_FillFormat()->get_SolidFillColor()->set_Color(Color::get_Black());
shape3->get_FillFormat()->set_FillType(FillType::Solid);
shape3->get_FillFormat()->get_SolidFillColor()->set_Color(Color::get_Black());

// Atur lebar garis.
shape1->get_LineFormat()->set_Width(15);
shape2->get_LineFormat()->set_Width(15);
shape3->get_LineFormat()->set_Width(15);

// Atur warna untuk garis tiap persegi panjang.
shape1->get_LineFormat()->get_FillFormat()->set_FillType(FillType::Solid);
shape1->get_LineFormat()->get_FillFormat()->get_SolidFillColor()->set_Color(Color::get_Blue());
shape2->get_LineFormat()->get_FillFormat()->set_FillType(FillType::Solid);
shape2->get_LineFormat()->get_FillFormat()->get_SolidFillColor()->set_Color(Color::get_Blue());
shape3->get_LineFormat()->get_FillFormat()->set_FillType(FillType::Solid);
shape3->get_LineFormat()->get_FillFormat()->get_SolidFillColor()->set_Color(Color::get_Blue());

// Atur gaya sambungan.
shape1->get_LineFormat()->set_JoinStyle(LineJoinStyle::Miter);
shape2->get_LineFormat()->set_JoinStyle(LineJoinStyle::Bevel);
shape3->get_LineFormat()->set_JoinStyle(LineJoinStyle::Round);

// Tambahkan teks ke setiap persegi panjang.
shape1->get_TextFrame()->set_Text(u"Miter Join Style");
shape2->get_TextFrame()->set_Text(u"Bevel Join Style");
shape3->get_TextFrame()->set_Text(u"Round Join Style");

// Simpan file PPTX ke disk.
presentation->Save(u"join_styles.pptx", SaveFormat::Pptx);
presentation->Dispose();
Isian Gradien
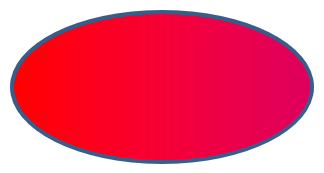
Di PowerPoint, Isian Gradien adalah opsi pemformatan yang memungkinkan Anda menerapkan perpaduan warna yang kontinu pada suatu bentuk. Misalnya, Anda dapat menerapkan dua atau lebih warna sehingga satu secara bertahap memudar menjadi yang lain.
Berikut cara menerapkan isian gradien pada bentuk menggunakan Aspose.Slides:
- Buat sebuah instance dari kelas Presentation.
- Ambil referensi ke slide berdasarkan indeksnya.
- Tambahkan sebuah IAutoShape ke slide.
- Tetapkan FillType bentuk ke
Gradient. - Tambahkan dua warna pilihan Anda dengan posisi yang ditentukan menggunakan metode
Adddari koleksi stop gradien yang diakses melalui antarmuka IGradientFormat. - Simpan presentasi yang telah dimodifikasi sebagai file PPTX.
#include <DOM/FillType.h>
#include <DOM/GradientDirection.h>
#include <DOM/GradientShape.h>
#include <DOM/IAutoShape.h>
#include <DOM/IFillFormat.h>
#include <DOM/IGradientFormat.h>
#include <DOM/IGradientStopCollection.h>
#include <DOM/IShapeCollection.h>
#include <DOM/ISlide.h>
#include <DOM/Presentation.h>
#include <DOM/PresetColor.h>
#include <DOM/ShapeType.h>
#include <Export/SaveFormat.h>
#include <system/smart_ptr.h>
using namespace Aspose::Slides;
using namespace Aspose::Slides::Export;
using namespace System;

// Buat instance kelas Presentation yang mewakili file presentasi.
auto presentation = MakeObject<Presentation>();

// Ambil slide pertama.
auto slide = presentation->get_Slide(0);

// Tambahkan auto shape tipe Ellipse.
auto shape = slide->get_Shapes()->AddAutoShape(ShapeType::Ellipse, 50, 50, 150, 75);

// Terapkan pemformatan gradien pada ellipse.
shape->get_FillFormat()->set_FillType(FillType::Gradient);
shape->get_FillFormat()->get_GradientFormat()->set_GradientShape(GradientShape::Linear);

// Atur arah gradien.
shape->get_FillFormat()->get_GradientFormat()->set_GradientDirection(GradientDirection::FromCorner2);

// Tambahkan dua stop gradien.
shape->get_FillFormat()->get_GradientFormat()->get_GradientStops()->Add(1.0f, PresetColor::Purple);
shape->get_FillFormat()->get_GradientFormat()->get_GradientStops()->Add(0.0f, PresetColor::Red);

// Simpan file PPTX ke disk.
presentation->Save(u"gradient_fill.pptx", SaveFormat::Pptx);
presentation->Dispose();
Hasil:
Isian Pola
Di PowerPoint, Isian Pola adalah opsi pemformatan yang memungkinkan Anda menerapkan desain dua warna—seperti titik, garis, silang, atau kotak—pada suatu bentuk. Anda dapat memilih warna khusus untuk latar depan dan latar belakang pola.
Aspose.Slides menyediakan lebih dari 45 gaya pola bawaan yang dapat Anda terapkan pada bentuk untuk meningkatkan daya tarik visual presentasi Anda. Bahkan setelah memilih pola bawaan, Anda masih dapat menentukan warna tepat yang akan digunakan.
Berikut cara menerapkan isian pola pada bentuk menggunakan Aspose.Slides:
- Buat sebuah instance dari kelas Presentation.
- Ambil referensi ke slide berdasarkan indeksnya.
- Tambahkan sebuah IAutoShape ke slide.
- Tetapkan FillType bentuk ke
Pattern. - Pilih gaya pola dari opsi yang telah ditetapkan.
- Tetapkan Background Color pola.
- Tetapkan Foreground Color pola.
- Simpan presentasi yang telah dimodifikasi sebagai file PPTX.
#include <DOM/FillType.h>
#include <DOM/IAutoShape.h>
#include <DOM/IColorFormat.h>
#include <DOM/IFillFormat.h>
#include <DOM/IPatternFormat.h>
#include <DOM/IShapeCollection.h>
#include <DOM/ISlide.h>
#include <DOM/PatternStyle.h>
#include <DOM/Presentation.h>
#include <DOM/ShapeType.h>
#include <Export/SaveFormat.h>
#include <drawing/color.h>
#include <system/smart_ptr.h>
using namespace Aspose::Slides;
using namespace Aspose::Slides::Export;
using namespace System;
using namespace System::Drawing;

// Buat instance kelas Presentation yang mewakili file presentasi.
auto presentation = MakeObject<Presentation>();

// Ambil slide pertama.
auto slide = presentation->get_Slide(0);

// Tambahkan auto shape tipe Rectangle.
auto shape = slide->get_Shapes()->AddAutoShape(ShapeType::Rectangle, 50, 50, 150, 75);

// Atur tipe isian menjadi Pattern.
shape->get_FillFormat()->set_FillType(FillType::Pattern);

// Atur gaya pola.
shape->get_FillFormat()->get_PatternFormat()->set_PatternStyle(PatternStyle::Trellis);

// Atur warna latar belakang dan latar depan pola.
shape->get_FillFormat()->get_PatternFormat()->get_BackColor()->set_Color(Color::get_LightGray());
shape->get_FillFormat()->get_PatternFormat()->get_ForeColor()->set_Color(Color::get_Yellow());

// Simpan file PPTX ke disk.
presentation->Save(u"pattern_fill.pptx", SaveFormat::Pptx);
presentation->Dispose();
Hasil:
Isian Gambar
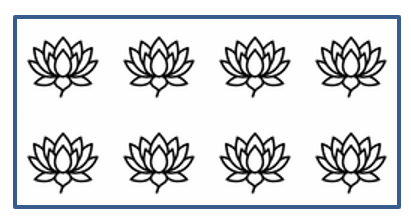
Di PowerPoint, Isian Gambar adalah opsi pemformatan yang memungkinkan Anda menyisipkan gambar di dalam bentuk—secara efektif menggunakan gambar sebagai latar belakang bentuk.
Berikut cara menggunakan Aspose.Slides untuk menerapkan isian gambar pada bentuk:
- Buat sebuah instance dari kelas Presentation.
- Ambil referensi ke slide berdasarkan indeksnya.
- Tambahkan sebuah IAutoShape ke slide.
- Tetapkan FillType bentuk ke
Picture. - Tetapkan mode isian gambar ke
Tile(atau mode pilihan lainnya). - Buat objek IPPImage dari gambar yang ingin Anda gunakan.
- Berikan gambar ke metode
ISlidesPicture.set_Image. - Simpan presentasi yang telah dimodifikasi sebagai file PPTX.
Misalkan kita memiliki file “lotus.png” dengan gambar berikut:

#include <DOM/FillType.h>
#include <DOM/IAutoShape.h>
#include <DOM/IFillFormat.h>
#include <DOM/IImageCollection.h>
#include <DOM/IPictureFillFormat.h>
#include <DOM/IShapeCollection.h>
#include <DOM/ISlide.h>
#include <DOM/ISlidesPicture.h>
#include <DOM/PictureFillMode.h>
#include <DOM/Presentation.h>
#include <DOM/ShapeType.h>
#include <Export/SaveFormat.h>
#include <IImage.h>
#include <Util/Images.h>
#include <system/smart_ptr.h>
using namespace Aspose::Slides;
using namespace Aspose::Slides::Export;
using namespace System;

// Buat instance kelas Presentation yang mewakili file presentasi.
auto presentation = MakeObject<Presentation>();

// Ambil slide pertama.
auto slide = presentation->get_Slide(0);

// Tambahkan auto shape tipe Rectangle.
auto shape = slide->get_Shapes()->AddAutoShape(ShapeType::Rectangle, 50, 50, 255, 130);

// Atur tipe isian menjadi Picture.
shape->get_FillFormat()->set_FillType(FillType::Picture);

// Atur mode isian gambar.
shape->get_FillFormat()->get_PictureFillFormat()->set_PictureFillMode(PictureFillMode::Tile);

// Muat gambar dan tambahkan ke sumber daya presentasi.
auto image = Images::FromFile(u"lotus.png");
auto picture = presentation->get_Images()->AddImage(image);
image->Dispose();

// Atur gambar.
shape->get_FillFormat()->get_PictureFillFormat()->get_Picture()->set_Image(picture);

// Simpan file PPTX ke disk.
presentation->Save(u"picture_fill.pptx", SaveFormat::Pptx);
presentation->Dispose();
Hasil:
Ubin Gambar sebagai Tekstur
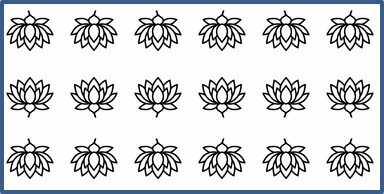
Jika Anda ingin mengatur gambar berulang sebagai tekstur dan menyesuaikan perilaku pengulangan, Anda dapat menggunakan metode berikut dari antarmuka IPictureFillFormat dan kelas PictureFillFormat:
- set_PictureFillMode: Menetapkan mode isian gambar—baik
TileatauStretch. - set_TileAlignment: Menentukan perataan ubin dalam bentuk.
- set_TileFlip: Mengontrol apakah ubin dibalik secara horizontal, vertikal, atau keduanya.
- set_TileOffsetX: Menetapkan offset horizontal ubin (dalam poin) dari asal bentuk.
- set_TileOffsetY: Menetapkan offset vertikal ubin (dalam poin) dari asal bentuk.
- set_TileScaleX: Mendefinisikan skala horizontal ubin dalam persentase.
- set_TileScaleY: Mendefinisikan skala vertikal ubin dalam persentase.
Contoh kode berikut menunjukkan cara menambahkan bentuk persegi panjang dengan isian gambar berulang dan mengonfigurasi opsi ubin:
#include <DOM/FillType.h>
#include <DOM/IAutoShape.h>
#include <DOM/IFillFormat.h>
#include <DOM/IImageCollection.h>
#include <DOM/IPictureFillFormat.h>
#include <DOM/IShapeCollection.h>
#include <DOM/ISlide.h>
#include <DOM/ISlidesPicture.h>
#include <DOM/PictureFillMode.h>
#include <DOM/Presentation.h>
#include <DOM/RectangleAlignment.h>
#include <DOM/ShapeType.h>
#include <DOM/TileFlip.h>
#include <Export/SaveFormat.h>
#include <IImage.h>
#include <Util/Images.h>
#include <system/smart_ptr.h>
using namespace Aspose::Slides;
using namespace Aspose::Slides::Export;
using namespace System;

// Buat instance kelas Presentation yang mewakili file presentasi.
auto presentation = MakeObject<Presentation>();

// Ambil slide pertama.
auto firstSlide = presentation->get_Slide(0);

// Tambahkan auto shape persegi panjang.
auto shape = firstSlide->get_Shapes()->AddAutoShape(ShapeType::Rectangle, 50, 50, 190, 95);

// Atur tipe isian bentuk menjadi Picture.
shape->get_FillFormat()->set_FillType(FillType::Picture);

// Muat gambar dan tambahkan ke sumber daya presentasi.
auto sourceImage = Images::FromFile(u"lotus.png");
auto presentationImage = presentation->get_Images()->AddImage(sourceImage);
sourceImage->Dispose();

// Tetapkan gambar ke bentuk.
auto pictureFillFormat = shape->get_FillFormat()->get_PictureFillFormat();
pictureFillFormat->get_Picture()->set_Image(presentationImage);

// Konfigurasikan mode isian gambar dan properti ubin.
pictureFillFormat->set_PictureFillMode(PictureFillMode::Tile);
pictureFillFormat->set_TileOffsetX(-32);
pictureFillFormat->set_TileOffsetY(-32);
pictureFillFormat->set_TileScaleX(50);
pictureFillFormat->set_TileScaleY(50);
pictureFillFormat->set_TileAlignment(RectangleAlignment::BottomRight);
pictureFillFormat->set_TileFlip(TileFlip::FlipBoth);

// Simpan file PPTX ke disk.
presentation->Save(u"tile.pptx", SaveFormat::Pptx);
presentation->Dispose();
Hasil:
Isian Warna Solid
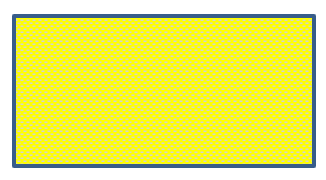
Di PowerPoint, Isian Warna Solid adalah opsi pemformatan yang mengisi bentuk dengan satu warna seragam. Warna latar belakang polos ini diterapkan tanpa gradien, tekstur, atau pola.
Untuk menerapkan isian warna solid pada bentuk menggunakan Aspose.Slides, ikuti langkah-langkah berikut:
- Buat sebuah instance dari kelas Presentation.
- Ambil referensi ke slide berdasarkan indeksnya.
- Tambahkan sebuah IAutoShape ke slide.
- Tetapkan FillType bentuk ke
Solid. - Tetapkan warna isian pilihan Anda ke bentuk.
- Simpan presentasi yang telah dimodifikasi sebagai file PPTX.
#include <DOM/FillType.h>
#include <DOM/IAutoShape.h>
#include <DOM/IColorFormat.h>
#include <DOM/IFillFormat.h>
#include <DOM/IShapeCollection.h>
#include <DOM/ISlide.h>
#include <DOM/Presentation.h>
#include <DOM/ShapeType.h>
#include <Export/SaveFormat.h>
#include <drawing/color.h>
#include <system/smart_ptr.h>
using namespace Aspose::Slides;
using namespace Aspose::Slides::Export;
using namespace System;
using namespace System::Drawing;

// Buat instance kelas Presentation yang mewakili file presentasi.
auto presentation = MakeObject<Presentation>();

// Ambil slide pertama.
auto slide = presentation->get_Slide(0);

// Tambahkan auto shape tipe Rectangle.
auto shape = slide->get_Shapes()->AddAutoShape(ShapeType::Rectangle, 50, 50, 150, 75);

// Atur tipe isian menjadi Solid.
shape->get_FillFormat()->set_FillType(FillType::Solid);

// Atur warna isian.
shape->get_FillFormat()->get_SolidFillColor()->set_Color(Color::get_Yellow());

// Simpan file PPTX ke disk.
presentation->Save(u"solid_color_fill.pptx", SaveFormat::Pptx);
presentation->Dispose();
Hasil:

Atur Transparansi
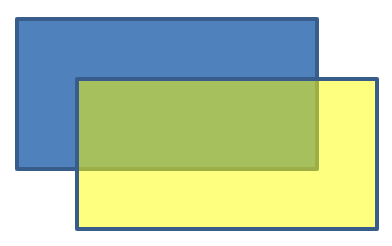
Di PowerPoint, ketika Anda menerapkan isian warna solid, gradien, gambar, atau tekstur pada bentuk, Anda juga dapat mengatur tingkat transparansi untuk mengontrol kejernihan isian. Nilai transparansi yang lebih tinggi membuat bentuk lebih tembus pandang, memungkinkan latar belakang atau objek di bawahnya terlihat sebagian.
Aspose.Slides memungkinkan Anda mengatur tingkat transparansi dengan menyesuaikan nilai alfa pada warna yang digunakan untuk isian. Berikut caranya:
- Buat sebuah instance dari kelas Presentation.
- Ambil referensi ke slide berdasarkan indeksnya.
- Tambahkan sebuah IAutoShape ke slide.
- Tetapkan FillType ke
Solid. - Gunakan
Coloruntuk mendefinisikan warna dengan transparansi (komponenalphamengontrol transparansi). - Simpan presentasi.
#include <DOM/FillType.h>
#include <DOM/IAutoShape.h>
#include <DOM/IColorFormat.h>
#include <DOM/IFillFormat.h>
#include <DOM/IShapeCollection.h>
#include <DOM/ISlide.h>
#include <DOM/Presentation.h>
#include <DOM/ShapeType.h>
#include <Export/SaveFormat.h>
#include <drawing/color.h>
#include <system/smart_ptr.h>
using namespace Aspose::Slides;
using namespace Aspose::Slides::Export;
using namespace System;
using namespace System::Drawing;

// Buat instance kelas Presentation yang mewakili file presentasi.
auto presentation = MakeObject<Presentation>();

// Ambil slide pertama.
auto slide = presentation->get_Slide(0);

// Tambahkan auto shape persegi panjang solid.
auto solidShape = slide->get_Shapes()->AddAutoShape(ShapeType::Rectangle, 50, 50, 150, 75);

// Tambahkan auto shape persegi panjang transparan di atas shape solid.
auto transparentShape = slide->get_Shapes()->AddAutoShape(ShapeType::Rectangle, 80, 80, 150, 75);
transparentShape->get_FillFormat()->set_FillType(FillType::Solid);
transparentShape->get_FillFormat()->get_SolidFillColor()->set_Color(Color::FromArgb(204, 255, 255, 0));

// Simpan file PPTX ke disk.
presentation->Save(u"shape_transparency.pptx", SaveFormat::Pptx);
presentation->Dispose();
Hasil:
Putar Bentuk
Aspose.Slides memungkinkan Anda memutar bentuk dalam presentasi PowerPoint. Ini dapat berguna saat menempatkan elemen visual dengan penyelarasan atau kebutuhan desain tertentu.
Untuk memutar bentuk pada slide, ikuti langkah-langkah berikut:
- Buat sebuah instance dari kelas Presentation.
- Ambil referensi ke slide berdasarkan indeksnya.
- Tambahkan sebuah IAutoShape ke slide.
- Tetapkan properti rotasi bentuk ke sudut yang diinginkan.
- Simpan presentasi.
#include <DOM/IAutoShape.h>
#include <DOM/IShapeCollection.h>
#include <DOM/ISlide.h>
#include <DOM/Presentation.h>
#include <DOM/ShapeType.h>
#include <Export/SaveFormat.h>
#include <system/smart_ptr.h>
using namespace Aspose::Slides;
using namespace Aspose::Slides::Export;
using namespace System;

// Buat instance kelas Presentation yang mewakili file presentasi.
auto presentation = MakeObject<Presentation>();

// Ambil slide pertama.
auto slide = presentation->get_Slide(0);

// Tambahkan auto shape tipe Rectangle.
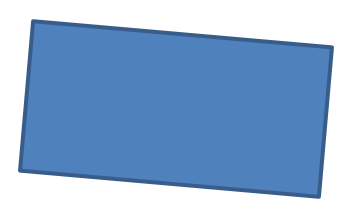
auto shape = slide->get_Shapes()->AddAutoShape(ShapeType::Rectangle, 50, 50, 150, 75);

// Putar bentuk sebesar 5 derajat.
shape->set_Rotation(5);

// Simpan file PPTX ke disk.
presentation->Save(u"shape_rotation.pptx", SaveFormat::Pptx);
presentation->Dispose();
Hasil:
Tambahkan Efek Bevel 3D
Aspose.Slides memungkinkan Anda menerapkan efek bevel 3D pada bentuk dengan mengonfigurasi properti ThreeDFormat mereka.
Untuk menambahkan efek bevel 3D pada bentuk, ikuti langkah-langkah berikut:
- Buat sebuah instance dari kelas Presentation.
- Ambil referensi ke slide berdasarkan indeksnya.
- Tambahkan sebuah IAutoShape ke slide.
- Konfigurasikan ThreeDFormat bentuk untuk menentukan pengaturan bevel.
- Simpan presentasi.
#include <DOM/BevelPresetType.h>
#include <DOM/CameraPresetType.h>
#include <DOM/FillType.h>
#include <DOM/IAutoShape.h>
#include <DOM/ICamera.h>
#include <DOM/IColorFormat.h>
#include <DOM/IFillFormat.h>
#include <DOM/ILightRig.h>
#include <DOM/ILineFillFormat.h>
#include <DOM/ILineFormat.h>
#include <DOM/IShapeBevel.h>
#include <DOM/IShapeCollection.h>
#include <DOM/ISlide.h>
#include <DOM/IThreeDFormat.h>
#include <DOM/LightRigPresetType.h>
#include <DOM/LightingDirection.h>
#include <DOM/Presentation.h>
#include <DOM/ShapeType.h>
#include <Export/SaveFormat.h>
#include <drawing/color.h>
#include <system/smart_ptr.h>
using namespace Aspose::Slides;
using namespace Aspose::Slides::Export;
using namespace System;
using namespace System::Drawing;

// Buat instance kelas Presentation.
auto presentation = MakeObject<Presentation>();

auto slide = presentation->get_Slide(0);

// Tambah bentuk ke slide.
auto shape = slide->get_Shapes()->AddAutoShape(ShapeType::Ellipse, 50, 50, 100, 100);
shape->get_FillFormat()->set_FillType(FillType::Solid);
shape->get_FillFormat()->get_SolidFillColor()->set_Color(Color::get_Green());
shape->get_LineFormat()->get_FillFormat()->set_FillType(FillType::Solid);
shape->get_LineFormat()->get_FillFormat()->get_SolidFillColor()->set_Color(Color::get_Orange());
shape->get_LineFormat()->set_Width(2.0);

// Atur properti ThreeDFormat bentuk.
shape->get_ThreeDFormat()->set_Depth(4.0);
shape->get_ThreeDFormat()->get_BevelTop()->set_BevelType(BevelPresetType::Circle);
shape->get_ThreeDFormat()->get_BevelTop()->set_Height(6);
shape->get_ThreeDFormat()->get_BevelTop()->set_Width(6);
shape->get_ThreeDFormat()->get_Camera()->set_CameraType(CameraPresetType::OrthographicFront);
shape->get_ThreeDFormat()->get_LightRig()->set_LightType(LightRigPresetType::ThreePt);
shape->get_ThreeDFormat()->get_LightRig()->set_Direction(LightingDirection::Top);

// Simpan presentasi sebagai file PPTX.
presentation->Save(u"3D_bevel_effect.pptx", SaveFormat::Pptx);
presentation->Dispose();
Hasil:

Tambahkan Efek Rotasi 3D
Aspose.Slides memungkinkan Anda menerapkan efek rotasi 3D pada bentuk dengan mengonfigurasi properti ThreeDFormat mereka.
Untuk menerapkan rotasi 3D pada bentuk:
- Buat sebuah instance dari kelas Presentation.
- Ambil referensi ke slide berdasarkan indeksnya.
- Tambahkan sebuah IAutoShape ke slide.
- Gunakan set_CameraType dan set_LightType untuk mendefinisikan rotasi 3D.
- Simpan presentasi.
#include <DOM/CameraPresetType.h>
#include <DOM/IAutoShape.h>
#include <DOM/ICamera.h>
#include <DOM/ILightRig.h>
#include <DOM/IShapeCollection.h>
#include <DOM/ISlide.h>
#include <DOM/ITextFrame.h>
#include <DOM/IThreeDFormat.h>
#include <DOM/LightRigPresetType.h>
#include <DOM/Presentation.h>
#include <DOM/ShapeType.h>
#include <Export/SaveFormat.h>
#include <system/smart_ptr.h>
using namespace Aspose::Slides;
using namespace Aspose::Slides::Export;
using namespace System;

// Buat instance kelas Presentation.
auto presentation = MakeObject<Presentation>();

auto slide = presentation->get_Slide(0);

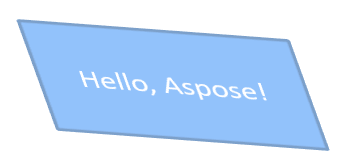
auto shape = slide->get_Shapes()->AddAutoShape(ShapeType::Rectangle, 50, 50, 150, 75);
shape->get_TextFrame()->set_Text(u"Hello, Aspose!");

shape->get_ThreeDFormat()->set_Depth(6);
shape->get_ThreeDFormat()->get_Camera()->SetRotation(40, 35, 20);
shape->get_ThreeDFormat()->get_Camera()->set_CameraType(CameraPresetType::IsometricLeftUp);
shape->get_ThreeDFormat()->get_LightRig()->set_LightType(LightRigPresetType::Balanced);

// Simpan presentasi sebagai file PPTX.
presentation->Save(u"3D_rotation_effect.pptx", SaveFormat::Pptx);
presentation->Dispose();
Hasil:
Kendalikan Rendering Hitam-putih untuk Bentuk
Metode IShape::set_BlackWhiteMode menentukan bagaimana sebuah bentuk individual dirender ketika presentasi dilihat atau diproses dalam mode hitam-putih. Metode ini tidak mengaktifkan tampilan hitam-putih secara otomatis, dan tidak mengubah isian, garis, atau pemformatan lain pada mode warna normal.
Gunakan nilai dari enumerasi BlackWhiteMode untuk memilih perilaku yang diinginkan. Misalnya, Automatic membiarkan aplikasi rendering memilih konversi, Gray dan LightGray menggunakan warna abu‑abu, BlackWhite hanya menggunakan hitam dan putih, Black dan White memaksa satu warna, Color mempertahankan warna normal, dan Hidden menghilangkan bentuk dalam mode hitam‑putih. NotDefined berarti tidak ada mode pada tingkat bentuk yang ditetapkan.
Kode C++ berikut membuat bentuk berwarna dan membuatnya muncul abu‑abu dalam mode tampilan hitam‑putih:
#include <DOM/BlackWhiteMode.h>
#include <DOM/FillType.h>
#include <DOM/IAutoShape.h>
#include <DOM/IFillFormat.h>
#include <DOM/IShapeCollection.h>
#include <DOM/ISlide.h>
#include <DOM/Presentation.h>
#include <DOM/ShapeType.h>
#include <Export/SaveFormat.h>
#include <drawing/color.h>
#include <system/smart_ptr.h>

using namespace Aspose::Slides;
using namespace Aspose::Slides::Export;
using namespace System;
using namespace System::Drawing;

auto presentation = MakeObject<Presentation>();
auto slide = presentation->get_Slide(0);

auto shape = slide->get_Shapes()->AddAutoShape(ShapeType::Rectangle, 50, 50, 200, 100);
shape->get_FillFormat()->set_FillType(FillType::Solid);
shape->get_FillFormat()->get_SolidFillColor()->set_Color(Color::get_Orange());

// Pertahankan isian oranye dalam mode warna, tetapi render bentuk dengan pewarnaan abu-abu dalam mode hitam-putih.
shape->set_BlackWhiteMode(BlackWhiteMode::Gray);

presentation->Save(u"shape_black_white_mode.pptx", SaveFormat::Pptx);
presentation->Dispose();
Dalam mode warna normal, persegi panjang mempertahankan isian oranye. Dalam alur kerja tampilan hitam‑putih, ia menggunakan warna abu‑abu karena mode diatur ke Gray. Ini memungkinkan Anda mempertahankan slide berwarna penuh sambil menentukan tampilan khusus untuk pencetakan, pratinjau, atau alur kerja lain yang menghormati pengaturan tampilan hitam‑putih presentasi.
Setel Ulang Pemformatan
Kode C++ berikut menunjukkan cara menyetel ulang pemformatan slide dan mengembalikan posisi, ukuran, serta pemformatan semua bentuk dengan placeholder pada LayoutSlide ke pengaturan default mereka:
#include <DOM/ISlide.h>
#include <DOM/ISlideCollection.h>
#include <DOM/Presentation.h>
#include <Export/SaveFormat.h>
#include <system/enumerator_adapter.h>
#include <system/smart_ptr.h>
using namespace Aspose::Slides;
using namespace Aspose::Slides::Export;
using namespace System;

auto presentation = MakeObject<Presentation>(u"sample.pptx");

for (auto&& slide : System::IterateOver(presentation->get_Slides()))
{
    // Setel ulang setiap shape pada slide yang memiliki placeholder pada tata letak.
    slide->Reset();
}

presentation->Save(u"reset_formatting.pptx", SaveFormat::Pptx);
presentation->Dispose();
FAQ
Apakah pemformatan bentuk memengaruhi ukuran file presentasi akhir?
Hanya sedikit. Gambar dan media yang disematkan menempati sebagian besar ruang file, sementara parameter bentuk seperti warna, efek, dan gradien disimpan sebagai metadata dan hampir tidak menambah ukuran file.
Bagaimana saya dapat mendeteksi bentuk pada slide yang memiliki pemformatan identik sehingga saya dapat mengelompokkannya?
Bandingkan setiap properti pemformatan utama bentuk—pengaturan isian, garis, dan efek. Jika semua nilai yang bersesuaian cocok, perlakukan gaya mereka sebagai identik dan kelompokkan bentuk-bentuk tersebut secara logis, yang menyederhanakan manajemen gaya di kemudian hari.
Apakah saya dapat menyimpan kumpulan gaya bentuk khusus ke file terpisah untuk digunakan kembali dalam presentasi lain?
Ya. Simpan contoh bentuk dengan gaya yang diinginkan dalam deck slide templat atau file templat .POTX. Saat membuat presentasi baru, buka templat tersebut, kloning bentuk bergaya yang Anda perlukan, dan terapkan kembali pemformatannya di mana pun diperlukan.