
การจัดรูปแบบรูปร่าง PowerPoint ใน C++
บทนำ
ใน PowerPoint คุณสามารถเพิ่มรูปร่างลงในสไลด์ได้ เนื่องจากรูปร่างประกอบด้วยเส้น คุณสามารถจัดรูปแบบรูปร่างได้โดยการแก้ไขหรือใช้เอฟเฟกต์กับขอบเส้นของมัน นอกจากนี้ คุณยังสามารถจัดรูปแบบรูปร่างโดยระบุการตั้งค่าที่ควบคุมการเติมภายในของรูปร่างได้
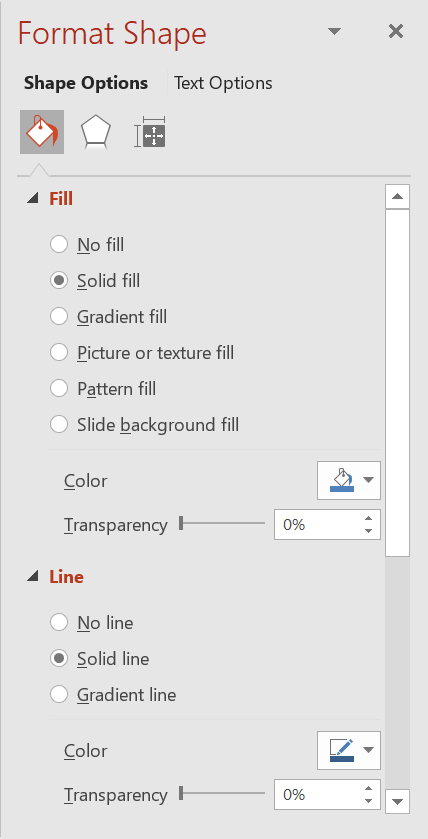
Aspose.Slides for C++ มีอินเทอร์เฟซและเมธอดที่ให้คุณจัดรูปแบบรูปร่างโดยใช้ตัวเลือกเดียวกับที่มีใน PowerPoint
รูปแบบเส้น
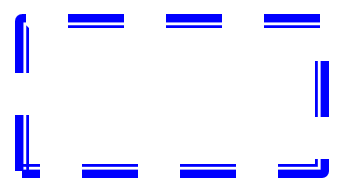
โดยใช้ Aspose.Slides คุณสามารถกำหนดรูปแบบเส้นที่กำหนดเองสำหรับรูปร่างได้ ขั้นตอนต่อไปนี้สรุปขั้นตอนการทำงาน:
- สร้างอินสแตนซ์ของคลาส Presentation
- รับอ้างอิงไปยังสไลด์ตามดัชนีของมัน
- เพิ่ม IAutoShape ลงในสไลด์
- ตั้งค่า รูปแบบเส้น ของรูปร่าง
- ตั้งค่าความกว้างของเส้น
- ตั้งค่า รูปแบบเส้นประ ของเส้น
- ตั้งค่าสีเส้นสำหรับรูปร่าง
- บันทึกงานนำเสนอที่แก้ไขเป็นไฟล์ PPTX
#include <DOM/FillType.h>
#include <DOM/IAutoShape.h>
#include <DOM/IColorFormat.h>
#include <DOM/IFillFormat.h>
#include <DOM/ILineFillFormat.h>
#include <DOM/ILineFormat.h>
#include <DOM/IShapeCollection.h>
#include <DOM/ISlide.h>
#include <DOM/LineDashStyle.h>
#include <DOM/LineStyle.h>
#include <DOM/Presentation.h>
#include <DOM/ShapeType.h>
#include <Export/SaveFormat.h>
#include <drawing/color.h>
#include <system/smart_ptr.h>
using namespace Aspose::Slides;
using namespace Aspose::Slides::Export;
using namespace System;
using namespace System::Drawing;

// สร้างอินสแตนซ์ของคลาส Presentation ที่เป็นตัวแทนของไฟล์งานนำเสนอ.
auto presentation = MakeObject<Presentation>();

// ดึงสไลด์แรก.
auto slide = presentation->get_Slide(0);

// เพิ่มออโต้เชปของประเภท Rectangle.
auto shape = slide->get_Shapes()->AddAutoShape(ShapeType::Rectangle, 50, 150, 150, 75);

// ตั้งค่าสีเติมสำหรับรูปร่างสี่เหลี่ยม.
shape->get_FillFormat()->set_FillType(FillType::NoFill);

// นำการจัดรูปแบบไปใช้กับเส้นของสี่เหลี่ยม.
shape->get_LineFormat()->set_Style(LineStyle::ThickThin);
shape->get_LineFormat()->set_Width(7);
shape->get_LineFormat()->set_DashStyle(LineDashStyle::Dash);

// ตั้งค่าสีสำหรับเส้นของสี่เหลี่ยม.
shape->get_LineFormat()->get_FillFormat()->set_FillType(FillType::Solid);
shape->get_LineFormat()->get_FillFormat()->get_SolidFillColor()->set_Color(Color::get_Blue());

// บันทึกไฟล์ PPTX ไปยังดิสก์.
presentation->Save(u"formatted_lines.pptx", SaveFormat::Pptx);
presentation->Dispose();
ใช้เอฟเฟกต์สเก็ตช์กับเส้นรูปร่าง
เอฟเฟกต์สเก็ตช์ทำให้เส้นของรูปร่างดูเหมือนวาดมือ ใช้ IShape::get_LineFormat เพื่อเข้าถึงการตั้งค่าเส้น, ILineFormat::get_SketchFormat เพื่อเข้าถึงการตั้งค่าสเก็ตช์, และ ISketchFormat::set_SketchType เพื่อเลือกค่าจาก enumeration LineSketchType
โค้ด C++ ด้านล่างแสดงวิธีการใช้เอฟเฟกต์ LineSketchType::Curved อ่านค่าที่กำหนดโดยชัดเจน, และลบเอฟเฟกต์ด้วย LineSketchType::None:
auto presentation = MakeObject<Presentation>();

auto slide = presentation->get_Slide(0);
auto shape = slide->get_Shapes()->AddAutoShape(ShapeType::Rectangle, 50, 50, 200, 100);

// Access the shape's line format and its sketch format.
auto sketchFormat = shape->get_LineFormat()->get_SketchFormat();

// Apply a sketch effect.
sketchFormat->set_SketchType(LineSketchType::Curved);

// Read the sketch effect assigned directly to the shape.
auto explicitSketchType = sketchFormat->get_SketchType();
Console::WriteLine(u"Explicit sketch type: {0}", explicitSketchType);

// Remove the sketch effect.
sketchFormat->set_SketchType(LineSketchType::None);

presentation->Dispose();
ค่าที่คืนโดย ISketchFormat::get_SketchType แสดงถึงการตั้งค่าที่กำหนดโดยตรงให้กับรูปร่าง หากการจัดรูปแบบเส้นสามารถสืบทอดจากธีม, สไลด์แม่ หรือสไลด์เลย์เอาต์ ให้ใช้ ILineFormat::GetEffective เพื่อเข้าถึง ILineFormatEffectiveData::get_SketchFormat แล้วอ่านค่า ISketchFormatEffectiveData::get_SketchType ค่าที่มีผลจะสะท้อนการจัดรูปแบบที่ใช้จริงหลังจากการสืบทอดได้รับการแก้ไข:
auto presentation = MakeObject<Presentation>(u"presentation.pptx");

auto shape = presentation->get_Slide(0)->get_Shape(0);
auto lineFormat = shape->get_LineFormat();

auto explicitSketchType = lineFormat->get_SketchFormat()->get_SketchType();
auto effectiveLineFormat = lineFormat->GetEffective();
auto effectiveSketchType = effectiveLineFormat->get_SketchFormat()->get_SketchType();

Console::WriteLine(u"Explicit sketch type: {0}", explicitSketchType);
Console::WriteLine(u"Effective sketch type: {0}", effectiveSketchType);

presentation->Dispose();
รูปแบบการเชื่อมต่อ
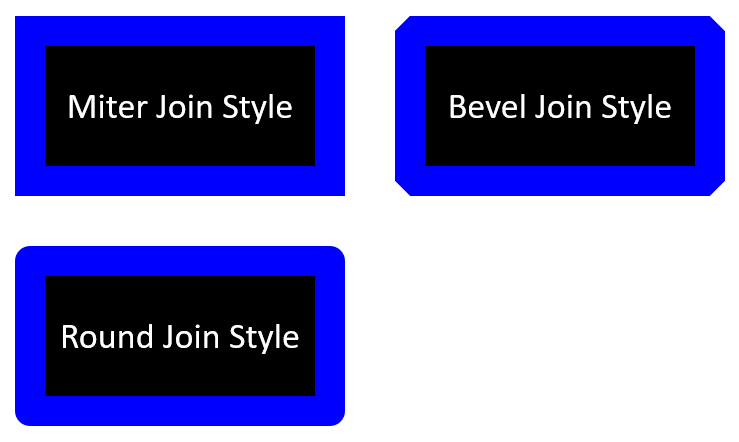
ต่อไปนี้เป็นตัวเลือกประเภทการเชื่อมต่อสามประเภท:
- โค้ง
- มิตเตอร์
- บีเวล
โดยค่าเริ่มต้น PowerPoint จะเชื่อมเส้นสองเส้นที่มุม (เช่นที่มุมของรูปร่าง) โดยใช้การตั้งค่า โค้ง อย่างไรก็ตาม หากคุณกำลังวาดรูปร่างที่มีมุมคม คุณอาจต้องการใช้ตัวเลือก มิตเตอร์
#include <DOM/FillType.h>
#include <DOM/IAutoShape.h>
#include <DOM/IColorFormat.h>
#include <DOM/IFillFormat.h>
#include <DOM/ILineFillFormat.h>
#include <DOM/ILineFormat.h>
#include <DOM/IShapeCollection.h>
#include <DOM/ISlide.h>
#include <DOM/ITextFrame.h>
#include <DOM/LineJoinStyle.h>
#include <DOM/Presentation.h>
#include <DOM/ShapeType.h>
#include <Export/SaveFormat.h>
#include <drawing/color.h>
#include <system/smart_ptr.h>
using namespace Aspose::Slides;
using namespace Aspose::Slides::Export;
using namespace System;
using namespace System::Drawing;

// สร้างอินสแตนซ์ของคลาส Presentation ที่เป็นตัวแทนของไฟล์งานนำเสนอ.
auto presentation = MakeObject<Presentation>();

// ดึงสไลด์แรก.
auto slide = presentation->get_Slide(0);

// เพิ่มออโต้เชปสามรูปประเภท Rectangle.
auto shape1 = slide->get_Shapes()->AddAutoShape(ShapeType::Rectangle, 20, 20, 150, 75);
auto shape2 = slide->get_Shapes()->AddAutoShape(ShapeType::Rectangle, 210, 20, 150, 75);
auto shape3 = slide->get_Shapes()->AddAutoShape(ShapeType::Rectangle, 20, 135, 150, 75);

// ตั้งค่าสีเติมสำหรับแต่ละรูปสี่เหลี่ยม.
shape1->get_FillFormat()->set_FillType(FillType::Solid);
shape1->get_FillFormat()->get_SolidFillColor()->set_Color(Color::get_Black());
shape2->get_FillFormat()->set_FillType(FillType::Solid);
shape2->get_FillFormat()->get_SolidFillColor()->set_Color(Color::get_Black());
shape3->get_FillFormat()->set_FillType(FillType::Solid);
shape3->get_FillFormat()->get_SolidFillColor()->set_Color(Color::get_Black());

// ตั้งค่าความกว้างของเส้น.
shape1->get_LineFormat()->set_Width(15);
shape2->get_LineFormat()->set_Width(15);
shape3->get_LineFormat()->set_Width(15);

// ตั้งค่าสีสำหรับเส้นของแต่ละสี่เหลี่ยม.
shape1->get_LineFormat()->get_FillFormat()->set_FillType(FillType::Solid);
shape1->get_LineFormat()->get_FillFormat()->get_SolidFillColor()->set_Color(Color::get_Blue());
shape2->get_LineFormat()->get_FillFormat()->set_FillType(FillType::Solid);
shape2->get_LineFormat()->get_FillFormat()->get_SolidFillColor()->set_Color(Color::get_Blue());
shape3->get_LineFormat()->get_FillFormat()->set_FillType(FillType::Solid);
shape3->get_LineFormat()->get_FillFormat()->get_SolidFillColor()->set_Color(Color::get_Blue());

// ตั้งค่าสไตล์การเชื่อมต่อ.
shape1->get_LineFormat()->set_JoinStyle(LineJoinStyle::Miter);
shape2->get_LineFormat()->set_JoinStyle(LineJoinStyle::Bevel);
shape3->get_LineFormat()->set_JoinStyle(LineJoinStyle::Round);

// เพิ่มข้อความในแต่ละสี่เหลี่ยม.
shape1->get_TextFrame()->set_Text(u"Miter Join Style");
shape2->get_TextFrame()->set_Text(u"Bevel Join Style");
shape3->get_TextFrame()->set_Text(u"Round Join Style");

// บันทึกไฟล์ PPTX ไปยังดิสก์.
presentation->Save(u"join_styles.pptx", SaveFormat::Pptx);
presentation->Dispose();
การเติมแบบไล่สี
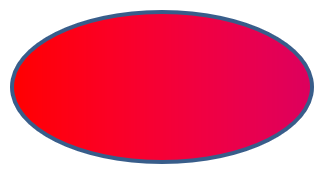
ใน PowerPoint, การเติมแบบไล่สีเป็นตัวเลือกการจัดรูปแบบที่ให้คุณใช้การผสมสีต่อเนื่องกับรูปร่าง ตัวอย่างเช่น คุณสามารถใช้สองสีหรือมากกว่่านั้นโดยให้สีหนึ่งค่อย ๆ จางลงเป็นอีกสีหนึ่ง
ต่อไปนี้คือวิธีการใช้การเติมแบบไล่สีกับรูปร่างโดยใช้ Aspose.Slides:
- สร้างอินสแตนซ์ของคลาส Presentation
- รับอ้างอิงไปยังสไลด์ตามดัชนีของมัน
- เพิ่ม IAutoShape ลงในสไลด์
- ตั้งค่า FillType ของรูปร่างเป็น
Gradient - เพิ่มสีที่คุณต้องการสองสีพร้อมตำแหน่งที่กำหนดโดยใช้เมธอด
Addของคอลเลกชัน gradient stop ที่เปิดให้ผ่านอินเทอร์เฟซ IGradientFormat - บันทึกงานนำเสนอที่แก้ไขเป็นไฟล์ PPTX
#include <DOM/FillType.h>
#include <DOM/GradientDirection.h>
#include <DOM/GradientShape.h>
#include <DOM/IAutoShape.h>
#include <DOM/IFillFormat.h>
#include <DOM/IGradientFormat.h>
#include <DOM/IGradientStopCollection.h>
#include <DOM/IShapeCollection.h>
#include <DOM/ISlide.h>
#include <DOM/Presentation.h>
#include <DOM/PresetColor.h>
#include <DOM/ShapeType.h>
#include <Export/SaveFormat.h>
#include <system/smart_ptr.h>
using namespace Aspose::Slides;
using namespace Aspose::Slides::Export;
using namespace System;

// สร้างอินสแตนซ์ของคลาส Presentation ที่เป็นตัวแทนของไฟล์งานนำเสนอ.
auto presentation = MakeObject<Presentation>();

// ดึงสไลด์แรก.
auto slide = presentation->get_Slide(0);

// เพิ่มออโต้เชปประเภท Ellipse.
auto shape = slide->get_Shapes()->AddAutoShape(ShapeType::Ellipse, 50, 50, 150, 75);

// ใช้การจัดรูปแบบไล่สีกับวงรี.
shape->get_FillFormat()->set_FillType(FillType::Gradient);
shape->get_FillFormat()->get_GradientFormat()->set_GradientShape(GradientShape::Linear);

// ตั้งทิศทางของไล่สี.
shape->get_FillFormat()->get_GradientFormat()->set_GradientDirection(GradientDirection::FromCorner2);

// เพิ่มจุดหยุดไล่สีสองจุด.
shape->get_FillFormat()->get_GradientFormat()->get_GradientStops()->Add(1.0f, PresetColor::Purple);
shape->get_FillFormat()->get_GradientFormat()->get_GradientStops()->Add(0.0f, PresetColor::Red);

// บันทึกไฟล์ PPTX ไปยังดิสก์.
presentation->Save(u"gradient_fill.pptx", SaveFormat::Pptx);
presentation->Dispose();
การเติมลาย
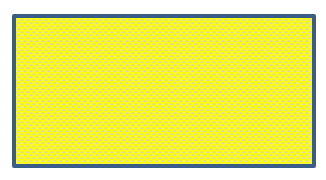
ใน PowerPoint, การเติมลายเป็นตัวเลือกการจัดรูปแบบที่ให้คุณใช้การออกแบบสองสี—เช่น จุด, ลายเส้น, ลายตาข่าย หรือเช็ก—กับรูปร่าง คุณสามารถเลือกสีกำหนดเองสำหรับสีหน้าและสีพื้นหลังของลายได้
Aspose.Slides มีสไตล์ลายที่กำหนดล่วงหน้าเกิน 45 แบบที่คุณสามารถใช้กับรูปร่างเพื่อเพิ่มความสวยงามของการนำเสนอของคุณ แม้หลังจากเลือกลายที่กำหนดล่วงหน้าแล้ว คุณก็ยังสามารถระบุสีที่ต้องการให้ใช้ได้
ต่อไปนี้คือวิธีการใช้การเติมลายกับรูปร่างโดยใช้ Aspose.Slides:
- สร้างอินสแตนซ์ของคลาส Presentation
- รับอ้างอิงไปยังสไลด์ตามดัชนีของมัน
- เพิ่ม IAutoShape ลงในสไลด์
- ตั้งค่า FillType ของรูปร่างเป็น
Pattern - เลือกสไตล์ลายจากตัวเลือกที่กำหนดล่วงหน้า
- ตั้งค่า Background Color ของลาย
- ตั้งค่า Foreground Color ของลาย
- บันทึกงานนำเสนอที่แก้ไขเป็นไฟล์ PPTX
#include <DOM/FillType.h>
#include <DOM/IAutoShape.h>
#include <DOM/IColorFormat.h>
#include <DOM/IFillFormat.h>
#include <DOM/IPatternFormat.h>
#include <DOM/IShapeCollection.h>
#include <DOM/ISlide.h>
#include <DOM/PatternStyle.h>
#include <DOM/Presentation.h>
#include <DOM/ShapeType.h>
#include <Export/SaveFormat.h>
#include <drawing/color.h>
#include <system/smart_ptr.h>
using namespace Aspose::Slides;
using namespace Aspose::Slides::Export;
using namespace System;
using namespace System::Drawing;

// สร้างอินสแตนซ์ของคลาส Presentation ที่เป็นตัวแทนของไฟล์งานนำเสนอ
auto presentation = MakeObject<Presentation>();

// ดึงสไลด์แรก
auto slide = presentation->get_Slide(0);

// เพิ่มออโต้เชปประเภท Rectangle
auto shape = slide->get_Shapes()->AddAutoShape(ShapeType::Rectangle, 50, 50, 150, 75);

// ตั้งค่าชนิดการเติมเป็น Pattern
shape->get_FillFormat()->set_FillType(FillType::Pattern);

// ตั้งค่าสไตล์ลาย
shape->get_FillFormat()->get_PatternFormat()->set_PatternStyle(PatternStyle::Trellis);

// ตั้งค่าสีพื้นหลังและสีพื้นหน้าของลาย
shape->get_FillFormat()->get_PatternFormat()->get_BackColor()->set_Color(Color::get_LightGray());
shape->get_FillFormat()->get_PatternFormat()->get_ForeColor()->set_Color(Color::get_Yellow());

// บันทึกไฟล์ PPTX ไปยังดิสก์
presentation->Save(u"pattern_fill.pptx", SaveFormat::Pptx);
presentation->Dispose();
การเติมรูปภาพ
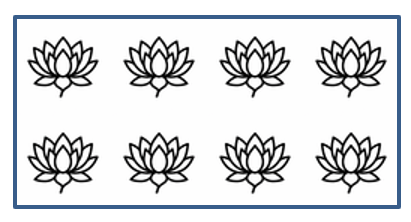
ใน PowerPoint, การเติมรูปภาพเป็นตัวเลือกการจัดรูปแบบที่ให้คุณแทรกรูปภาพเข้าไปในรูปร่าง—โดยใช้รูปภาพเป็นพื้นหลังของรูปร่าง
ต่อไปนี้คือวิธีการใช้ Aspose.Slides เพื่อใช้การเติมรูปภาพกับรูปร่าง:
- สร้างอินสแตนซ์ของคลาส Presentation
- รับอ้างอิงไปยังสไลด์ตามดัชนีของมัน
- เพิ่ม IAutoShape ลงในสไลด์
- ตั้งค่า FillType ของรูปร่างเป็น
Picture - ตั้งค่าโหมดการเติมรูปภาพเป็น
Tile(หรือโหมดอื่นที่ต้องการ) - สร้างอ็อบเจ็กต์ IPPImage จากภาพที่คุณต้องการใช้
- ส่งภาพไปยังเมธอด
ISlidesPicture.set_Image - บันทึกงานนำเสนอที่แก้ไขเป็นไฟล์ PPTX

#include <DOM/FillType.h>
#include <DOM/IAutoShape.h>
#include <DOM/IFillFormat.h>
#include <DOM/IImageCollection.h>
#include <DOM/IPictureFillFormat.h>
#include <DOM/IShapeCollection.h>
#include <DOM/ISlide.h>
#include <DOM/ISlidesPicture.h>
#include <DOM/PictureFillMode.h>
#include <DOM/Presentation.h>
#include <DOM/ShapeType.h>
#include <Export/SaveFormat.h>
#include <IImage.h>
#include <Util/Images.h>
#include <system/smart_ptr.h>
using namespace Aspose::Slides;
using namespace Aspose::Slides::Export;
using namespace System;

// สร้างอินสแตนซ์ของคลาส Presentation ที่เป็นตัวแทนของไฟล์งานนำเสนอ.
auto presentation = MakeObject<Presentation>();

// ดึงสไลด์แรก.
auto slide = presentation->get_Slide(0);

// เพิ่มออโต้เชปประเภท Rectangle.
auto shape = slide->get_Shapes()->AddAutoShape(ShapeType::Rectangle, 50, 50, 255, 130);

// ตั้งค่าชนิดการเติมเป็น Picture.
shape->get_FillFormat()->set_FillType(FillType::Picture);

// ตั้งค่าโหมดการเติมรูปภาพ.
shape->get_FillFormat()->get_PictureFillFormat()->set_PictureFillMode(PictureFillMode::Tile);

// โหลดรูปภาพและเพิ่มลงในทรัพยากรของงานนำเสนอ.
auto image = Images::FromFile(u"lotus.png");
auto picture = presentation->get_Images()->AddImage(image);
image->Dispose();

// ตั้งค่ารูปภาพ.
shape->get_FillFormat()->get_PictureFillFormat()->get_Picture()->set_Image(picture);

// บันทึกไฟล์ PPTX ไปยังดิสก์.
presentation->Save(u"picture_fill.pptx", SaveFormat::Pptx);
presentation->Dispose();
ใช้รูปภาพเป็นพื้นผิวแบบปูกระเบียบ
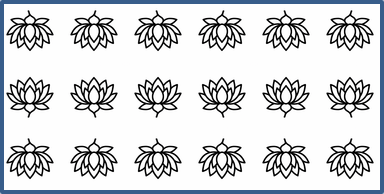
[set_PictureFillMode](https://reference.aspose.com/slides/th/cpp/aspose.slides/ipicturefillformat/set_picturefillmode/): ตั้งค่าโหมดการเติมรูปภาพ —TileหรือStretch[set_TileAlignment](https://reference.aspose.com/slides/th/cpp/aspose.slides/ipicturefillformat/set_tilealignment/): ระบุตำแหน่งการจัดวางของไทล์ภายในรูปร่าง[set_TileFlip](https://reference.aspose.com/slides/th/cpp/aspose.slides/ipicturefillformat/set_tileflip/): ควบคุมว่ไทล์จะพลิกแนวนอน แนวตั้ง หรือทั้งสองอย่าง[set_TileOffsetX](https://reference.aspose.com/slides/th/cpp/aspose.slides/ipicturefillformat/set_tileoffsetx/): ตั้งค่าออฟเซ็ตแนวนอนของไทล์ (เป็นพอยท์) จากจุดกำเนิดของรูปร่าง[set_TileOffsetY](https://reference.aspose.com/slides/th/cpp/aspose.slides/ipicturefillformat/set_tileoffsety/): ตั้งค่าออฟเซ็ตแนวตั้งของไทล์ (เป็นพอยท์) จากจุดกำเนิดของรูปร่าง[set_TileScaleX](https://reference.aspose.com/slides/th/cpp/aspose.slides/ipicturefillformat/set_tilescalex/): กำหนดสเกลแนวนอนของไทล์เป็นเปอร์เซ็นต์[set_TileScaleY](https://reference.aspose.com/slides/th/cpp/aspose.slides/ipicturefillformat/set_tilescaley/): กำหนดสเกลแนวตั้งของไทล์เป็นเปอร์เซ็นต์
#include <DOM/FillType.h>
#include <DOM/IAutoShape.h>
#include <DOM/IFillFormat.h>
#include <DOM/IImageCollection.h>
#include <DOM/IPictureFillFormat.h>
#include <DOM/IShapeCollection.h>
#include <DOM/ISlide.h>
#include <DOM/ISlidesPicture.h>
#include <DOM/PictureFillMode.h>
#include <DOM/Presentation.h>
#include <DOM/RectangleAlignment.h>
#include <DOM/ShapeType.h>
#include <DOM/TileFlip.h>
#include <Export/SaveFormat.h>
#include <IImage.h>
#include <Util/Images.h>
#include <system/smart_ptr.h>
using namespace Aspose::Slides;
using namespace Aspose::Slides::Export;
using namespace System;

// สร้างอินสแตนซ์ของคลาส Presentation ที่เป็นตัวแทนของไฟล์งานนำเสนอ.
auto presentation = MakeObject<Presentation>();

// ดึงสไลด์แรก.
auto firstSlide = presentation->get_Slide(0);

// เพิ่มออโต้เชปสี่เหลี่ยมผืนผ้า.
auto shape = firstSlide->get_Shapes()->AddAutoShape(ShapeType::Rectangle, 50, 50, 190, 95);

// ตั้งค่าชนิดการเติมของรูปร่างเป็น Picture.
shape->get_FillFormat()->set_FillType(FillType::Picture);

// โหลดภาพและเพิ่มลงในทรัพยากรของงานนำเสนอ.
auto sourceImage = Images::FromFile(u"lotus.png");
auto presentationImage = presentation->get_Images()->AddImage(sourceImage);
sourceImage->Dispose();

// กำหนดภาพให้กับรูปร่าง.
auto pictureFillFormat = shape->get_FillFormat()->get_PictureFillFormat();
pictureFillFormat->get_Picture()->set_Image(presentationImage);

// ตั้งค่าโหมดการเติมรูปภาพและคุณสมบัติการปูกระเบียบ.
pictureFillFormat->set_PictureFillMode(PictureFillMode::Tile);
pictureFillFormat->set_TileOffsetX(-32);
pictureFillFormat->set_TileOffsetY(-32);
pictureFillFormat->set_TileScaleX(50);
pictureFillFormat->set_TileScaleY(50);
pictureFillFormat->set_TileAlignment(RectangleAlignment::BottomRight);
pictureFillFormat->set_TileFlip(TileFlip::FlipBoth);

// บันทึกไฟล์ PPTX ไปยังดิสก์.
presentation->Save(u"tile.pptx", SaveFormat::Pptx);
presentation->Dispose();
การเติมสีทึบ
ใน PowerPoint, การเติมสีทึบเป็นตัวเลือกการจัดรูปแบบที่เติมสีเดียวที่สม่ำเสมอบนรูปร่าง สีพื้นหลังเรียบนี้จะถูกใช้โดยไม่มีการไล่สี, เท็กซ์เจอร์, หรือ ลายใด ๆ
เพื่อใช้การเติมสีทึบกับรูปร่างโดยใช้ Aspose.Slides ให้ทำตามขั้นตอนต่อนี้:
- สร้างอินสแตนซ์ของคลาส Presentation
- รับอ้างอิงไปยังสไลด์ตามดัชนีของมัน
- เพิ่ม IAutoShape ลงในสไลด์
- ตั้งค่า FillType ของรูปร่างเป็น
Solid - กำหนดสีเติมที่คุณต้องการให้กับรูปร่าง
- บันทึกงานนำเสนอที่แก้ไขเป็นไฟล์ PPTX
#include <DOM/FillType.h>
#include <DOM/IAutoShape.h>
#include <DOM/IColorFormat.h>
#include <DOM/IFillFormat.h>
#include <DOM/IShapeCollection.h>
#include <DOM/ISlide.h>
#include <DOM/Presentation.h>
#include <DOM/ShapeType.h>
#include <Export/SaveFormat.h>
#include <drawing/color.h>
#include <system/smart_ptr.h>
using namespace Aspose::Slides;
using namespace Aspose::Slides::Export;
using namespace System;
using namespace System::Drawing;

// สร้างอินสแตนซ์ของคลาส Presentation ที่เป็นตัวแทนของไฟล์งานนำเสนอ.
auto presentation = MakeObject<Presentation>();

// ดึงสไลด์แรก.
auto slide = presentation->get_Slide(0);

// เพิ่มออโต้เชปประเภท Rectangle.
auto shape = slide->get_Shapes()->AddAutoShape(ShapeType::Rectangle, 50, 50, 150, 75);

// ตั้งค่าชนิดการเติมเป็น Solid.
shape->get_FillFormat()->set_FillType(FillType::Solid);

// ตั้งค่าสีเติม.
shape->get_FillFormat()->get_SolidFillColor()->set_Color(Color::get_Yellow());

// บันทึกไฟล์ PPTX ไปยังดิสก์.
presentation->Save(u"solid_color_fill.pptx", SaveFormat::Pptx);
presentation->Dispose();

ตั้งค่าความโปร่งใส
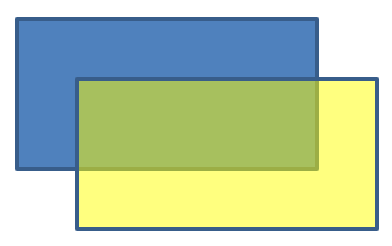
ใน PowerPoint, เมื่อคุณใช้การเติมสีทึบ, ไล่สี, รูปภาพ หรือเท็กซ์เจอร์กับรูปร่าง คุณสามารถตั้งค่าระดับความโปร่งใสเพื่อควบคุมความทึบของการเติมได้ ค่าความโปร่งใสที่สูงจะทำให้รูปร่างโปร่งใสมากขึ้น ทำให้พื้นหลังหรือวัตถุใต้รูปร่างมองเห็นได้บางส่วน
Aspose.Slides ให้คุณตั้งค่าความโปร่งใสโดยปรับค่า alpha ของสีที่ใช้สำหรับการเติม นี่คือวิธีทำ:
- สร้างอินสแตนซ์ของคลาส Presentation
- รับอ้างอิงไปยังสไลด์ตามดัชนีของมัน
- เพิ่ม IAutoShape ลงในสไลด์
- ตั้งค่า FillType ของรูปร่างเป็น
Solid - ใช้
Colorเพื่อกำหนดสีพร้อมความโปร่งใส (คอมโพเนนต์alphaควบคุมความโปร่งใส) - บันทึกงานนำเสนอ
#include <DOM/FillType.h>
#include <DOM/IAutoShape.h>
#include <DOM/IColorFormat.h>
#include <DOM/IFillFormat.h>
#include <DOM/IShapeCollection.h>
#include <DOM/ISlide.h>
#include <DOM/Presentation.h>
#include <DOM/ShapeType.h>
#include <Export/SaveFormat.h>
#include <drawing/color.h>
#include <system/smart_ptr.h>
using namespace Aspose::Slides;
using namespace Aspose::Slides::Export;
using namespace System;
using namespace System::Drawing;

// สร้างอินสแตนซ์ของคลาส Presentation ที่เป็นตัวแทนของไฟล์งานนำเสนอ.
auto presentation = MakeObject<Presentation>();

// ดึงสไลด์แรก.
auto slide = presentation->get_Slide(0);

// เพิ่มออโต้เชปสี่เหลี่ยมทึบ.
auto solidShape = slide->get_Shapes()->AddAutoShape(ShapeType::Rectangle, 50, 50, 150, 75);

// เพิ่มออโต้เชปสี่เหลี่ยมโปร่งใสเหนือรูปร่างทึบ.
auto transparentShape = slide->get_Shapes()->AddAutoShape(ShapeType::Rectangle, 80, 80, 150, 75);
transparentShape->get_FillFormat()->set_FillType(FillType::Solid);
transparentShape->get_FillFormat()->get_SolidFillColor()->set_Color(Color::FromArgb(204, 255, 255, 0));

// บันทึกไฟล์ PPTX ไปยังดิสก์.
presentation->Save(u"shape_transparency.pptx", SaveFormat::Pptx);
presentation->Dispose();
หมุนรูปร่าง
Aspose.Slides ให้คุณหมุนรูปร่างในงานนำเสนอ PowerPoint ซึ่งเป็นประโยชน์เมื่อต้องการจัดตำแหน่งองค์ประกอบภาพตามการจัดแนวหรือความต้องการออกแบบที่เฉพาะเจาะจง
เพื่อหมุนรูปร่างบนสไลด์ ให้ทำตามขั้นตอนต่อไปนี้:
- สร้างอินสแตนซ์ของคลาส Presentation
- รับอ้างอิงไปยังสไลด์ตามดัชนีของมัน
- เพิ่ม IAutoShape ลงในสไลด์
- ตั้งค่าคุณสมบัติการหมุนของรูปร่างเป็นมุมที่ต้องการ
- บันทึกงานนำเสนอ
#include <DOM/IAutoShape.h>
#include <DOM/IShapeCollection.h>
#include <DOM/ISlide.h>
#include <DOM/Presentation.h>
#include <DOM/ShapeType.h>
#include <Export/SaveFormat.h>
#include <system/smart_ptr.h>
using namespace Aspose::Slides;
using namespace Aspose::Slides::Export;
using namespace System;

// สร้างอินสแตนซ์ของคลาส Presentation ที่เป็นตัวแทนของไฟล์งานนำเสนอ.
auto presentation = MakeObject<Presentation>();

// ดึงสไลด์แรก.
auto slide = presentation->get_Slide(0);

// เพิ่มออโต้เชปประเภท Rectangle.
auto shape = slide->get_Shapes()->AddAutoShape(ShapeType::Rectangle, 50, 50, 150, 75);

// หมุนรูปร่างโดย 5 องศา.
shape->set_Rotation(5);

// บันทึกไฟล์ PPTX ไปยังดิสก์.
presentation->Save(u"shape_rotation.pptx", SaveFormat::Pptx);
presentation->Dispose();
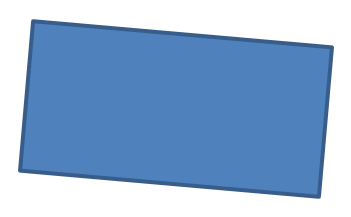
เพิ่มเอฟเฟกต์ bevel 3 มิติ
Aspose.Slides ให้คุณใช้เอฟเฟกต์ bevel 3 มิติกับรูปร่างโดยกำหนดคุณสมบัติของ ThreeDFormat
เพื่อเพิ่มเอฟเฟกต์ bevel 3 มิติให้กับรูปร่าง ให้ทำตามขั้นตอนต่อไปนี้:
- สร้างอินสแตนซ์ของคลาส Presentation
- รับอ้างอิงไปยังสไลด์ตามดัชนีของมัน
- เพิ่ม IAutoShape ลงในสไลด์
- กำหนดค่า ThreeDFormat ของรูปร่างเพื่อกำหนดการตั้งค่า bevel
- บันทึกงานนำเสนอ
#include <DOM/BevelPresetType.h>
#include <DOM/CameraPresetType.h>
#include <DOM/FillType.h>
#include <DOM/IAutoShape.h>
#include <DOM/ICamera.h>
#include <DOM/IColorFormat.h>
#include <DOM/IFillFormat.h>
#include <DOM/ILightRig.h>
#include <DOM/ILineFillFormat.h>
#include <DOM/ILineFormat.h>
#include <DOM/IShapeBevel.h>
#include <DOM/IShapeCollection.h>
#include <DOM/ISlide.h>
#include <DOM/IThreeDFormat.h>
#include <DOM/LightRigPresetType.h>
#include <DOM/LightingDirection.h>
#include <DOM/Presentation.h>
#include <DOM/ShapeType.h>
#include <Export/SaveFormat.h>
#include <drawing/color.h>
#include <system/smart_ptr.h>
using namespace Aspose::Slides;
using namespace Aspose::Slides::Export;
using namespace System;
using namespace System::Drawing;

// สร้างอินสแตนซ์ของคลาส Presentation.
auto presentation = MakeObject<Presentation>();

auto slide = presentation->get_Slide(0);

// เพิ่มรูปร่างลงในสไลด์.
auto shape = slide->get_Shapes()->AddAutoShape(ShapeType::Ellipse, 50, 50, 100, 100);
shape->get_FillFormat()->set_FillType(FillType::Solid);
shape->get_FillFormat()->get_SolidFillColor()->set_Color(Color::get_Green());
shape->get_LineFormat()->get_FillFormat()->set_FillType(FillType::Solid);
shape->get_LineFormat()->get_FillFormat()->get_SolidFillColor()->set_Color(Color::get_Orange());
shape->get_LineFormat()->set_Width(2.0);

// ตั้งค่าคุณสมบัติ ThreeDFormat ของรูปร่าง.
shape->get_ThreeDFormat()->set_Depth(4.0);
shape->get_ThreeDFormat()->get_BevelTop()->set_BevelType(BevelPresetType::Circle);
shape->get_ThreeDFormat()->get_BevelTop()->set_Height(6);
shape->get_ThreeDFormat()->get_BevelTop()->set_Width(6);
shape->get_ThreeDFormat()->get_Camera()->set_CameraType(CameraPresetType::OrthographicFront);
shape->get_ThreeDFormat()->get_LightRig()->set_LightType(LightRigPresetType::ThreePt);
shape->get_ThreeDFormat()->get_LightRig()->set_Direction(LightingDirection::Top);

// บันทึกงานนำเสนอเป็นไฟล์ PPTX.
presentation->Save(u"3D_bevel_effect.pptx", SaveFormat::Pptx);
presentation->Dispose();

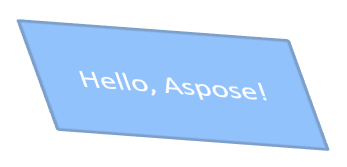
เพิ่มเอฟเฟกต์การหมุน 3 มิติ
Aspose.Slides ให้คุณใช้เอฟเฟกต์การหมุน 3 มิติกับรูปร่างโดยกำหนดคุณสมบัติของ ThreeDFormat
เพื่อใช้เอฟเฟกต์การหมุน 3 มิติ:
- สร้างอินสแตนซ์ของคลาส Presentation
- รับอ้างอิงไปยังสไลด์ตามดัชนีของมัน
- เพิ่ม IAutoShape ลงในสไลด์
- ใช้ set_CameraType และ set_LightType เพื่อกำหนดการหมุน 3 มิติ
- บันทึกงานนำเสนอ
#include <DOM/CameraPresetType.h>
#include <DOM/IAutoShape.h>
#include <DOM/ICamera.h>
#include <DOM/ILightRig.h>
#include <DOM/IShapeCollection.h>
#include <DOM/ISlide.h>
#include <DOM/ITextFrame.h>
#include <DOM/IThreeDFormat.h>
#include <DOM/LightRigPresetType.h>
#include <DOM/Presentation.h>
#include <DOM/ShapeType.h>
#include <Export/SaveFormat.h>
#include <system/smart_ptr.h>
using namespace Aspose::Slides;
using namespace Aspose::Slides::Export;
using namespace System;

// สร้างอินสแตนซ์ของคลาส Presentation.
auto presentation = MakeObject<Presentation>();

auto slide = presentation->get_Slide(0);

auto shape = slide->get_Shapes()->AddAutoShape(ShapeType::Rectangle, 50, 50, 150, 75);
shape->get_TextFrame()->set_Text(u"Hello, Aspose!");

shape->get_ThreeDFormat()->set_Depth(6);
shape->get_ThreeDFormat()->get_Camera()->SetRotation(40, 35, 20);
shape->get_ThreeDFormat()->get_Camera()->set_CameraType(CameraPresetType::IsometricLeftUp);
shape->get_ThreeDFormat()->get_LightRig()->set_LightType(LightRigPresetType::Balanced);

// บันทึกงานนำเสนอเป็นไฟล์ PPTX.
presentation->Save(u"3D_rotation_effect.pptx", SaveFormat::Pptx);
presentation->Dispose();
ควบคุมการแสดงผลสีขาว-ดำสำหรับรูปร่าง
เมธอด IShape::set_BlackWhiteMode กำหนดวิธีการแสดงผลของรูปร่างแต่ละตัวเมื่อดูหรือประมวลผลงานนำเสนอในโหมดสีขาว-ดำ มันไม่ได้เปิดใช้งานการแสดงผลสีขาว-ดำโดยตรง และไม่ได้เปลี่ยนการเติม, เส้น, หรือการจัดรูปแบบอื่นของรูปร่างในโหมดสีปกติ
ใช้ค่าจาก enumeration BlackWhiteMode เพื่อเลือกพฤติกรรมที่ต้องการ ตัวอย่างเช่น Automatic ให้แอปพลิเคชันแสดงผลเลือกการแปลง, Gray และ LightGray ใช้สีเทา, BlackWhite ใช้เฉพาะสีดำและสีขาว, Black และ White บังคับให้เป็นสีเดียว, Color รักษาสีปกติ, และ Hidden ลบรูปร่างในโหมดสีขาว-ดำ. NotDefined หมายถึงไม่มีการกำหนดโหมดระดับรูปร่าง
โค้ด C++ ด้านล่างสร้างรูปร่างสีและทำให้แสดงเป็นสีเทาในโหมดแสดงผลสีขาว-ดำ:
#include <DOM/BlackWhiteMode.h>
#include <DOM/FillType.h>
#include <DOM/IAutoShape.h>
#include <DOM/IFillFormat.h>
#include <DOM/IShapeCollection.h>
#include <DOM/ISlide.h>
#include <DOM/Presentation.h>
#include <DOM/ShapeType.h>
#include <Export/SaveFormat.h>
#include <drawing/color.h>
#include <system/smart_ptr.h>

using namespace Aspose::Slides;
using namespace Aspose::Slides::Export;
using namespace System;
using namespace System::Drawing;

auto presentation = MakeObject<Presentation>();
auto slide = presentation->get_Slide(0);

auto shape = slide->get_Shapes()->AddAutoShape(ShapeType::Rectangle, 50, 50, 200, 100);
shape->get_FillFormat()->set_FillType(FillType::Solid);
shape->get_FillFormat()->get_SolidFillColor()->set_Color(Color::get_Orange());

// Keep the orange fill in color mode, but render the shape with gray coloring in black-and-white mode.
shape->set_BlackWhiteMode(BlackWhiteMode::Gray);

presentation->Save(u"shape_black_white_mode.pptx", SaveFormat::Pptx);
presentation->Dispose();
ในโหมดสีปกติ สี่เหลี่ยมยังคงสีเติมส้มไว้ ในกระบวนการแสดงผลสีขาว-ดำ จะใช้สีเทาเนื่องจากโหมดถูกตั้งเป็น Gray สิ่งนี้ทำให้คุณสามารถรักษาสไลด์สีเต็มได้พร้อมกำหนดลักษณะเฉพาะสำหรับการพิมพ์ การดูตัวอย่าง หรือกระบวนการอื่น ๆ ที่เคารพการตั้งค่าแสดงผลสีขาว-ดำของงานนำเสนอ
รีเซ็ตการจัดรูปแบบ
โค้ด C++ ด้านล่างแสดงวิธีรีเซ็ตการจัดรูปแบบของสไลด์และคืนตำแหน่ง, ขนาด, และการจัดรูปแบบของรูปร่างทั้งหมดที่มี placeholder บน LayoutSlide ไปยังการตั้งค่าเริ่มต้น:
#include <DOM/ISlide.h>
#include <DOM/ISlideCollection.h>
#include <DOM/Presentation.h>
#include <Export/SaveFormat.h>
#include <system/enumerator_adapter.h>
#include <system/smart_ptr.h>
using namespace Aspose::Slides;
using namespace Aspose::Slides::Export;
using namespace System;

auto presentation = MakeObject<Presentation>(u"sample.pptx");

for (auto&& slide : System::IterateOver(presentation->get_Slides()))
{
    // รีเซ็ตรูปแต่ละรูปบนสไลด์ที่มี placeholder บนเลย์เอาต์.
    slide->Reset();
}

presentation->Save(u"reset_formatting.pptx", SaveFormat::Pptx);
presentation->Dispose();
คำถามที่พบบ่อย
การจัดรูปแบบรูปร่างมีผลต่อขนาดไฟล์งานนำเสนอสุดท้ายหรือไม่?
มีผลเพียงเล็กน้อย เท่านั้น ภาพและสื่อที่ฝังคู่มือใช้ส่วนใหญ่ของพื้นที่ไฟล์ ส่วนพารามิเตอร์ของรูปร่าง เช่น สี, เอฟเฟกต์, และการไล่สี จะถูกเก็บเป็นเมทาดาต้าและเพิ่มขนาดไฟล์เกือบไม่มี
ฉันจะตรวจจับรูปร่างบนสไลด์ที่มีการจัดรูปแบบเดียวกันเพื่อที่จะจัดกลุ่มได้อย่างไร?
เปรียบเทียบคุณสมบัติการจัดรูปแบบหลักของแต่ละรูปร่าง — การเติม, เส้น, และการตั้งค่าเอฟเฟกต์ หากค่าทั้งหมดตรงกัน ให้ถือว่ารูปแบบเดียวกันและจัดกลุ่มรูปร่างเหล่านั้นตามตรรกะ ซึ่งช่วยให้การจัดการสไตล์ในภายหลังง่ายขึ้น
ฉันสามารถบันทึกชุดสไตล์รูปร่างกำหนดเองเป็นไฟล์แยกเพื่อใช้ซ้ำในงานนำเสนออื่นได้หรือไม่?
ได้. เก็บรูปร่างตัวอย่างที่มีสไตล์ที่ต้องการในชุดสไลด์เทมเพลตหรือไฟล์เทมเพลต .POTX เมื่อสร้างงานนำเสนอใหม่ เปิดเทมเพลต, คัดลอกรูปร่างที่มีสไตล์ที่ต้องการ, และนำการจัดรูปแบบของมันไปใช้ใหม่ตามที่ต้องการ