Manage PowerPoint Text Paragraphs in .NET
Introduction
Aspose.Slides provides all the interfaces and classes you need to work with PowerPoint texts, paragraphs, and portions in C#.
- Aspose.Slides provides the ITextFrame interface to allow you to add objects that represent a paragraph. An
ITextFameobject can have one or multiple paragraphs (each paragraph is created through a carriage return). - Aspose.Slides provides the IParagraph interface to allow you to add objects that represent portions. An
IParagraphobject can have one or multiple portions (collection of iPortions objects). - Aspose.Slides provides IPortion interface to allow you to add objects that represent texts and their formatting properties.
An IParagraph object is capable of handling texts with different formatting properties through its underlying IPortion objects.
Add Multiple Paragraphs Containing Multiple Portions
These steps show you how to add a text frame containing 3 paragraphs and each paragraph containing 3 portions:
- Create an instance of the Presentation class.
- Access the relevant slide’s reference through its index.
- Add a Rectangle IAutoShape to the slide.
- Get the ITextFrame associated with the IAutoShape.
- Create two IParagraph objects and add them to the
IParagraphscollection of the ITextFrame. - Create three IPortion objects for each new
IParagraph(two Portion objects for default Paragraph) and add eachIPortionobject to the IPortion collection of eachIParagraph. - Set some text for each portion.
- Apply your preferred formatting features to each portion using the formatting properties exposed by the
IPortionobject. - Save the modified presentation.
This C# code is an implementation of the steps for adding paragraphs containing portions:
// Instantiates a Presentation class that represents a PPTX file
using (Presentation pres = new Presentation())
{
    // Accesses the first slide
    ISlide slide = pres.Slides[0];

    // Adds a Rectangle IAutoShape
    IAutoShape ashp = slide.Shapes.AddAutoShape(ShapeType.Rectangle, 50, 150, 300, 150);

    // Accesses the AutoShape TextFrame
    ITextFrame tf = ashp.TextFrame;

    // Creates Paragraphs and Portions with different text formats
    IParagraph para0 = tf.Paragraphs[0];
    IPortion port01 = new Portion();
    IPortion port02 = new Portion();
    para0.Portions.Add(port01);
    para0.Portions.Add(port02);

    IParagraph para1 = new Paragraph();
    tf.Paragraphs.Add(para1);
    IPortion port10 = new Portion();
    IPortion port11 = new Portion();
    IPortion port12 = new Portion();
    para1.Portions.Add(port10);
    para1.Portions.Add(port11);
    para1.Portions.Add(port12);

    IParagraph para2 = new Paragraph();
    tf.Paragraphs.Add(para2);
    IPortion port20 = new Portion();
    IPortion port21 = new Portion();
    IPortion port22 = new Portion();
    para2.Portions.Add(port20);
    para2.Portions.Add(port21);
    para2.Portions.Add(port22);

    for (int i = 0; i < 3; i++)
        for (int j = 0; j < 3; j++)
        {
            tf.Paragraphs[i].Portions[j].Text = "Portion0" + j.ToString();
            if (j == 0)
            {
                tf.Paragraphs[i].Portions[j].PortionFormat.FillFormat.FillType = FillType.Solid;
                tf.Paragraphs[i].Portions[j].PortionFormat.FillFormat.SolidFillColor.Color = Color.Red;
                tf.Paragraphs[i].Portions[j].PortionFormat.FontBold = NullableBool.True;
                tf.Paragraphs[i].Portions[j].PortionFormat.FontHeight = 15;
            }
            else if (j == 1)
            {
                tf.Paragraphs[i].Portions[j].PortionFormat.FillFormat.FillType = FillType.Solid;
                tf.Paragraphs[i].Portions[j].PortionFormat.FillFormat.SolidFillColor.Color = Color.Blue;
                tf.Paragraphs[i].Portions[j].PortionFormat.FontItalic = NullableBool.True;
                tf.Paragraphs[i].Portions[j].PortionFormat.FontHeight = 18;
            }
        }
    // Saves the modified presentation
    pres.Save("multiParaPort_out.pptx", SaveFormat.Pptx);
Manage Paragraph Bullets
Bullet lists help you to organize and present information quickly and efficiently. Bulleted paragraphs are always easier to read and understand.
- Create an instance of the Presentation class.
- Access the relevant slide’s reference through its index.
- Add an autoshape to the selected slide.
- Access the autoshape’s TextFrame.
- Remove the default paragraph in the
TextFrame. - Create the first paragraph instance using the Paragraph class.
- Set the bullet
Typefor the paragraph toSymboland set the bullet character. - Set the paragraph
Text. - Set the paragraph
Indentfor the bullet. - Set a color for the bullet.
- Set a height of the bullet.
- Add the new paragraph to the
TextFrameparagraph collection. - Add the second paragraph and repeat the process given in steps 7 to 13.
- Save the presentation.
This C# code shows you how to add a paragraph bullet:
// Instantiates a Presentation class that represents a PPTX file
using (Presentation pres = new Presentation())
{

    // Accesses the first slide
    ISlide slide = pres.Slides[0];


    // Adds and accesses Autoshape
    IAutoShape aShp = slide.Shapes.AddAutoShape(ShapeType.Rectangle, 200, 200, 400, 200);

    // Accesses the autoshape text frame
    ITextFrame txtFrm = aShp.TextFrame;

    // Removes the default paragraph
    txtFrm.Paragraphs.RemoveAt(0);

    // Creates a paragraph
    Paragraph para = new Paragraph();

    // Sets a paragraph bullet style and symbol
    para.ParagraphFormat.Bullet.Type = BulletType.Symbol;
    para.ParagraphFormat.Bullet.Char = Convert.ToChar(8226);

    // Sets a paragraph text
    para.Text = "Welcome to Aspose.Slides";

    // Sets bullet indent
    para.ParagraphFormat.Indent = 25;

    // Sets bullet color
    para.ParagraphFormat.Bullet.Color.ColorType = ColorType.RGB;
    para.ParagraphFormat.Bullet.Color.Color = Color.Black;
    para.ParagraphFormat.Bullet.IsBulletHardColor = NullableBool.True; // set IsBulletHardColor to true to use own bullet color

    // Sets Bullet Height
    para.ParagraphFormat.Bullet.Height = 100;

    // Adds Paragraph to text frame
    txtFrm.Paragraphs.Add(para);

    // Creates second paragraph
    Paragraph para2 = new Paragraph();

    // Sets paragraph bullet type and style
    para2.ParagraphFormat.Bullet.Type = BulletType.Numbered;
    para2.ParagraphFormat.Bullet.NumberedBulletStyle = NumberedBulletStyle.BulletCircleNumWDBlackPlain;

    // Adds paragraph text
    para2.Text = "This is numbered bullet";

    // Sets bullet indent
    para2.ParagraphFormat.Indent = 25;

    para2.ParagraphFormat.Bullet.Color.ColorType = ColorType.RGB;
    para2.ParagraphFormat.Bullet.Color.Color = Color.Black;
    para2.ParagraphFormat.Bullet.IsBulletHardColor = NullableBool.True; // set IsBulletHardColor to true to use own bullet color

    // Sets Bullet Height
    para2.ParagraphFormat.Bullet.Height = 100;

    // Adds Paragraph to text frame
    txtFrm.Paragraphs.Add(para2);


    // Saves the modified presentation
    pres.Save("Bullet_out.pptx", SaveFormat.Pptx);

}
Manage Picture Bullets
Bullet lists help you to organize and present information quickly and efficiently. Picture paragraphs are easy to read and understand.
- Create an instance of the Presentation class.
- Access the relevant slide’s reference through its index.
- Add an autoshape to the slide.
- Access the autoshape’s TextFrame.
- Remove the default paragraph in the
TextFrame. - Create the first paragraph instance using the Paragraph class.
- Load the image in IPPImage.
- Set the bullet type to Picture and set the image.
- Set the Paragraph
Text. - Set the Paragraph
Indentfor the bullet. - Set a color for the bullet.
- Set a height for the bullet.
- Add the new paragraph to the
TextFrameparagraph collection. - Add the second paragraph and repeat the process based on the previous steps.
- Save the modified presentation.
This C# code shows you how to add and manage picture bullets:
// Instantiates a Presentation class that represents a PPTX file
Presentation presentation = new Presentation();

// Accesses the first slide
ISlide slide = presentation.Slides[0];

// Instantiates the image for bullets
IImage image = Images.FromFile("bullets.png");
IPPImage ippxImage = presentation.Images.AddImage(image);
image.Dispose();

// Adds and accesses Autoshape
IAutoShape autoShape = slide.Shapes.AddAutoShape(ShapeType.Rectangle, 200, 200, 400, 200);

// Accesses the autoshape textframe
ITextFrame textFrame = autoShape.TextFrame;

// Removes the default paragraph
textFrame.Paragraphs.RemoveAt(0);

// Creates a new paragraph
Paragraph paragraph = new Paragraph();
paragraph.Text = "Welcome to Aspose.Slides";

// Sets paragraph bullet style and image
paragraph.ParagraphFormat.Bullet.Type = BulletType.Picture;
paragraph.ParagraphFormat.Bullet.Picture.Image = ippxImage;

// Sets bullet Height
paragraph.ParagraphFormat.Bullet.Height = 100;

// Adds paragraph to text frame
textFrame.Paragraphs.Add(paragraph);

// Writes the presentation as a PPTX file
presentation.Save("ParagraphPictureBulletsPPTX_out.pptx", SaveFormat.Pptx);

// Writes the presentation as a PPT file
presentation.Save("ParagraphPictureBulletsPPT_out.ppt", SaveFormat.Ppt);
Manage Multilevel Bullets
Bullet lists help you to organize and present information quickly and efficiently. Multilevel bullets are easy to read and understand.
- Create an instance of the Presentation class.
- Access the relevant slide’s reference through its index.
- Add an autoshape in the new slide.
- Access the autoshape’s TextFrame.
- Remove the default paragraph in the
TextFrame. - Create the first paragraph instance through the Paragraph class and set the depth to 0.
- Create the second paragraph instance through the
Paragraphclass and set the depth set to 1. - Create the third paragraph instance through the
Paragraphclass and set the depth set to 2. - Create the fourth paragraph instance through the
Paragraphclass and set the depth set to 3. - Add the new paragraphs to the
TextFrameparagraph collection. - Save the modified presentation.
This C# code shows you how to add and manage multilevel bullets:
// Instantiates a Presentation class that represents a PPTX file
using (Presentation pres = new Presentation())
{

    // Accesses the first slide
    ISlide slide = pres.Slides[0];

    // Adds and accesses Autoshape
    IAutoShape aShp = slide.Shapes.AddAutoShape(ShapeType.Rectangle, 200, 200, 400, 200);

    // Accesses the text frame of created autoshape
    ITextFrame text = aShp.AddTextFrame("");

    // Clears the default paragraph
    text.Paragraphs.Clear();

    // Adds the first paragraph
    IParagraph para1 = new Paragraph();
    para1.Text = "Content";
    para1.ParagraphFormat.Bullet.Type = BulletType.Symbol;
    para1.ParagraphFormat.Bullet.Char = Convert.ToChar(8226);
    para1.ParagraphFormat.DefaultPortionFormat.FillFormat.FillType = FillType.Solid;
    para1.ParagraphFormat.DefaultPortionFormat.FillFormat.SolidFillColor.Color = Color.Black;
    // Sets the bullet level
    para1.ParagraphFormat.Depth = 0;

    // Adds the second paragraph
    IParagraph para2 = new Paragraph();
    para2.Text = "Second Level";
    para2.ParagraphFormat.Bullet.Type = BulletType.Symbol;
    para2.ParagraphFormat.Bullet.Char = '-';
    para2.ParagraphFormat.DefaultPortionFormat.FillFormat.FillType = FillType.Solid;
    para2.ParagraphFormat.DefaultPortionFormat.FillFormat.SolidFillColor.Color = Color.Black;
    // Sets the bullet level
    para2.ParagraphFormat.Depth = 1;

    // Adds the third paragraph
    IParagraph para3 = new Paragraph();
    para3.Text = "Third Level";
    para3.ParagraphFormat.Bullet.Type = BulletType.Symbol;
    para3.ParagraphFormat.Bullet.Char = Convert.ToChar(8226);
    para3.ParagraphFormat.DefaultPortionFormat.FillFormat.FillType = FillType.Solid;
    para3.ParagraphFormat.DefaultPortionFormat.FillFormat.SolidFillColor.Color = Color.Black;
    // Sets the bullet level
    para3.ParagraphFormat.Depth = 2;

    // Adds the fourth paragraph
    IParagraph para4 = new Paragraph();
    para4.Text = "Fourth Level";
    para4.ParagraphFormat.Bullet.Type = BulletType.Symbol;
    para4.ParagraphFormat.Bullet.Char = '-';
    para4.ParagraphFormat.DefaultPortionFormat.FillFormat.FillType = FillType.Solid;
    para4.ParagraphFormat.DefaultPortionFormat.FillFormat.SolidFillColor.Color = Color.Black;
    // Sets the bullet level
    para4.ParagraphFormat.Depth = 3;

    // Adds paragraphs to collection
    text.Paragraphs.Add(para1);
    text.Paragraphs.Add(para2);
    text.Paragraphs.Add(para3);
    text.Paragraphs.Add(para4);

    // Writes the presentation as a PPTX file
    pres.Save("MultilevelBullet.pptx", Aspose.Slides.Export.SaveFormat.Pptx);
}
Manage a Paragraph with a Custom Numbered List
The IBulletFormat interface provides the NumberedBulletStartWith property and others that allow you to manage paragraphs with custom numbering or formatting.
- Create an instance of the Presentation class.
- Access the slide containing the paragraph.
- Add an autoshape to the slide.
- Access the autoshape TextFrame.
- Remove the default paragraph in the
TextFrame. - Create the first paragraph instance through the Paragraph class and set NumberedBulletStartWith to 2.
- Create the second paragraph instance through the
Paragraphclass and setNumberedBulletStartWithto 3. - Create the third paragraph instance through the
Paragraphclass and setNumberedBulletStartWithto 7. - Add the new paragraphs to the
TextFrameparagraph collection. - Save the modified presentation.
This C# code shows you how to add and manage paragraphs with custom numbering or formatting:
using (var presentation = new Presentation())
{
	var shape = presentation.Slides[0].Shapes.AddAutoShape(ShapeType.Rectangle, 200, 200, 400, 200);

	// Accesses the text frame of created autoshape
	ITextFrame textFrame = shape.TextFrame;

	// Removes the default exisiting paragraph
	textFrame.Paragraphs.RemoveAt(0);

	// First list
	var paragraph1 = new Paragraph { Text = "bullet 2" };
	paragraph1.ParagraphFormat.Depth = 4;
	paragraph1.ParagraphFormat.Bullet.NumberedBulletStartWith = 2;
	paragraph1.ParagraphFormat.Bullet.Type = BulletType.Numbered;
	textFrame.Paragraphs.Add(paragraph1);

	var paragraph2 = new Paragraph { Text = "bullet 3" };
	paragraph2.ParagraphFormat.Depth = 4;
	paragraph2.ParagraphFormat.Bullet.NumberedBulletStartWith = 3;
	paragraph2.ParagraphFormat.Bullet.Type = BulletType.Numbered;
	textFrame.Paragraphs.Add(paragraph2);


	var paragraph5 = new Paragraph { Text = "bullet 7" };
	paragraph5.ParagraphFormat.Depth = 4;
	paragraph5.ParagraphFormat.Bullet.NumberedBulletStartWith = 7;
	paragraph5.ParagraphFormat.Bullet.Type = BulletType.Numbered;
	textFrame.Paragraphs.Add(paragraph5);

	presentation.Save("SetCustomBulletsNumber-slides.pptx", SaveFormat.Pptx);
}
Set First-Line Indent for a Paragraph
Use the IParagraphFormat.Indent property to control the first-line indent of a paragraph. This property moves only the first line relative to the paragraph’s left margin. A positive value shifts the first line to the right, while the remaining lines stay aligned to the paragraph body.
Use IParagraphFormat.MarginLeft when you need to move the whole paragraph. Use IParagraphFormat.Indent when you need to move only the first line.
The example below creates several paragraphs and applies different Indent values to demonstrate how the first-line indent affects paragraph layout.
- Create an instance of the Presentation class.
- Access the target slide.
- Add a rectangular AutoShape to the slide.
- Add an empty TextFrame to the shape and remove the default paragraph.
- Create several paragraphs and set different Indent values for them.
- Add the paragraphs to the text frame.
- Save the modified presentation.
This code shows you how to set a paragraph indent:
using (Presentation presentation = new Presentation())
{
    ISlide slide = presentation.Slides[0];

    IAutoShape rectangleShape = slide.Shapes.AddAutoShape(ShapeType.Rectangle, 50, 50, 420, 220);
    rectangleShape.FillFormat.FillType = FillType.NoFill;
    rectangleShape.LineFormat.FillFormat.FillType = FillType.Solid;
    rectangleShape.LineFormat.FillFormat.SolidFillColor.Color = Color.Gray;

    ITextFrame textFrame = rectangleShape.AddTextFrame(string.Empty);
    textFrame.TextFrameFormat.AutofitType = TextAutofitType.Shape;
    textFrame.Paragraphs.RemoveAt(0);

    Paragraph firstParagraph = new Paragraph();
    firstParagraph.ParagraphFormat.DefaultPortionFormat.FillFormat.FillType = FillType.Solid;
    firstParagraph.ParagraphFormat.DefaultPortionFormat.FillFormat.SolidFillColor.Color = Color.Black;
    firstParagraph.Text = "No first-line indent. Wrapped lines start at the same position as the first line.";
    firstParagraph.ParagraphFormat.MarginLeft = 20f;
    firstParagraph.ParagraphFormat.Indent = 0f;

    Paragraph secondParagraph = new Paragraph();
    secondParagraph.ParagraphFormat.DefaultPortionFormat.FillFormat.FillType = FillType.Solid;
    secondParagraph.ParagraphFormat.DefaultPortionFormat.FillFormat.SolidFillColor.Color = Color.Black;
    secondParagraph.Text = "First-line indent of 20 points. The first line moves to the right, while wrapped lines remain aligned to the paragraph body.";
    secondParagraph.ParagraphFormat.MarginLeft = 20f;
    secondParagraph.ParagraphFormat.Indent = 20f;

    Paragraph thirdParagraph = new Paragraph();
    thirdParagraph.ParagraphFormat.DefaultPortionFormat.FillFormat.FillType = FillType.Solid;
    thirdParagraph.ParagraphFormat.DefaultPortionFormat.FillFormat.SolidFillColor.Color = Color.Black;
    thirdParagraph.Text = "First-line indent of 40 points. This paragraph shows a larger first-line offset to make the effect easier to see.";
    thirdParagraph.ParagraphFormat.MarginLeft = 20f;
    thirdParagraph.ParagraphFormat.Indent = 40f;

    textFrame.Paragraphs.Add(firstParagraph);
    textFrame.Paragraphs.Add(secondParagraph);
    textFrame.Paragraphs.Add(thirdParagraph);

    presentation.Save("paragraph_indent.pptx", SaveFormat.Pptx);
}
The result:

Set Hanging Indent for a Paragraph
A hanging indent is a paragraph layout in which the first line starts to the left of the remaining lines. In Aspose.Slides, you create this effect with the IParagraphFormat.Indent property. Set Indent to a negative value to move the first line to the left relative to the paragraph body.
In practice, IParagraphFormat.MarginLeft defines the left position of the paragraph body, and IParagraphFormat.Indent defines the position of the first line relative to that margin. To create a hanging indent, set a positive MarginLeft value and a negative Indent value.
This formatting is useful for bibliographies, references, glossary entries, and other paragraphs where wrapped lines must align under the paragraph body rather than under the first character of the first line.
- Create an instance of the Presentation class.
- Access the target slide.
- Add a rectangular AutoShape to the slide.
- Add an empty TextFrame to the shape and remove the default paragraph.
- Create paragraphs and set a positive MarginLeft value for each paragraph.
- Set a negative Indent value to create the hanging indent effect.
- Add the paragraphs to the text frame.
- Save the modified presentation.
This code shows you how to set a hanging indent for a paragraph:
using (Presentation presentation = new Presentation())
{
    ISlide slide = presentation.Slides[0];

    IAutoShape rectangleShape = slide.Shapes.AddAutoShape(ShapeType.Rectangle, 50, 50, 420, 220);
    rectangleShape.FillFormat.FillType = FillType.NoFill;
    rectangleShape.LineFormat.FillFormat.FillType = FillType.Solid;
    rectangleShape.LineFormat.FillFormat.SolidFillColor.Color = Color.Gray;

    ITextFrame textFrame = rectangleShape.AddTextFrame(string.Empty);
    textFrame.TextFrameFormat.AutofitType = TextAutofitType.Shape;
    textFrame.Paragraphs.RemoveAt(0);

    Paragraph firstParagraph = new Paragraph();
    firstParagraph.ParagraphFormat.DefaultPortionFormat.FillFormat.FillType = FillType.Solid;
    firstParagraph.ParagraphFormat.DefaultPortionFormat.FillFormat.SolidFillColor.Color = Color.Black;
    firstParagraph.Text = "A hanging indent is created by combining a positive left margin with a negative indent. The first line starts to the left, while wrapped lines align with the paragraph body.";
    firstParagraph.ParagraphFormat.MarginLeft = 40f;
    firstParagraph.ParagraphFormat.Indent = -20f;

    Paragraph secondParagraph = new Paragraph();
    secondParagraph.ParagraphFormat.DefaultPortionFormat.FillFormat.FillType = FillType.Solid;
    secondParagraph.ParagraphFormat.DefaultPortionFormat.FillFormat.SolidFillColor.Color = Color.Black;
    secondParagraph.Text = "This second example uses a deeper hanging indent so the difference between the first line and the wrapped lines is easier to compare.";
    secondParagraph.ParagraphFormat.MarginLeft = 60f;
    secondParagraph.ParagraphFormat.Indent = -30f;

    textFrame.Paragraphs.Add(firstParagraph);
    textFrame.Paragraphs.Add(secondParagraph);

    presentation.Save("hanging_indent.pptx", SaveFormat.Pptx);
}
The result:

Manage End Paragraph Run Properties
- Create an instance of Presentation class.
- Get the reference for the slide containing the paragraph through its position.
- Add a rectangle autoshape to the slide.
- Add a TextFrame with two paragraphs to the Rectangle.
- Set the
FontHeightand Font type for the paragraphs. - Set the End properties for the paragraphs.
- Write the modified presentation as a PPTX file.
This C# code shows you how to set the End properties for paragraphs in PowerPoint:
using (Presentation pres = new Presentation("Test.pptx"))
{
	IAutoShape shape = pres.Slides[0].Shapes.AddAutoShape(ShapeType.Rectangle, 10, 10, 200, 250);

	Paragraph para1 = new Paragraph();
	para1.Portions.Add(new Portion("Sample text"));

	Paragraph para2 = new Paragraph();
	para2.Portions.Add(new Portion("Sample text 2"));
	PortionFormat endParagraphPortionFormat = new PortionFormat();
	endParagraphPortionFormat.FontHeight = 48;
	endParagraphPortionFormat.LatinFont = new FontData("Times New Roman");
	para2.EndParagraphPortionFormat = endParagraphPortionFormat;

	shape.TextFrame.Paragraphs.Add(para1);
	shape.TextFrame.Paragraphs.Add(para2);

	pres.Save("pres.pptx", SaveFormat.Pptx);
}
Import HTML Text into Paragraphs
Aspose.Slides provides enhanced support for importing HTML text into paragraphs.
- Create an instance of the Presentation class.
- Access the relevant slide’s reference through its index.
- Add an autoshape to the slide.
- Add and access
autoshapeITextFrame. - Remove the default paragraph in the
ITextFrame. - Read the source HTML file in a TextReader.
- Create the first paragraph instance through the Paragraph class.
- Add the HTML file content in the read TextReader to the TextFrame’s ParagraphCollection.
- Save the modified presentation.
This C# code is an implementation of the steps for importing HTML texts in paragraphs:
// Creates Empty presentation instance
using (Presentation pres = new Presentation())
{
    // Acessses the default first slide of presentation
    ISlide slide = pres.Slides[0];

    // Adds the AutoShape to house the HTML content
    IAutoShape ashape = slide.Shapes.AddAutoShape(ShapeType.Rectangle, 10, 10, pres.SlideSize.Size.Width - 20, pres.SlideSize.Size.Height - 10);

    ashape.FillFormat.FillType = FillType.NoFill;

    // Adds text frame to the shape
    ashape.AddTextFrame("");

    // Clears all paragraphs in the added text frame
    ashape.TextFrame.Paragraphs.Clear();

    // Loads the HTML file using stream reader
    TextReader tr = new StreamReader("file.html");

    // Adds the text from HTML stream reader in text frame
    ashape.TextFrame.Paragraphs.AddFromHtml(tr.ReadToEnd());

    // Saves Presentation
    pres.Save("output_out.pptx", Aspose.Slides.Export.SaveFormat.Pptx);
}
Export Paragraph Text to HTML
Aspose.Slides provides enhanced support for exporting texts (contained in paragraphs) to HTML.
- Create an instance of the Presentation class and load the desired presentation.
- Access the relevant slide’s reference through its index.
- Access the shape containing the text that will be exported to HTML.
- Access the shape TextFrame.
- Create an instance of
StreamWriterand add the new HTML file. - Provide a starting index to StreamWriter and export your preferred paragraphs.
This C# code shows you how to export PowerPoint paragraph texts to HTML:
// Loads the presentation file
using (Presentation pres = new Presentation("ExportingHTMLText.pptx"))
{

    // Acessses the default first slide of presentation
    ISlide slide = pres.Slides[0];

    // Accesses the required  index
    int index = 0;

    // Accesses the added shape
    IAutoShape ashape = (IAutoShape)slide.Shapes[index];

    StreamWriter sw = new StreamWriter("output_out.html", false, Encoding.UTF8);

    // Writes paragraphs data to HTML by specifying paragraph starting index and number of paragraphs to be copied
    sw.Write(ashape.TextFrame.Paragraphs.ExportToHtml(0, ashape.TextFrame.Paragraphs.Count, null));

    sw.Close();
}
Save a Paragraph as an Image
In this section, we will explore two examples that demonstrate how to save a text paragraph, represented by the IParagraph interface, as an image. Both examples include obtaining the image of a shape containing the paragraph using the GetImage methods from the IShape interface, calculating the bounds of the paragraph within the shape, and exporting it as a bitmap image. These approaches allow you to extract specific parts of the text from PowerPoint presentations and save them as separate images, which can be useful for further use in various scenarios.
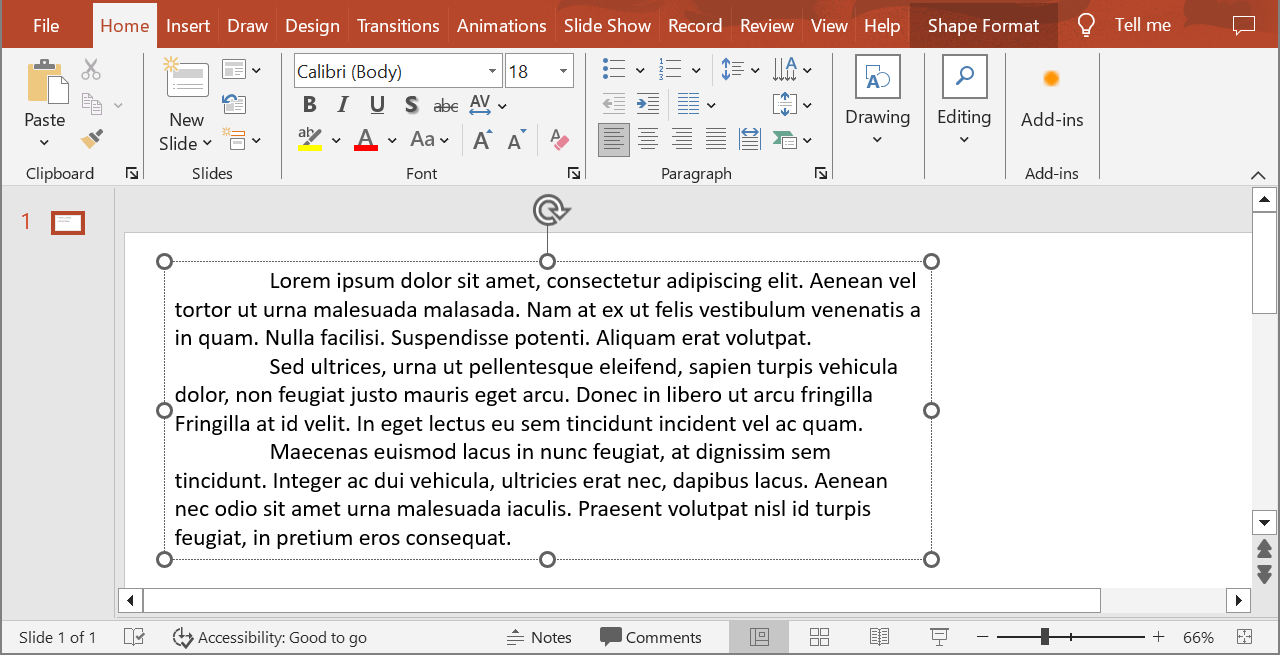
Let’s assume we have a presentation file called sample.pptx with one slide, where the first shape is a text box containing three paragraphs.
Example 1
In this example, we obtain the second paragraph as an image. To do this, we extract the image of the shape from the first slide of the presentation and then calculate the bounds of the second paragraph in the shape’s text frame. The paragraph is then redrawn onto a new bitmap image, which is saved in PNG format. This method is especially useful when you need to save a specific paragraph as a separate image while preserving the exact dimensions and formatting of the text.
using var presentation = new Presentation("sample.pptx");
var firstShape = presentation.Slides[0].Shapes[0] as IAutoShape;

// Save the shape in memory as a bitmap.
using var shapeImage = firstShape.GetImage();
using var shapeImageStream = new MemoryStream();
shapeImage.Save(shapeImageStream, ImageFormat.Png);

// Create a shape bitmap from memory.
shapeImageStream.Seek(0, SeekOrigin.Begin);
using var shapeBitmap = Image.FromStream(shapeImageStream);

// Calculate the boundaries of the second paragraph.
var secondParagraph = firstShape.TextFrame.Paragraphs[1];
var paragraphRectangle = secondParagraph.GetRect();

// Calculate the size for the output image (minimum size - 1x1 pixel).
var imageWidth = Math.Max(1, (int)Math.Ceiling(paragraphRectangle.Width));
var imageHeight = Math.Max(1, (int)Math.Ceiling(paragraphRectangle.Height));

// Prepare a bitmap for the paragraph.
using var paragraphBitmap = new Bitmap(imageWidth, imageHeight);

// Redraw the paragraph from the shape bitmap to the paragraph bitmap.
using var imageGraphics = Graphics.FromImage(paragraphBitmap);
var drawingRectangle = new RectangleF(0, 0, paragraphRectangle.Width, paragraphRectangle.Height);
imageGraphics.DrawImage(shapeBitmap, drawingRectangle, paragraphRectangle, GraphicsUnit.Pixel);

paragraphBitmap.Save("paragraph.png", System.Drawing.Imaging.ImageFormat.Png);
The result:

Example 2
In this example, we extend the previous approach by adding scaling factors to the paragraph image. The shape is extracted from the presentation and saved as an image with a scaling factor of 2. This allows for a higher resolution output when exporting the paragraph. The paragraph bounds are then calculated considering the scale. Scaling can be particularly useful when a more detailed image is needed, for example, for use in high-quality printed materials.
var imageScaleX = 2f;
var imageScaleY = imageScaleX;

using var presentation = new Presentation("sample.pptx");
var firstShape = presentation.Slides[0].Shapes[0] as IAutoShape;

// Save the shape in memory as a bitmap with scaling.
using var shapeImage = firstShape.GetImage(ShapeThumbnailBounds.Shape, imageScaleX, imageScaleY);
using var shapeImageStream = new MemoryStream();
shapeImage.Save(shapeImageStream, ImageFormat.Png);

// Create a shape bitmap from memory.
shapeImageStream.Seek(0, SeekOrigin.Begin);
using var shapeBitmap = Image.FromStream(shapeImageStream);

// Calculate the boundaries of the second paragraph.
var secondParagraph = firstShape.TextFrame.Paragraphs[1];
var paragraphRectangle = secondParagraph.GetRect();
paragraphRectangle.X *= imageScaleX;
paragraphRectangle.Y *= imageScaleY;
paragraphRectangle.Width *= imageScaleX;
paragraphRectangle.Height *= imageScaleY;

// Calculate the size for the output image (minimum size - 1x1 pixel).
var imageWidth = Math.Max(1, (int)Math.Ceiling(paragraphRectangle.Width));
var imageHeight = Math.Max(1, (int)Math.Ceiling(paragraphRectangle.Height));

// Prepare a bitmap for the paragraph.
using var paragraphBitmap = new Bitmap(imageWidth, imageHeight);

// Redraw the paragraph from the shape bitmap to the paragraph bitmap.
using var imageGraphics = Graphics.FromImage(paragraphBitmap);
var drawingRectangle = new RectangleF(0, 0, paragraphRectangle.Width, paragraphRectangle.Height);
imageGraphics.DrawImage(shapeBitmap, drawingRectangle, paragraphRectangle, GraphicsUnit.Pixel);

paragraphBitmap.Save("paragraph.png", System.Drawing.Imaging.ImageFormat.Png);
FAQ
Can I completely disable line wrapping inside a text frame?
Yes. Use the text frame’s wrapping setting (WrapText) to turn wrapping off so lines won’t break at the frame’s edges.
How can I get the exact on-slide bounds of a specific paragraph?
You can retrieve the paragraph’s (and even a single portion’s) bounding rectangle to know its precise position and size on the slide.
Where is paragraph alignment (left/right/center/justify) controlled?
Alignment is a paragraph-level setting in ParagraphFormat; it applies to the whole paragraph regardless of individual portion formatting.
Can I set a spell-check language for just part of a paragraph (e.g., one word)?
Yes. The language is set at the portion level (PortionFormat.LanguageId), so multiple languages can coexist within a single paragraph.