Split Screen of Excel Worksheet
Introduction
In this article, we will learn how to display certain rows and/or columns in separate panes by splitting the worksheet into two or four parts . When working with large datasets, we need to see a few areas of the same worksheet at a time to compare different subsets of data. The split screen function can meet your needs.
How to split screen in Excel
To split up a worksheet into two or four parts, do as the following:
- Select the row/column/cell before which you want to place the split.
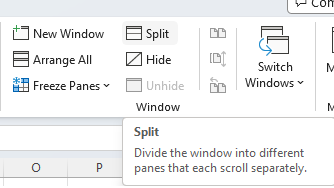
- On the View tab, in the Windows group, click the Split button.
Split worksheet vertically on columns
To separate two areas of the spreadsheet vertically, select the column to the right of the column where you wish the split to appear and click the Split button in Excel.
It’s easy to split worksheet vertically on columns programmatically with Aspose.Cells for .Net, we only need to select one cell in the top row as active cell, then split with Worksheet.Split method.
Split worksheet horizontally on rows
To separate your Excel window horizontally, select the row below the row where you want the split to occur in Excel.
It’s easy to split worksheet horizontally on rows programmatically with Aspose.Cells for .Net, we only need to select one cell in the left column as active cell, then split with Worksheet.Split method.
Split worksheet into four parts
To view four different sections of the same worksheet simultaneously, split your screen both vertically and horizontally in Excel.
It’s easy to split worksheet vertically on columns programmatically with Aspose.Cells for .Net, we only need to select one cell not in the first row and column as active cell, then split with Worksheet.Split method.
How to remove split
To remove the worksheet splitting, just click the Split button again.
Aspose.Cells for .Net provides a Worksheet.RemoveSplit method to remove split setting.