Analyzing your prompt, please hold on...
An error occurred while retrieving the results. Please refresh the page and try again.
Docker is a popular open-source platform that allows you to automate the deployment and management of applications within containers. Containers have many features and benefits, providing a lightweight and isolated environment for running applications and allowing them to work consistently across different operating systems and infrastructures.
The container is like a virtual machine. It can be installed, deleted, stopped, resumed, or connected to the terminal. So, the docker container is a lightweight, self-contained executable software package that includes everything needed to run an application: code, runtime, system tools, system libraries, and settings.
In this article, we’ll look at how to containerize a .NET application with docker and integrate Aspose.HTML functionality into your project. Here you will find step-by-step instructions on how to run Aspose.HTML in docker – how to create a console application and set up a Dockerfile.
Before you can run Aspose.HTML in docker, you must have docker installed on your system. To install Docker Desktop successfully, you should ensure that your system meets the minimum requirements for docker installation. For information on how to install docker on Windows, Mac, or Linux follow the links:
Let’s consider the example: we create a simple
Console Application ConsoleApp that converts an HTML document (document.html) and saves it in the TIFF format. This application you can build and run in docker. To create a console application project, follow a few steps:
Console App C#.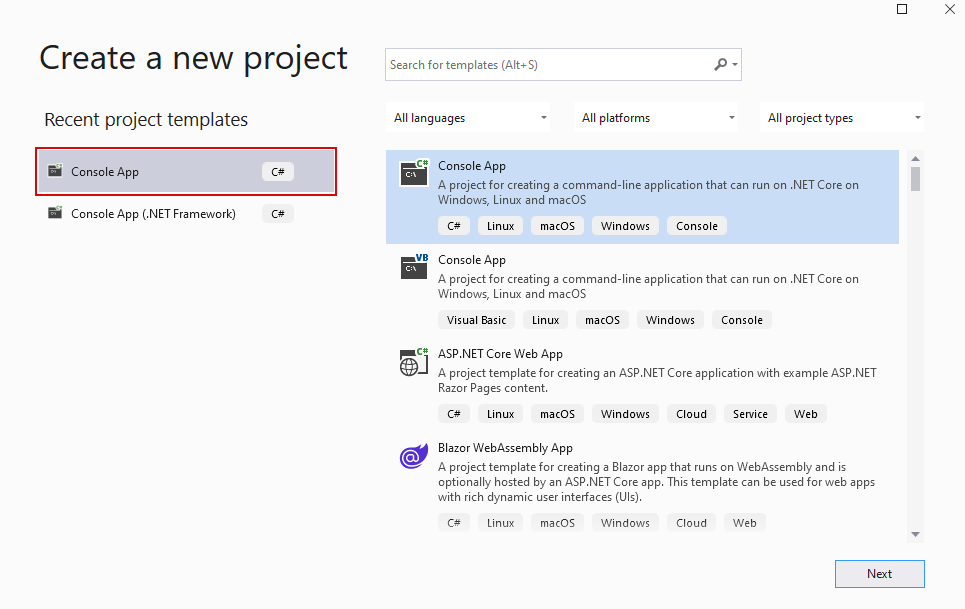
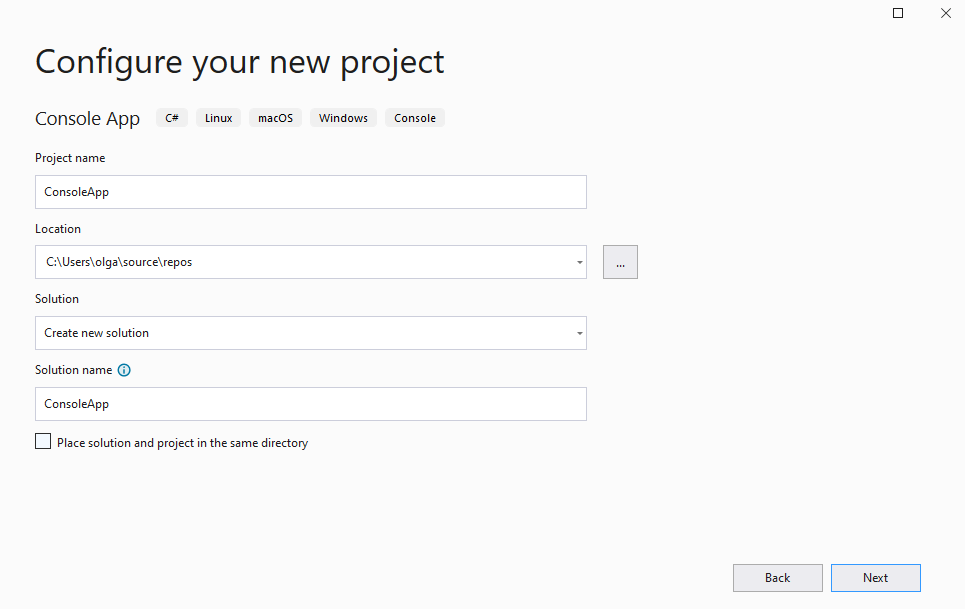

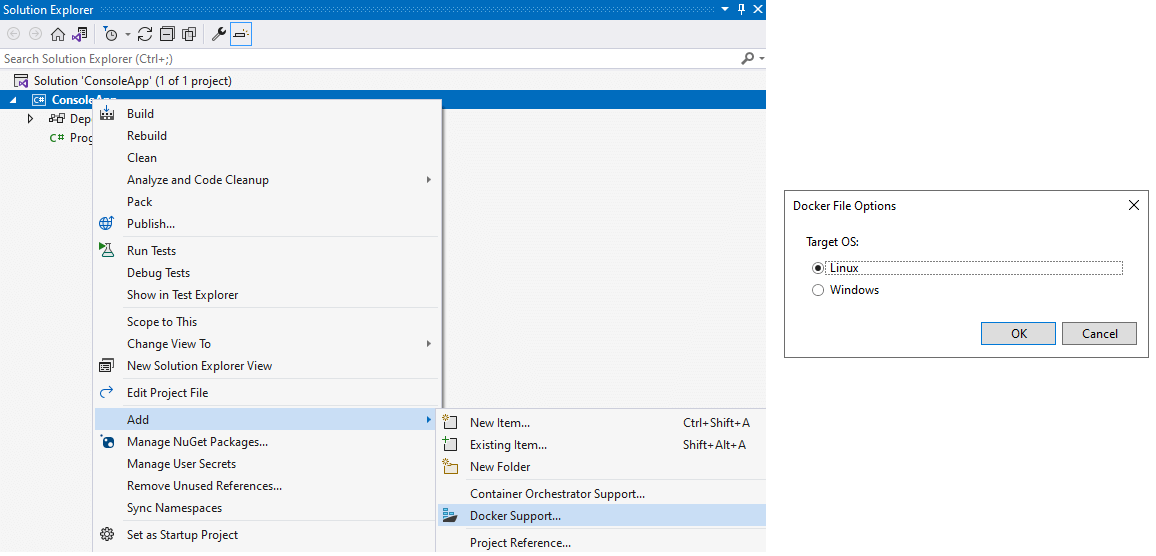
After adding docker support, a Dockerfile is created with default content.
By properly configuring the Dockerfile, you can define the steps to build a docker image and create a containerized environment that includes all the necessary dependencies and configurations to run your application.
 1#See https://aka.ms/containerfastmode to understand how Visual Studio uses this Dockerfile to build your images for faster debugging.
 2
 3FROM mcr.microsoft.com/dotnet/runtime:6.0 AS base
 4WORKDIR /app
 5
 6FROM mcr.microsoft.com/dotnet/sdk:6.0 AS build
 7WORKDIR /src
 8COPY ["ConsoleApp/ConsoleApp.csproj", "ConsoleApp/"]
 9RUN dotnet restore "ConsoleApp/ConsoleApp.csproj"
10COPY . .
11WORKDIR "/src/ConsoleApp"
12RUN dotnet build "ConsoleApp.csproj" -c Release -o /app/build
13
14FROM build AS publish
15RUN dotnet publish "ConsoleApp.csproj" -c Release -o /app/publish
16
17FROM base AS final
18WORKDIR /app
19COPY --from=publish /app/publish .
20ENTRYPOINT ["dotnet", "ConsoleApp.dll"] 1# See https://aka.ms/customizecontainer to learn how to customize your debug container and how Visual Studio uses this Dockerfile to build your images for faster debugging.
2
3# ---------- Base runtime stage ----------
4# .NET runtime + font and globalization support
5FROM mcr.microsoft.com/dotnet/runtime:6.0 AS base
6WORKDIR /app
7
8# Install fonts, fontconfig, locale support, and CA certificates
9RUN apt-get update && apt-get install -y --no-install-recommends \
10 libc6-dev \
11 libgdiplus \
12 fontconfig \
13 fonts-dejavu-core \
14 fonts-dejavu-extra \
15 fonts-liberation \
16 fonts-freefont-ttf \
17 locales \
18 ca-certificates \
19 && rm -rf /var/lib/apt/lists/*
20
21# Enable and generate UTF-8 locale
22RUN sed -i 's/# \(en_US.UTF-8 UTF-8\)/\1/' /etc/locale.gen \
23 && locale-gen
24
25# Configure globalization
26ENV LANG=en_US.UTF-8 \
27 LANGUAGE=en_US:en \
28 LC_ALL=en_US.UTF-8 \
29 DOTNET_SYSTEM_GLOBALIZATION_INVARIANT=false
30
31# Build font cache (useful for predictable font discovery)
32RUN fc-cache -f -v
33
34# ---------- Build stage ----------
35# Restore and build the application
36FROM mcr.microsoft.com/dotnet/sdk:6.0 AS build
37WORKDIR /src
38COPY ["ConsoleApp/ConsoleApp.csproj", "ConsoleApp/"]
39RUN dotnet restore "ConsoleApp/ConsoleApp.csproj"
40COPY . .
41WORKDIR "/src/ConsoleApp"
42RUN dotnet build "ConsoleApp.csproj" -c Release -o /app/build
43
44# ---------- Publish stage ----------
45FROM build AS publish
46RUN dotnet publish "ConsoleApp.csproj" -c Release -o /app/publish /p:UseAppHost=false
47
48# ---------- Final runtime stage ----------
49FROM base AS final
50WORKDIR /app
51COPY --from=publish /app/publish .
52ENTRYPOINT ["dotnet", "ConsoleApp.dll"]A Dockerfile is a text file that contains a set of instructions used to build a Docker image. In a multi-stage build, it is typically divided into several stages: a base runtime stage, a build stage, a publish stage, and a final runtime stage. Let’s go through these stages and their purposes.
mcr.microsoft.com/dotnet/runtime:6.0 is specified. This base image provides the runtime environment for .NET applications./app.libc6-dev, libgdiplus), fontconfig and open-source font packages, locale support, and CA certificates, configure UTF-8 globalization settings for .NET, rebuild the font cache, and clean up the package cache to minimize the image size.mcr.microsoft.com/dotnet/sdk:6.0 base image. The dotnet segment is the container repository, whereas the sdk segment is the docker container image name. The image includes the .NET 6.0 SDK, allowing you to build your .NET application./src.ConsoleApp/ to the container’s /src/ConsoleApp/ directory.dotnet restore to restore the NuGet packages for the project./scr/.dotnet build "ConsoleApp.csproj" -c Release -o /app/build command compiles the .NET application specified in ConsoleApp.csproj using the Release configuration and stores the build output in the /app/build directory inside the container.FROM build AS publish line sets up a new docker image stage named publish based on the previous build stage. This indicates that the publish stage will inherit all files, dependencies, and configurations from the build stage.dotnet publish to publish the application in the Release configuration, with the output directory set as /app/publish.base stage as the base image./app.publish stage to the current directory in the final stage.ConsoleApp.dll.These four blocks in the Dockerfile work together to build a multi-stage docker image. The initial base and build stages are used to install dependencies, restore packages, and build the application. The next publish and final blocks are used for publishing the application for deployment and running when the container starts.
In the example, we suggest using a simple program that converts an HTML document to a TIFF image format:
 1using Aspose.Html;
 2using Aspose.Html.Rendering.Image;
 3
 4namespace ConsoleApp
 5{
 6    internal class Program
 7    {
 8        static void Main(string[] args)
 9        {
10            using var doc = new HTMLDocument("document.html");
11            using var dev = new ImageDevice(new ImageRenderingOptions(ImageFormat.Tiff), "result.tiff");
12            doc.RenderTo(dev);
13        }
14    }
15}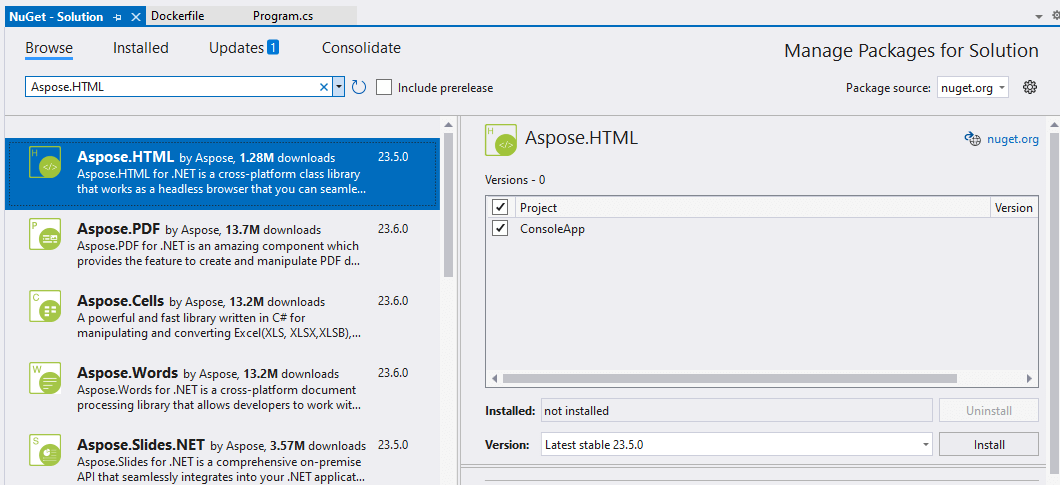
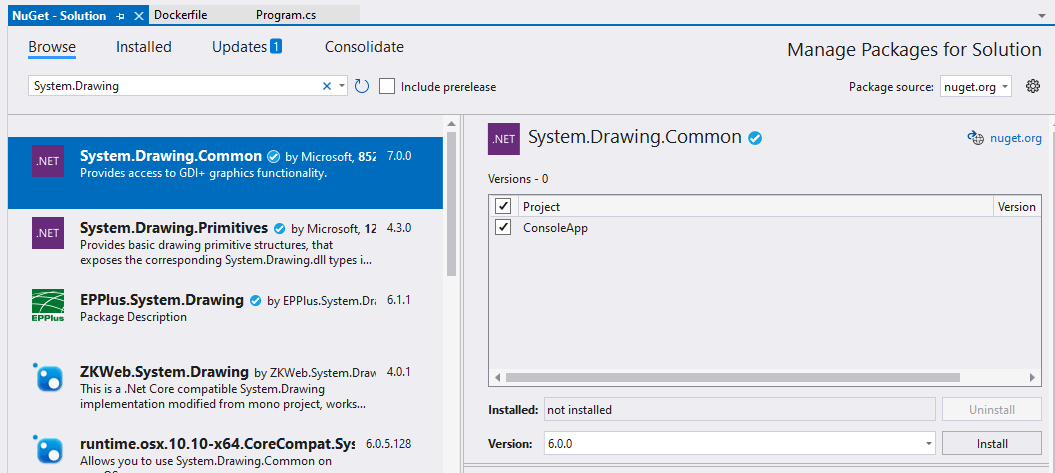
false:The following file is a .NET project file that defines the project settings, dependencies, and additional files needed to create an executable application. <InvariantGlobalization> is an additional element that disables invariant globalization behavior in the project. When set to false, the project will use the default globalization behavior.
 1<Project Sdk="Microsoft.NET.Sdk">
 2
 3  <PropertyGroup>
 4    <OutputType>Exe</OutputType>
 5    <TargetFramework>net6.0</TargetFramework>
 6    <ImplicitUsings>enable</ImplicitUsings>
 7    <Nullable>enable</Nullable>
 8    <DockerDefaultTargetOS>Linux</DockerDefaultTargetOS>
 9  </PropertyGroup>
10
11  <ItemGroup>
12    <PackageReference Include="Aspose.HTML" Version="23.5.0" />
13    <PackageReference Include="Microsoft.VisualStudio.Azure.Containers.Tools.Targets" Version="1.14.0" />
14    <PackageReference Include="System.Drawing.Common" Version="6.0.0" />
15  </ItemGroup>
16
17  <ItemGroup>
18    <None Update="document.html">
19      <CopyToOutputDirectory>Always</CopyToOutputDirectory>
20    </None>
21  </ItemGroup>
22
23  <ItemGroup>
24    <RuntimeHostConfigurationOption Include="System.Drawing.EnableUnixSupport" Value="true" />
25  </ItemGroup>
26
27  <PropertyGroup>
28	  <InvariantGlobalization>false</InvariantGlobalization>
29  </PropertyGroup>
30
31</Project>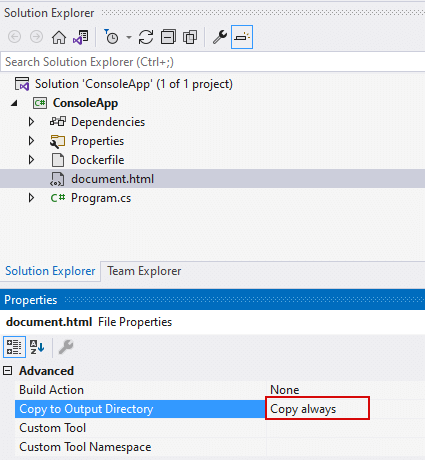

Help & Support
If you need help or have questions about running Aspose.HTML in docker, please contact Free Support Forum or Free Consulting. We will be happy to help!
See Also
Analyzing your prompt, please hold on...
An error occurred while retrieving the results. Please refresh the page and try again.