
Python में WordArt प्रभाव बनाएं और लागू करें
अवलोकन
WordArt प्रभाव आपको टेक्स्ट को फ़िल, आउटलाइन, शैडो, रिफ्लेक्शन, ग्लो, ट्रांसफ़ॉर्मेशन और 3D फ़ॉर्मेटिंग के साथ स्टाइल करने की अनुमति देते हैं। यह लेख PowerPoint प्रस्तुतियों में Aspose.Slides for Python via .NET का उपयोग करके इन प्रभावों को बनाना और अनुकूलित करना समझाता है, बिना Microsoft Office स्थापित किए।
एक सरल WordArt टेम्प्लेट बनाएं और इसे टेक्स्ट पर लागू करें
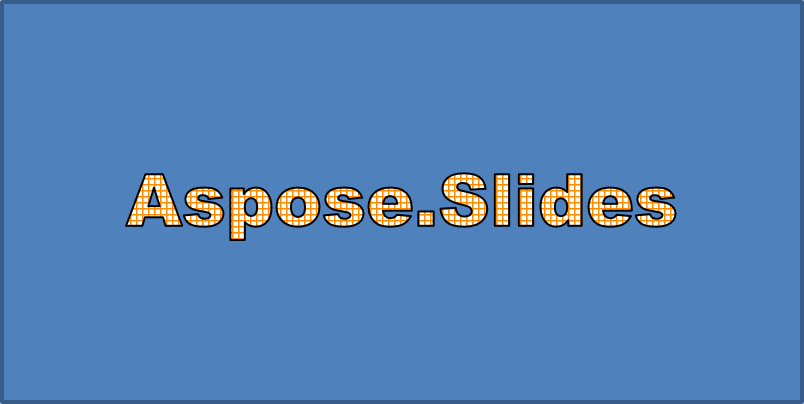
निम्नलिखित उदाहरण टेक्स्ट, फ़ॉन्ट, पैटर्न फ़िल और आउटलाइन सेट करके एक सरल WordArt शैली बनाते हैं।
प्रत्येक उदाहरण एक नई प्रस्तुति बनाता है और उसकी पहली स्लाइड पर एक आयत जोड़ता है; किसी इनपुट फ़ाइल की आवश्यकता नहीं होती। पहला उदाहरण टेक्स्ट को “Aspose.Slides” सेट करता है। आकार की स्थिति और आयाम पॉइंट में मापे जाते हैं:
import aspose.slides as slides

with slides.Presentation() as presentation:
    slide = presentation.slides[0]

    auto_shape = slide.shapes.add_auto_shape(slides.ShapeType.RECTANGLE, 20, 20, 400, 200)
    text_frame = auto_shape.text_frame

    portion = text_frame.paragraphs[0].portions[0]
    portion.text = "Aspose.Slides"
फ़ॉन्ट को Arial Black, 36 पॉइंट पर सेट करें ताकि फ़ॉर्मेटिंग अधिक स्पष्ट दिखे:
import aspose.slides as slides

with slides.Presentation() as presentation:
    slide = presentation.slides[0]

    auto_shape = slide.shapes.add_auto_shape(slides.ShapeType.RECTANGLE, 20, 20, 400, 200)

    portion = auto_shape.text_frame.paragraphs[0].portions[0]
    portion.text = "Aspose.Slides"
    portion.portion_format.latin_font = slides.FontData("Arial Black")
    portion.portion_format.font_height = 36
एक SMALL_GRID पैटर्न को डार्क ऑरेंज फोरग्राउंड और सफेद बैकग्राउंड के साथ लागू करें, फिर 1 पॉइंट की चौड़ाई वाला काली टेक्स्ट आउटलाइन जोड़ें:
import aspose.slides as slides
import aspose.pydrawing as draw

with slides.Presentation() as presentation:
    slide = presentation.slides[0]

    auto_shape = slide.shapes.add_auto_shape(slides.ShapeType.RECTANGLE, 20, 20, 400, 200)

    portion = auto_shape.text_frame.paragraphs[0].portions[0]
    portion.text = "Aspose.Slides"
    portion.portion_format.latin_font = slides.FontData("Arial Black")
    portion.portion_format.font_height = 36

    portion.portion_format.fill_format.fill_type = slides.FillType.PATTERN
    portion.portion_format.fill_format.pattern_format.fore_color.color = draw.Color.dark_orange
    portion.portion_format.fill_format.pattern_format.back_color.color = draw.Color.white
    portion.portion_format.fill_format.pattern_format.pattern_style = slides.PatternStyle.SMALL_GRID

    portion.portion_format.line_format.width = 1
    portion.portion_format.line_format.fill_format.fill_type = slides.FillType.SOLID
    portion.portion_format.line_format.fill_format.solid_fill_color.color = draw.Color.black
परिणामी टेक्स्ट:
अन्य WordArt प्रभाव लागू करें
निम्नलिखित उदाहरण दिखाते हैं कि टेक्स्ट पर शैडो, रिफ्लेक्शन, ग्लो, ट्रांसफ़ॉर्मेशन और 3D प्रभाव कैसे लागू करें।
बाहरी शैडो प्रभाव लागू करें
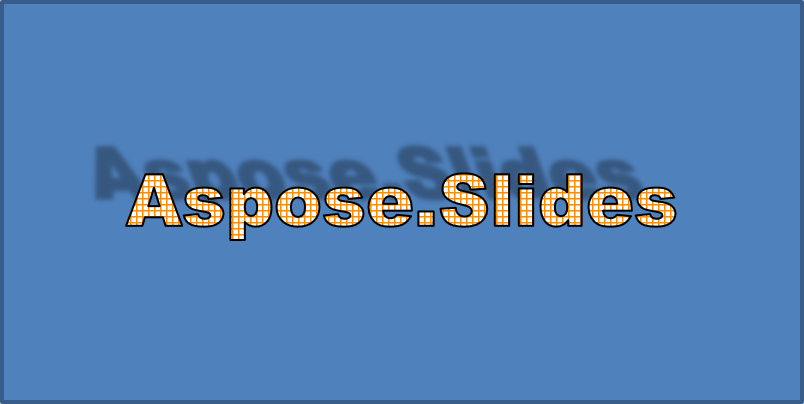
एक बाहरी शैडो टेक्स्ट के पीछे शैडो रखकर गहराई जोड़ता है। आप इसका रंग, दिशा, दूरी, ब्लर रेडियस, स्केल और स्क्यू कस्टमाइज़ कर सकते हैं।
यह उदाहरण enable_outer_shadow_effect को कॉल करता है और 4‑पॉइंट ब्लर रेडियस, 230‑डिग्री दिशा और 30‑पॉइंट दूरी वाला काला शैडो सेट करता है। 100 का स्केल मूल आकार को बरकरार रखता है, जबकि हॉरिज़ोंटल स्क्यू शैडो को 20‑डिग्री झुका देता है। अल्फा ट्रांसफ़ॉर्म इसकी अपारदर्शिता को 32 % पर सेट करता है:
import aspose.slides as slides
import aspose.pydrawing as draw

with slides.Presentation() as presentation:
    slide = presentation.slides[0]

    auto_shape = slide.shapes.add_auto_shape(slides.ShapeType.RECTANGLE, 20, 20, 400, 200)

    portion = auto_shape.text_frame.paragraphs[0].portions[0]
    portion.text = "Aspose.Slides"
    portion.portion_format.latin_font = slides.FontData("Arial Black")
    portion.portion_format.font_height = 36

    portion.portion_format.effect_format.enable_outer_shadow_effect()
    portion.portion_format.effect_format.outer_shadow_effect.shadow_color.color = draw.Color.black
    portion.portion_format.effect_format.outer_shadow_effect.scale_horizontal = 100
    portion.portion_format.effect_format.outer_shadow_effect.scale_vertical = 100
    portion.portion_format.effect_format.outer_shadow_effect.blur_radius = 4
    portion.portion_format.effect_format.outer_shadow_effect.direction = 230
    portion.portion_format.effect_format.outer_shadow_effect.distance = 30
    portion.portion_format.effect_format.outer_shadow_effect.skew_horizontal = 20
    portion.portion_format.effect_format.outer_shadow_effect.skew_vertical = 0
    portion.portion_format.effect_format.outer_shadow_effect.shadow_color.color_transform.add(slides.ColorTransformOperation.SET_ALPHA, 0.32)
परिणामी टेक्स्ट:
Note
- जब बाहरी और प्रीसेट शैडो एक साथ उपयोग किए जाते हैं, तो केवल बाहरी शैडो लागू होता है।
- यदि बाहरी और आंतरिक शैडो एक साथ उपयोग किए जाते हैं, तो प्रभाव का परिणाम PowerPoint संस्करण पर निर्भर करता है। उदाहरण के लिए, PowerPoint 2013 में प्रभाव दोगुना हो जाता है, जबकि PowerPoint 2007 में केवल बाहरी शैडो लागू होता है।
रिफ्लेक्शन प्रभाव लागू करें
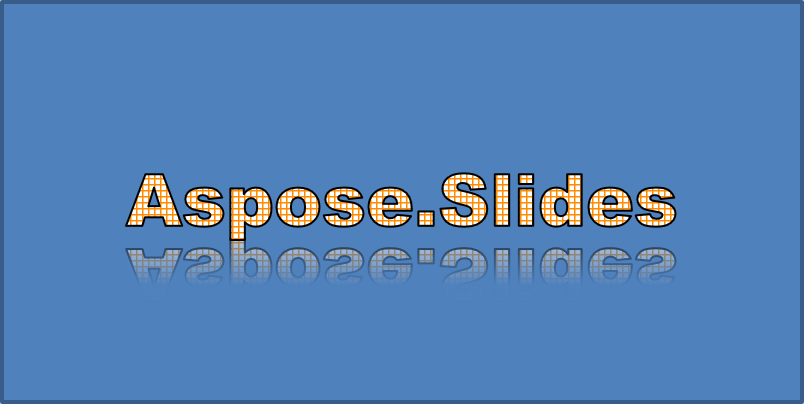
एक रिफ्लेक्शन टेक्स्ट की प्रतिबिंबित प्रतिलिपि बनाता है। उसकी स्थिति, स्केल, ब्लर और अपारदर्शिता को समायोजित करके आप उसका स्वरूप नियंत्रित कर सकते हैं।
यह उदाहरण enable_reflection_effect को कॉल करता है और रिफ्लेक्शन को -100 % स्केल के साथ वर्टिकली फ़्लिप करता है। 0.5‑पॉइंट ब्लर रेडियस और 4.72‑पॉइंट दूरी का उपयोग किया गया है। अपारदर्शिता 60 % से 0.9 % तक घटती है, जो रिफ्लेक्शन के 0 % से 60 % स्थानों के बीच बदलती है:
import aspose.slides as slides

with slides.Presentation() as presentation:
    slide = presentation.slides[0]

    auto_shape = slide.shapes.add_auto_shape(slides.ShapeType.RECTANGLE, 20, 20, 400, 200)

    portion = auto_shape.text_frame.paragraphs[0].portions[0]
    portion.text = "Aspose.Slides"
    portion.portion_format.latin_font = slides.FontData("Arial Black")
    portion.portion_format.font_height = 36

    portion.portion_format.effect_format.enable_reflection_effect()
    portion.portion_format.effect_format.reflection_effect.blur_radius = 0.5
    portion.portion_format.effect_format.reflection_effect.distance = 4.72
    portion.portion_format.effect_format.reflection_effect.start_pos_alpha = 0
    portion.portion_format.effect_format.reflection_effect.end_pos_alpha = 60
    portion.portion_format.effect_format.reflection_effect.direction = 90
    portion.portion_format.effect_format.reflection_effect.scale_horizontal = 100
    portion.portion_format.effect_format.reflection_effect.scale_vertical = -100
    portion.portion_format.effect_format.reflection_effect.start_reflection_opacity = 60
    portion.portion_format.effect_format.reflection_effect.end_reflection_opacity = 0.9
    portion.portion_format.effect_format.reflection_effect.rectangle_align = slides.RectangleAlignment.BOTTOM_LEFT
परिणामी टेक्स्ट:
ग्लो प्रभाव लागू करें
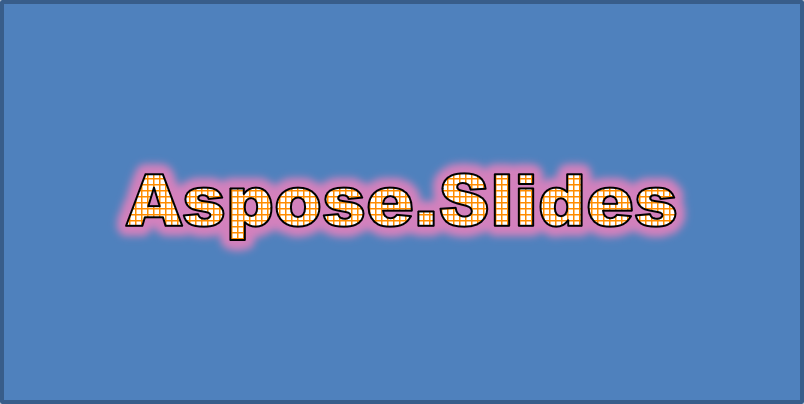
एक ग्लो टेक्स्ट के चारों ओर एक हल्की रंगीन आउटलाइन जोड़ता है। इसका रंग, अपारदर्शिता और रेडियस समायोजित करके आप प्रभाव को नियंत्रित कर सकते हैं।
यह उदाहरण enable_glow_effect को कॉल करता है और 54 % अपारदर्शिता और 7 पॉइंट रेडियस के साथ लाल ग्लो लागू करता है:
import aspose.slides as slides
import aspose.pydrawing as draw

with slides.Presentation() as presentation:
    slide = presentation.slides[0]

    auto_shape = slide.shapes.add_auto_shape(slides.ShapeType.RECTANGLE, 20, 20, 400, 200)

    portion = auto_shape.text_frame.paragraphs[0].portions[0]
    portion.text = "Aspose.Slides"
    portion.portion_format.latin_font = slides.FontData("Arial Black")
    portion.portion_format.font_height = 36

    portion.portion_format.effect_format.enable_glow_effect()
    portion.portion_format.effect_format.glow_effect.color.color = draw.Color.red
    portion.portion_format.effect_format.glow_effect.color.color_transform.add(slides.ColorTransformOperation.SET_ALPHA, 0.54)
    portion.portion_format.effect_format.glow_effect.radius = 7
परिणामी टेक्स्ट:
WordArt ट्रांसफ़ॉर्मेशन लागू करें
WordArt ट्रांसफ़ॉर्मेशन टेक्स्ट ब्लॉक को मोड़ता, खींचता या वॉर्प करता है।
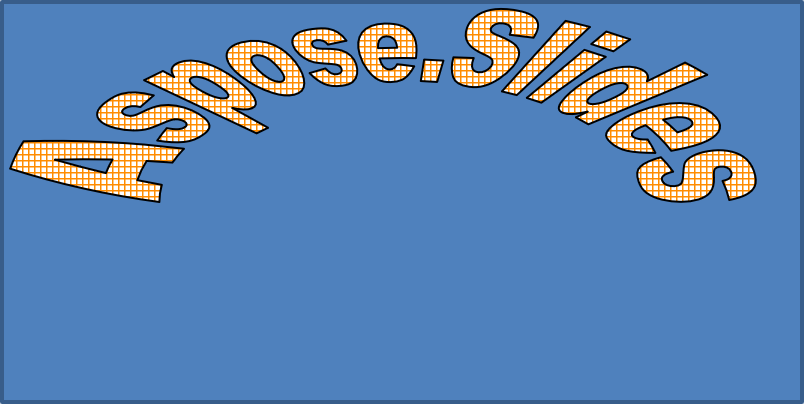
transform को ARCH_UP_POUR पर सेट करें ताकि पूरे टेक्स्ट फ्रेम को ऊपर की ओर वक्र किया जा सके:
import aspose.slides as slides

with slides.Presentation() as presentation:
    slide = presentation.slides[0]

    auto_shape = slide.shapes.add_auto_shape(slides.ShapeType.RECTANGLE, 20, 20, 400, 200)

    text_frame = auto_shape.text_frame
    text_frame.text = "Aspose.Slides"
    text_frame.text_frame_format.transform = slides.TextShapeType.ARCH_UP_POUR
परिणामी टेक्स्ट:
Note
Aspose.Slides for Python via .NET पूर्वनिर्धारित ट्रांसफ़ॉर्मेशन प्रकारों का सेट प्रदान करता है।Shapes और टेक्स्ट पर 3D प्रभाव लागू करें
आप आकार या उसके टेक्स्ट पर 3D प्रभाव लागू कर सकते हैं। बेवेल, एक्सट्रूज़न, लाइटिंग और कैमरा सेटिंग्स परिणामस्वरूप स्वरूप को नियंत्रित करती हैं।
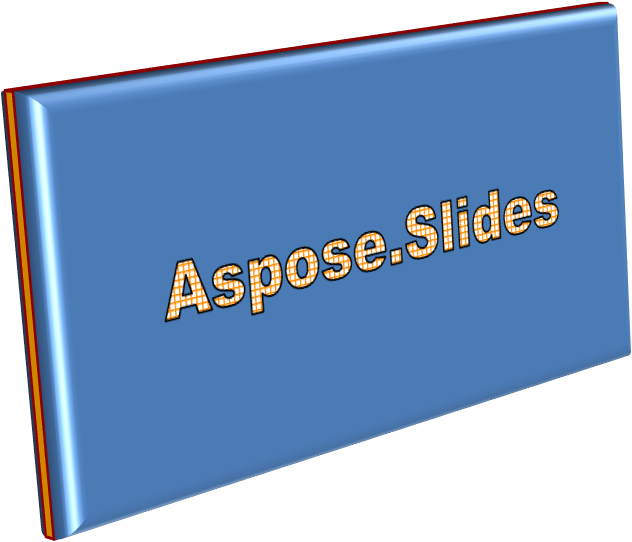
निम्न उदाहरण ThreeDFormat का उपयोग करके आयत में गोलाकार बेवेल, ऑरेंज एक्सट्रूज़न और डार्क रेड कंटूर जोड़ता है। बेवेल आयाम, एक्सट्रूज़न ऊँचाई, कंटूर चौड़ाई और गहराई पॉइंट में मापी जाती हैं। एक प्लास्टिक सामग्री, Z-अक्ष के चारों ओर 40 डिग्री घुमाया गया बैलेंस्ड लाइटिंग, और पर्स्पेक्टिव कैमरा इसका स्वरूप निर्धारित करते हैं:
import aspose.slides as slides
import aspose.pydrawing as draw

with slides.Presentation() as presentation:
    slide = presentation.slides[0]

    auto_shape = slide.shapes.add_auto_shape(slides.ShapeType.RECTANGLE, 20, 20, 400, 200)
    auto_shape.text_frame.text = "Aspose.Slides"

    auto_shape.three_d_format.bevel_bottom.bevel_type = slides.BevelPresetType.CIRCLE
    auto_shape.three_d_format.bevel_bottom.height = 10.5
    auto_shape.three_d_format.bevel_bottom.width = 10.5

    auto_shape.three_d_format.bevel_top.bevel_type = slides.BevelPresetType.CIRCLE
    auto_shape.three_d_format.bevel_top.height = 12.5
    auto_shape.three_d_format.bevel_top.width = 11

    auto_shape.three_d_format.extrusion_color.color = draw.Color.orange
    auto_shape.three_d_format.extrusion_height = 6

    auto_shape.three_d_format.contour_color.color = draw.Color.dark_red
    auto_shape.three_d_format.contour_width = 1.5

    auto_shape.three_d_format.depth = 3

    auto_shape.three_d_format.material = slides.MaterialPresetType.PLASTIC

    auto_shape.three_d_format.light_rig.direction = slides.LightingDirection.TOP
    auto_shape.three_d_format.light_rig.light_type = slides.LightRigPresetType.BALANCED
    auto_shape.three_d_format.light_rig.set_rotation(0, 0, 40)

    auto_shape.three_d_format.camera.camera_type = slides.CameraPresetType.PERSPECTIVE_CONTRASTING_RIGHT_FACING
परिणामी आकार:
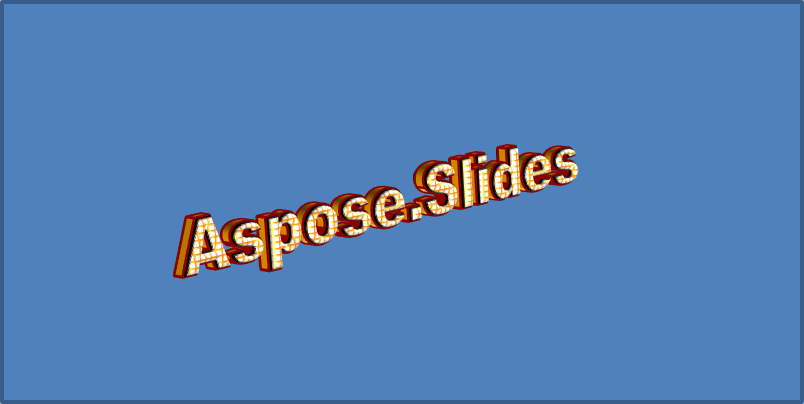
यह उदाहरण समान 3D फ़ॉर्मेटिंग को टेक्स्ट पर TextFrameFormat.three_d_format के माध्यम से लागू करता है। छोटे बेवेल अक्षरों के किनारों को आकार देते हैं, जबकि एक्सट्रूज़न और लाइटिंग टेक्स्ट को गहराई प्रदान करती है:
import aspose.slides as slides
import aspose.pydrawing as draw

with slides.Presentation() as presentation:
    slide = presentation.slides[0]

    auto_shape = slide.shapes.add_auto_shape(slides.ShapeType.RECTANGLE, 20, 20, 400, 200)
    text_frame = auto_shape.text_frame
    text_frame.text = "Aspose.Slides"

    text_frame.text_frame_format.three_d_format.bevel_bottom.bevel_type = slides.BevelPresetType.CIRCLE
    text_frame.text_frame_format.three_d_format.bevel_bottom.height = 3.5
    text_frame.text_frame_format.three_d_format.bevel_bottom.width = 3.5

    text_frame.text_frame_format.three_d_format.bevel_top.bevel_type = slides.BevelPresetType.CIRCLE
    text_frame.text_frame_format.three_d_format.bevel_top.height = 4
    text_frame.text_frame_format.three_d_format.bevel_top.width = 4

    text_frame.text_frame_format.three_d_format.extrusion_color.color = draw.Color.orange
    text_frame.text_frame_format.three_d_format.extrusion_height = 6

    text_frame.text_frame_format.three_d_format.contour_color.color = draw.Color.dark_red
    text_frame.text_frame_format.three_d_format.contour_width = 1.5

    text_frame.text_frame_format.three_d_format.depth = 3

    text_frame.text_frame_format.three_d_format.material = slides.MaterialPresetType.PLASTIC

    text_frame.text_frame_format.three_d_format.light_rig.direction = slides.LightingDirection.TOP
    text_frame.text_frame_format.three_d_format.light_rig.light_type = slides.LightRigPresetType.BALANCED
    text_frame.text_frame_format.three_d_format.light_rig.set_rotation(0, 0, 40)

    text_frame.text_frame_format.three_d_format.camera.camera_type = slides.CameraPresetType.PERSPECTIVE_CONTRASTING_RIGHT_FACING
परिणामी टेक्स्ट:
Note
टेक्स्ट या उसके आकार पर 3D प्रभाव लागू करने और इन प्रभावों के बीच इंटरैक्शन को विशिष्ट नियमों द्वारा नियंत्रित किया जाता है। कल्पना करें कि टेक्स्ट और वह आकार दोनों शामिल हैं। एक 3D प्रभाव वस्तु की 3D अभिरूप और उस दृश्य को शामिल करता है जिसमें वह स्थित है।
- यदि आकार और टेक्स्ट दोनों के लिए एक दृश्य सेट किया गया है, तो आकार का दृश्य प्राथमिकता लेता है और टेक्स्ट का दृश्य अनदेखा किया जाता है।
- यदि आकार के पास अपना स्वयं का दृश्य नहीं है लेकिन उसके पास 3D अभिरूप है, तो टेक्स्ट का दृश्य उपयोग किया जाता है।
- यदि आकार के पास बिल्कुल भी 3D प्रभाव नहीं है, तो वह फ्लैट माना जाता है, और 3D प्रभाव केवल टेक्स्ट पर लागू होता है।
ये व्यवहार ThreeDFormat.light_rig और ThreeDFormat.camera गुणों से संबंधित हैं।
टेक्स्ट को फ्लैट और पठनीय रखने तथा आकार की 3D फ़ॉर्मेटिंग को बनाए रखने के लिए, दोनों सेटिंग्स की तुलना और एक पूर्ण Python उदाहरण के लिए देखें Keep Text Flat on a 3D Shape।
अक्सर पूछे जाने वाले प्रश्न
क्या मैं WordArt प्रभाव विभिन्न फ़ॉन्ट या स्क्रिप्ट (जैसे अरबी, चीनी) के साथ उपयोग कर सकता हूँ?
हां, Aspose.Slides for Python via .NET यूनिकोड का समर्थन करता है और सभी प्रमुख फ़ॉन्ट व स्क्रिप्ट के साथ काम करता है। WordArt प्रभाव जैसे शैडो, फ़िल और आउटलाइन भाषा की परवाह किए बिना लागू किए जा सकते हैं, हालांकि फ़ॉन्ट उपलब्धता और रेंडरिंग सिस्टम फ़ॉन्ट पर निर्भर हो सकती है।
क्या मैं WordArt प्रभाव स्लाइड मास्टर तत्वों पर लागू कर सकता हूँ?
हां, आप मास्टर स्लाइड पर स्थित आकारों, जैसे शीर्षक प्लेसहोल्डर, फुटर या बैकग्राउंड टेक्स्ट, पर WordArt प्रभाव लागू कर सकते हैं। मास्टर लेआउट में किए गए परिवर्तन सभी संबंधित स्लाइडों में प्रतिबिंबित होते हैं।
क्या WordArt प्रभाव प्रस्तुति फ़ाइल आकार को प्रभावित करते हैं?
थोड़ा। शैडो, ग्लो और ग्रेडिएंट फ़िल जैसे WordArt प्रभाव अतिरिक्त फ़ॉर्मेटिंग मेटाडेटा जोड़ते हैं, जिससे फ़ाइल आकार में कुछ वृद्धि हो सकती है, लेकिन आम तौर पर अंतर नगण्य रहता है।
क्या मैं प्रस्तुति सहेजे बिना WordArt प्रभाव का परिणाम प्रीव्यू कर सकता हूँ?
हां, आप Slide.get_image का उपयोग करके WordArt वाले स्लाइड को इमेज (PNG, JPEG आदि) में रेंडर कर सकते हैं, या व्यक्तिगत आकार को Shape.get_image से रेंडर कर सकते हैं। इससे आप पूरे प्रस्तुति को सहेजने या एक्सपोर्ट करने से पहले मेमोरी या स्क्रीन पर परिणाम का प्रीव्यू ले सकते हैं।