
สร้างและนำใช้เอฟเฟกต์ WordArt ใน Python
ภาพรวม
เอฟเฟกต์ WordArt ช่วยให้คุณจัดรูปแบบข้อความด้วยการเติมสี, เส้นขอบ, เงา, การสะท้อน, แสงเรืองแสง, การแปลงรูป, และการจัดรูปแบบ 3 มิติ บทความนี้อธิบายวิธีสร้างและปรับแต่งเอฟเฟกต์เหล่านี้ในงานนำเสนอ PowerPoint โดยใช้ Aspose.Slides สำหรับ Python ผ่าน .NET โดยไม่ต้องติดตั้ง Microsoft Office.
สร้างแม่แบบ WordArt ง่ายและนำไปใช้กับข้อความ
ตัวอย่างต่อไปนี้สร้างสไตล์ WordArt อย่างง่ายโดยกำหนดข้อความ, แบบอักษร, การเติมลวดลาย, และเส้นขอบ.
แต่ละตัวอย่างสร้างงานนำเสนอใหม่และเพิ่มสี่เหลี่ยมผืนผ้าไปยังสไลด์แรก; ไม่จำเป็นต้องมีไฟล์อินพุต ตัวอย่างแรกตั้งข้อความเป็น “Aspose.Slides” ตำแหน่งและขนาดของรูปร่างวัดเป็นหน่วยพอยท์:
import aspose.slides as slides

with slides.Presentation() as presentation:
    slide = presentation.slides[0]

    auto_shape = slide.shapes.add_auto_shape(slides.ShapeType.RECTANGLE, 20, 20, 400, 200)
    text_frame = auto_shape.text_frame

    portion = text_frame.paragraphs[0].portions[0]
    portion.text = "Aspose.Slides"
ตั้งแบบอักษรเป็น Arial Black ขนาด 36 พอยท์เพื่อให้การจัดรูปแบบเด่นชัดยิ่งขึ้น:
import aspose.slides as slides

with slides.Presentation() as presentation:
    slide = presentation.slides[0]

    auto_shape = slide.shapes.add_auto_shape(slides.ShapeType.RECTANGLE, 20, 20, 400, 200)

    portion = auto_shape.text_frame.paragraphs[0].portions[0]
    portion.text = "Aspose.Slides"
    portion.portion_format.latin_font = slides.FontData("Arial Black")
    portion.portion_format.font_height = 36
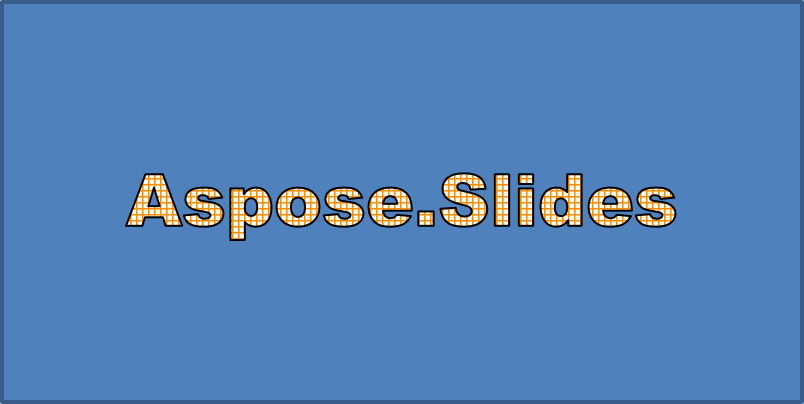
ใช้ลวดลาย SMALL_GRID ด้วยสีส้มเข้มเป็นพื้นหน้าและพื้นหลังสีขาว จากนั้นเพิ่มเส้นขอบข้อความสีดำความกว้าง 1 พอยท์:
import aspose.slides as slides
import aspose.pydrawing as draw

with slides.Presentation() as presentation:
    slide = presentation.slides[0]

    auto_shape = slide.shapes.add_auto_shape(slides.ShapeType.RECTANGLE, 20, 20, 400, 200)

    portion = auto_shape.text_frame.paragraphs[0].portions[0]
    portion.text = "Aspose.Slides"
    portion.portion_format.latin_font = slides.FontData("Arial Black")
    portion.portion_format.font_height = 36

    portion.portion_format.fill_format.fill_type = slides.FillType.PATTERN
    portion.portion_format.fill_format.pattern_format.fore_color.color = draw.Color.dark_orange
    portion.portion_format.fill_format.pattern_format.back_color.color = draw.Color.white
    portion.portion_format.fill_format.pattern_format.pattern_style = slides.PatternStyle.SMALL_GRID

    portion.portion_format.line_format.width = 1
    portion.portion_format.line_format.fill_format.fill_type = slides.FillType.SOLID
    portion.portion_format.line_format.fill_format.solid_fill_color.color = draw.Color.black
ข้อความที่ได้:
ใช้เอฟเฟกต์ WordArt อื่นๆ
ตัวอย่างต่อไปนี้แสดงวิธีนำเงา, การสะท้อน, แสงเรืองแสง, การแปลงรูป, และเอฟเฟกต์ 3 มิติ ไปใช้กับข้อความ.
ใช้เอฟเฟกต์เงานอก
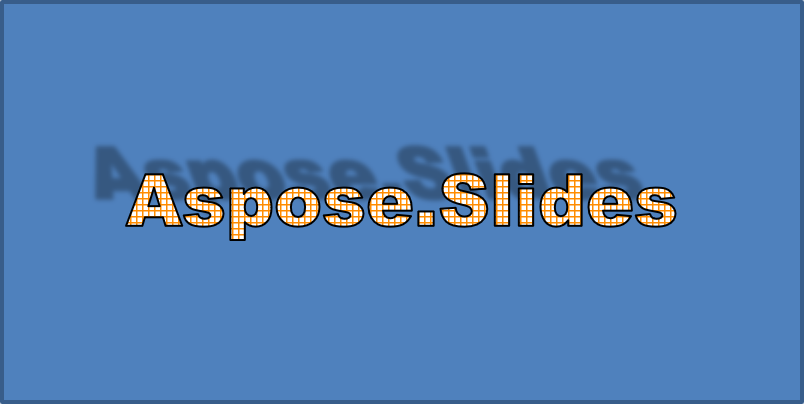
เงานอกเพิ่มความลึกโดยวางเงาที่อยู่ด้านหลังข้อความ คุณสามารถปรับแต่งสี, ทิศทาง, ระยะทาง, รัศมีเบลอ, สเกลและการเอียงได้.
ตัวอย่างนี้เรียก enable_outer_shadow_effect และตั้งค่าเงาสีดำด้วยรัศมีเบลอ 4 พอยท์, ทิศทาง 230 องศา, ระยะ 30 พอยท์ ค่าความสเกล 100 จะรักษาขนาดเงาไว้, ในขณะที่การเอียงแนวนอนทำให้เงาเอียง 20 องศา การแปลงอัลฟาจะตั้งความทึบเป็น 32%:
import aspose.slides as slides
import aspose.pydrawing as draw

with slides.Presentation() as presentation:
    slide = presentation.slides[0]

    auto_shape = slide.shapes.add_auto_shape(slides.ShapeType.RECTANGLE, 20, 20, 400, 200)

    portion = auto_shape.text_frame.paragraphs[0].portions[0]
    portion.text = "Aspose.Slides"
    portion.portion_format.latin_font = slides.FontData("Arial Black")
    portion.portion_format.font_height = 36

    portion.portion_format.effect_format.enable_outer_shadow_effect()
    portion.portion_format.effect_format.outer_shadow_effect.shadow_color.color = draw.Color.black
    portion.portion_format.effect_format.outer_shadow_effect.scale_horizontal = 100
    portion.portion_format.effect_format.outer_shadow_effect.scale_vertical = 100
    portion.portion_format.effect_format.outer_shadow_effect.blur_radius = 4
    portion.portion_format.effect_format.outer_shadow_effect.direction = 230
    portion.portion_format.effect_format.outer_shadow_effect.distance = 30
    portion.portion_format.effect_format.outer_shadow_effect.skew_horizontal = 20
    portion.portion_format.effect_format.outer_shadow_effect.skew_vertical = 0
    portion.portion_format.effect_format.outer_shadow_effect.shadow_color.color_transform.add(slides.ColorTransformOperation.SET_ALPHA, 0.32)
ข้อความที่ได้:
Note
- เมื่อใช้เงานอกและเงาที่กำหนดล่วงหน้าพร้อมกัน, จะใช้เฉพาะเงานอกเท่านั้น.
- หากใช้เงานอกและเงาภายในพร้อมกัน, ผลลัพธ์จะขึ้นอยู่กับเวอร์ชันของ PowerPoint ตัวอย่างเช่น ใน PowerPoint 2013, เอฟเฟกต์จะเพิ่มเป็นสองเท่า, ในขณะที่ใน PowerPoint 2007 จะใช้เฉพาะเงานอกเท่านั้น.
ใช้เอฟเฟกต์การสะท้อน
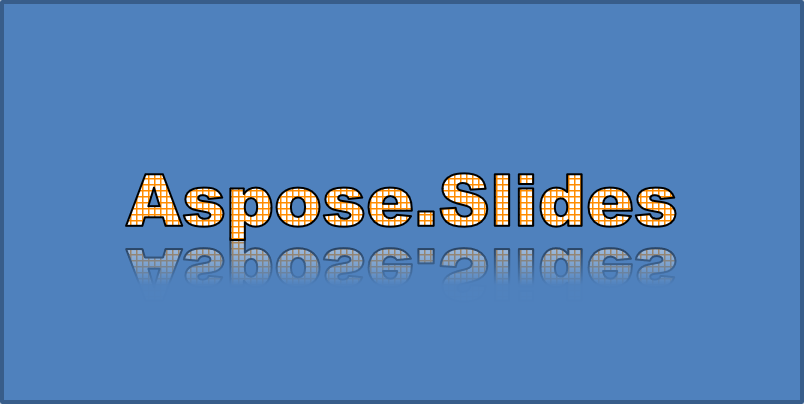
การสะท้อนสร้างสำเนาแบบกระจกของข้อความ ปรับตำแหน่ง, สเกล, เบลอ, และความทึบเพื่อควบคุมลักษณะการแสดงผล.
ตัวอย่างนี้เรียก enable_reflection_effect และพลิกการสะท้อนแนวตั้งโดยสเกล -100% ใช้รัศมีเบลอ 0.5 พอยท์และระยะ 4.72 พอยท์ ความทึบลดจาก 60% ถึง 0.9% ระหว่างตำแหน่ง 0% ถึง 60% ตลอดการสะท้อน:
import aspose.slides as slides

with slides.Presentation() as presentation:
    slide = presentation.slides[0]

    auto_shape = slide.shapes.add_auto_shape(slides.ShapeType.RECTANGLE, 20, 20, 400, 200)

    portion = auto_shape.text_frame.paragraphs[0].portions[0]
    portion.text = "Aspose.Slides"
    portion.portion_format.latin_font = slides.FontData("Arial Black")
    portion.portion_format.font_height = 36

    portion.portion_format.effect_format.enable_reflection_effect()
    portion.portion_format.effect_format.reflection_effect.blur_radius = 0.5
    portion.portion_format.effect_format.reflection_effect.distance = 4.72
    portion.portion_format.effect_format.reflection_effect.start_pos_alpha = 0
    portion.portion_format.effect_format.reflection_effect.end_pos_alpha = 60
    portion.portion_format.effect_format.reflection_effect.direction = 90
    portion.portion_format.effect_format.reflection_effect.scale_horizontal = 100
    portion.portion_format.effect_format.reflection_effect.scale_vertical = -100
    portion.portion_format.effect_format.reflection_effect.start_reflection_opacity = 60
    portion.portion_format.effect_format.reflection_effect.end_reflection_opacity = 0.9
    portion.portion_format.effect_format.reflection_effect.rectangle_align = slides.RectangleAlignment.BOTTOM_LEFT
ข้อความที่ได้:
ใช้เอฟเฟกต์แสงเรืองแสง
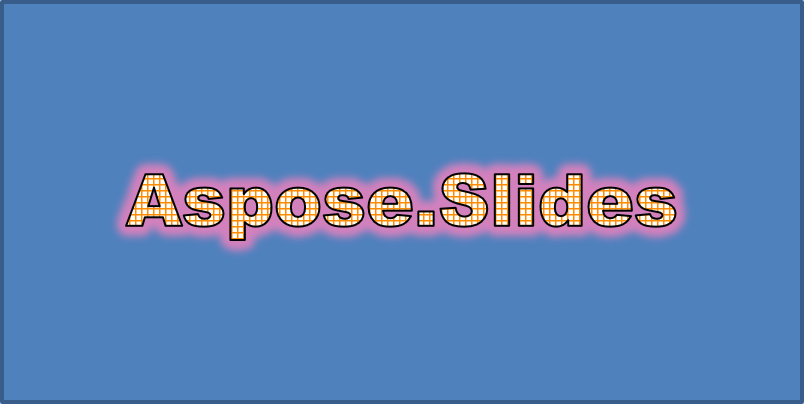
แสงเรืองแสงเพิ่มเส้นขอบสีอ่อนรอบข้อความ ปรับสี, ความทึบ, และรัศมีเพื่อควบคุมเอฟเฟกต์.
ตัวอย่างนี้เรียก enable_glow_effect และใช้แสงเรืองแสงสีแดงความทึบ 54% และรัศมี 7 พอยท์:
import aspose.slides as slides
import aspose.pydrawing as draw

with slides.Presentation() as presentation:
    slide = presentation.slides[0]

    auto_shape = slide.shapes.add_auto_shape(slides.ShapeType.RECTANGLE, 20, 20, 400, 200)

    portion = auto_shape.text_frame.paragraphs[0].portions[0]
    portion.text = "Aspose.Slides"
    portion.portion_format.latin_font = slides.FontData("Arial Black")
    portion.portion_format.font_height = 36

    portion.portion_format.effect_format.enable_glow_effect()
    portion.portion_format.effect_format.glow_effect.color.color = draw.Color.red
    portion.portion_format.effect_format.glow_effect.color.color_transform.add(slides.ColorTransformOperation.SET_ALPHA, 0.54)
    portion.portion_format.effect_format.glow_effect.radius = 7
ข้อความที่ได้:
ใช้การแปลง WordArt
การแปลง WordArt จะโค้ง, ยืด, หรือบิดบานข้อความบล็อก.
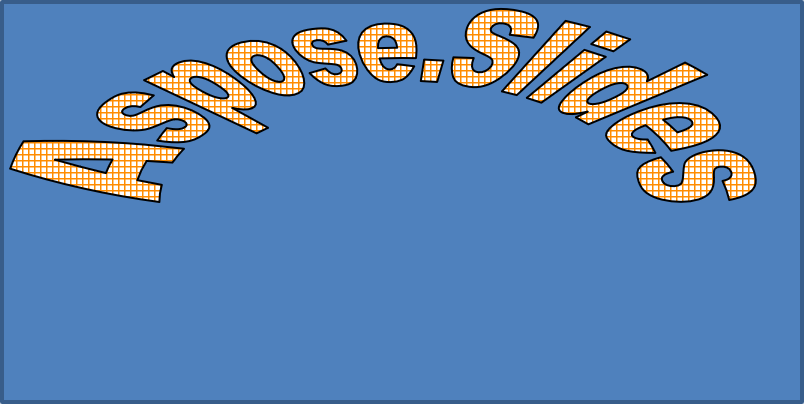
กำหนด transform เป็น ARCH_UP_POUR เพื่อโค้งกรอบข้อความทั้งหมดขึ้นด้านบน:
import aspose.slides as slides

with slides.Presentation() as presentation:
    slide = presentation.slides[0]

    auto_shape = slide.shapes.add_auto_shape(slides.ShapeType.RECTANGLE, 20, 20, 400, 200)

    text_frame = auto_shape.text_frame
    text_frame.text = "Aspose.Slides"
    text_frame.text_frame_format.transform = slides.TextShapeType.ARCH_UP_POUR
ข้อความที่ได้:
Note
Aspose.Slides for Python via .NET มีชุดประเภทการแปลงที่กำหนดล่วงหน้าต่างๆ ประเภทการแปลง.ใช้เอฟเฟกต์ 3D กับรูปร่างและข้อความ
คุณสามารถใช้เอฟเฟกต์ 3D กับรูปร่างหรือข้อความของมันได้ บีเวล, การดึงออก, แสงสว่าง, และการตั้งค่ากล้องควบคุมลักษณะที่ได้.
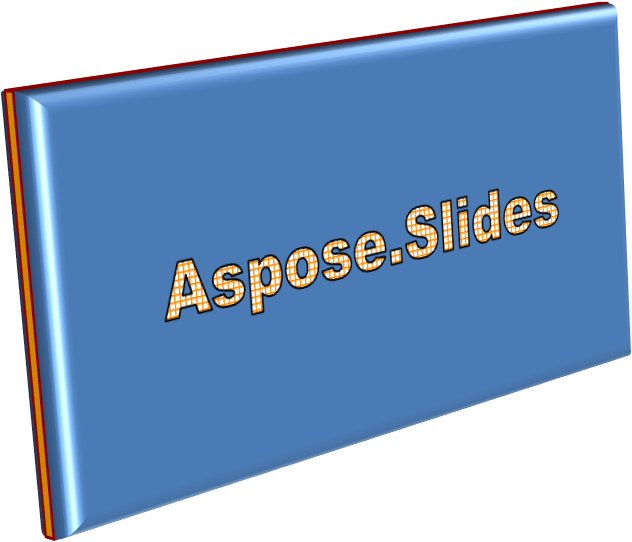
ตัวอย่างต่อไปนี้ใช้ ThreeDFormat เพื่อเพิ่มบีเวลวงกลม, การดึงออกสีส้ม, และเส้นขอบสีแดงเข้มให้กับสี่เหลี่ยม มิติของบีเวล, ความสูงการดึงออก, ความกว้างเส้นขอบ, และความลึกวัดเป็นพอยท์ วัสดุพลาสติก, แสงสว่างสมดุลที่หมุน 40 องศารอบแกน Z, และกล้องแบบมุมมองกำหนดลักษณะของมัน:
import aspose.slides as slides
import aspose.pydrawing as draw

with slides.Presentation() as presentation:
    slide = presentation.slides[0]

    auto_shape = slide.shapes.add_auto_shape(slides.ShapeType.RECTANGLE, 20, 20, 400, 200)
    auto_shape.text_frame.text = "Aspose.Slides"

    auto_shape.three_d_format.bevel_bottom.bevel_type = slides.BevelPresetType.CIRCLE
    auto_shape.three_d_format.bevel_bottom.height = 10.5
    auto_shape.three_d_format.bevel_bottom.width = 10.5

    auto_shape.three_d_format.bevel_top.bevel_type = slides.BevelPresetType.CIRCLE
    auto_shape.three_d_format.bevel_top.height = 12.5
    auto_shape.three_d_format.bevel_top.width = 11

    auto_shape.three_d_format.extrusion_color.color = draw.Color.orange
    auto_shape.three_d_format.extrusion_height = 6

    auto_shape.three_d_format.contour_color.color = draw.Color.dark_red
    auto_shape.three_d_format.contour_width = 1.5

    auto_shape.three_d_format.depth = 3

    auto_shape.three_d_format.material = slides.MaterialPresetType.PLASTIC

    auto_shape.three_d_format.light_rig.direction = slides.LightingDirection.TOP
    auto_shape.three_d_format.light_rig.light_type = slides.LightRigPresetType.BALANCED
    auto_shape.three_d_format.light_rig.set_rotation(0, 0, 40)

    auto_shape.three_d_format.camera.camera_type = slides.CameraPresetType.PERSPECTIVE_CONTRASTING_RIGHT_FACING
รูปร่างที่ได้:
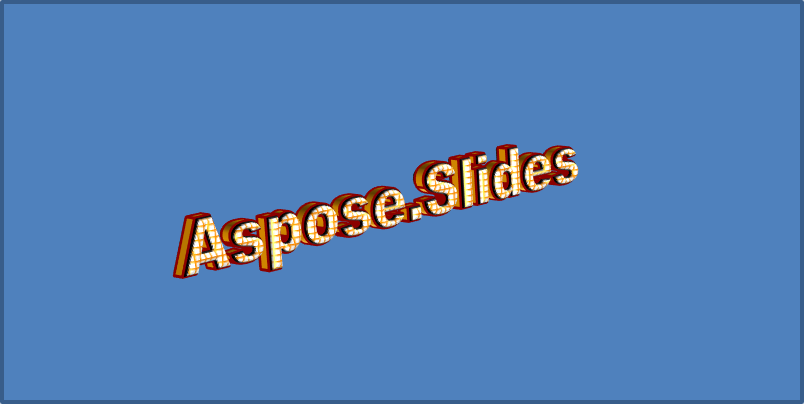
ตัวอย่างนี้ใช้การจัดรูปแบบ 3D ที่คล้ายกันกับข้อความผ่าน TextFrameFormat.three_d_format. บีเวลขนาดเล็กทำให้ขอบอักษรเป็นรูปทรง, ส่วนการดึงออกและแสงสว่างทำให้ข้อความมีความลึก:
import aspose.slides as slides
import aspose.pydrawing as draw

with slides.Presentation() as presentation:
    slide = presentation.slides[0]

    auto_shape = slide.shapes.add_auto_shape(slides.ShapeType.RECTANGLE, 20, 20, 400, 200)
    text_frame = auto_shape.text_frame
    text_frame.text = "Aspose.Slides"

    text_frame.text_frame_format.three_d_format.bevel_bottom.bevel_type = slides.BevelPresetType.CIRCLE
    text_frame.text_frame_format.three_d_format.bevel_bottom.height = 3.5
    text_frame.text_frame_format.three_d_format.bevel_bottom.width = 3.5

    text_frame.text_frame_format.three_d_format.bevel_top.bevel_type = slides.BevelPresetType.CIRCLE
    text_frame.text_frame_format.three_d_format.bevel_top.height = 4
    text_frame.text_frame_format.three_d_format.bevel_top.width = 4

    text_frame.text_frame_format.three_d_format.extrusion_color.color = draw.Color.orange
    text_frame.text_frame_format.three_d_format.extrusion_height = 6

    text_frame.text_frame_format.three_d_format.contour_color.color = draw.Color.dark_red
    text_frame.text_frame_format.three_d_format.contour_width = 1.5

    text_frame.text_frame_format.three_d_format.depth = 3

    text_frame.text_frame_format.three_d_format.material = slides.MaterialPresetType.PLASTIC

    text_frame.text_frame_format.three_d_format.light_rig.direction = slides.LightingDirection.TOP
    text_frame.text_frame_format.three_d_format.light_rig.light_type = slides.LightRigPresetType.BALANCED
    text_frame.text_frame_format.three_d_format.light_rig.set_rotation(0, 0, 40)

    text_frame.text_frame_format.three_d_format.camera.camera_type = slides.CameraPresetType.PERSPECTIVE_CONTRASTING_RIGHT_FACING
ข้อความที่ได้:
Note
การใช้เอฟเฟกต์ 3D กับข้อความหรือรูปร่างของมัน — และการโต้ตอบระหว่างเอฟเฟ็กต์เหล่านี้ — ถูกกำหนดโดยกฎเฉพาะ พิจารณาฉากที่เกี่ยวข้องกับทั้งข้อความและรูปร่างที่บรรจุข้อความเอฟเฟกต์ 3D จะรวมถึงการแสดงผล 3D ของวัตถุและฉากที่มันตั้งอยู่.
- หากมีการตั้งฉากสำหรับทั้งรูปร่างและข้อความ, ฉากของรูปร่างจะมีลำดับความสำคัญและฉากของข้อความจะถูกละเลย.
- หากรูปร่างไม่มีฉากของตัวเองแต่มีการแสดงผล 3D, จะใช้ฉากของข้อความ.
- หากรูปร่างไม่มีเอฟเฟกต์ 3D ใดๆ, จะถือว่าเป็นแบนและเอฟเฟกต์ 3D จะใช้กับข้อความเท่านั้น.
These behaviors relate to the ThreeDFormat.light_rig and ThreeDFormat.camera properties.
เพื่อทำให้ข้อความแบนและอ่านง่ายในขณะที่คงการจัดรูปแบบ 3D ของรูปร่าง, ดูที่ Keep Text Flat on a 3D Shape สำหรับการเปรียบเทียบของทั้งสองการตั้งค่าและตัวอย่าง Python ฉบับเต็ม.
คำถามที่พบบ่อย
ฉันสามารถใช้เอฟเฟกต์ WordArt กับแบบอักษรหรือสคริปต์ที่ต่างกัน (เช่น ภาษาอารบิก, จีน) ได้หรือไม่?
ใช่, Aspose.Slides สำหรับ Python ผ่าน .NET รองรับ Unicode และทำงานกับแบบอักษรและสคริปต์หลักทั้งหมด เอฟเฟกต์ WordArt เช่น เงา, การเติมสี, และเส้นขอบสามารถใช้ได้โดยไม่คำนึงถึงภาษา แม้ว่าการใช้งานแบบอักษรและการเรนเดอร์อาจขึ้นอยู่กับแบบอักษรในระบบ.
ฉันสามารถใช้เอฟเฟกต์ WordArt กับองค์ประกอบของสไลด์มาสเตอร์ได้หรือไม่?
ได้, คุณสามารถใช้เอฟเฟกต์ WordArt กับรูปทรงบนสไลด์มาสเตอร์ รวมถึงพื้นที่เก็บตำแหน่งหัวเรื่อง, ส่วนท้าย, หรือข้อความพื้นหลัง การเปลี่ยนแปลงที่ทำกับเลย์เอาต์มาสเตอร์จะสะท้อนไปยังสไลด์ที่เชื่อมโยงทั้งหมด.
เอฟเฟกต์ WordArt มีผลต่อขนาดไฟล์การนำเสนอหรือไม่?
เล็กน้อย. เอฟเฟกต์ WordArt เช่น เงา, แสงเรืองแสง, และการเติมสีไล่ระดับอาจทำให้ขนาดไฟล์เพิ่มขึ้นเล็กน้อยเนื่องจากเมตาดาต้าเพิ่มเติมของการจัดรูปแบบ, แต่ความแตกต่างมักจะไม่มีนัยสำคัญ.
ฉันสามารถดูตัวอย่างผลของเอฟเฟกต์ WordArt โดยไม่ต้องบันทึกการนำเสนอได้หรือไม่?
ได้, คุณสามารถแปลงสไลด์ที่มี WordArt เป็นภาพ (เช่น PNG, JPEG) โดยใช้ Slide.get_image, หรือแปลงรูปร่างแต่ละอันโดยใช้ Shape.get_image. วิธีนี้ทำให้คุณดูตัวอย่างผลลัพธ์ในหน่วยความจำหรือบนหน้าจอก่อนบันทึกหรือส่งออกการนำเสนอเต็มรูปแบบ.