
Python에서 WordArt 효과 만들기 및 적용
개요
WordArt 효과를 사용하면 텍스트를 채우기, 외곽선, 그림자, 반사, 글로우, 변환 및 3D 서식으로 스타일링할 수 있습니다. 이 문서에서는 Microsoft Office 없이 .NET용 Python용 Aspose.Slides를 사용하여 PowerPoint 프레젠테이션에서 이러한 효과를 만들고 사용자 지정하는 방법을 설명합니다.
간단한 WordArt 템플릿 만들기 및 텍스트에 적용
다음 예제에서는 텍스트, 글꼴, 패턴 채우기 및 외곽선을 설정하여 간단한 WordArt 스타일을 구축합니다.
각 예제는 새 프레젠테이션을 만들고 첫 번째 슬라이드에 사각형을 추가합니다. 입력 파일이 필요하지 않습니다. 첫 번째 예제는 텍스트를 “Aspose.Slides"로 설정합니다. 도형의 위치와 크기는 포인트 단위로 측정됩니다:
import aspose.slides as slides

with slides.Presentation() as presentation:
    slide = presentation.slides[0]

    auto_shape = slide.shapes.add_auto_shape(slides.ShapeType.RECTANGLE, 20, 20, 400, 200)
    text_frame = auto_shape.text_frame

    portion = text_frame.paragraphs[0].portions[0]
    portion.text = "Aspose.Slides"
서식을 더 눈에 띄게 만들기 위해 글꼴을 Arial Black, 36포인트로 설정합니다:
import aspose.slides as slides

with slides.Presentation() as presentation:
    slide = presentation.slides[0]

    auto_shape = slide.shapes.add_auto_shape(slides.ShapeType.RECTANGLE, 20, 20, 400, 200)

    portion = auto_shape.text_frame.paragraphs[0].portions[0]
    portion.text = "Aspose.Slides"
    portion.portion_format.latin_font = slides.FontData("Arial Black")
    portion.portion_format.font_height = 36
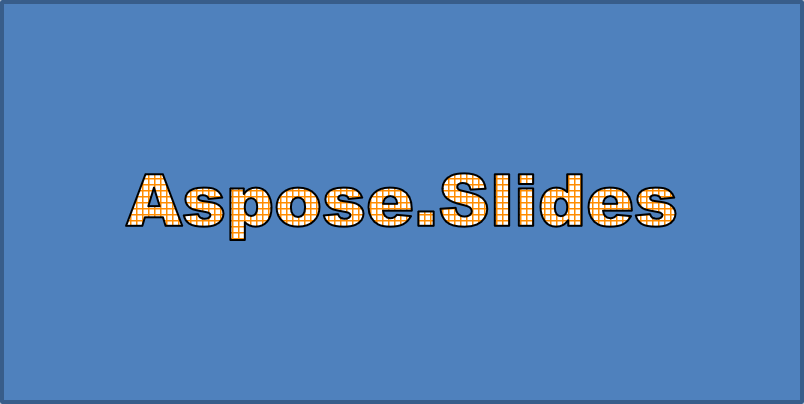
SMALL_GRID 패턴을 어두운 주황색 전경과 흰색 배경으로 적용한 다음, 폭이 1포인트인 검은색 텍스트 외곽선을 추가합니다:
import aspose.slides as slides
import aspose.pydrawing as draw

with slides.Presentation() as presentation:
    slide = presentation.slides[0]

    auto_shape = slide.shapes.add_auto_shape(slides.ShapeType.RECTANGLE, 20, 20, 400, 200)

    portion = auto_shape.text_frame.paragraphs[0].portions[0]
    portion.text = "Aspose.Slides"
    portion.portion_format.latin_font = slides.FontData("Arial Black")
    portion.portion_format.font_height = 36

    portion.portion_format.fill_format.fill_type = slides.FillType.PATTERN
    portion.portion_format.fill_format.pattern_format.fore_color.color = draw.Color.dark_orange
    portion.portion_format.fill_format.pattern_format.back_color.color = draw.Color.white
    portion.portion_format.fill_format.pattern_format.pattern_style = slides.PatternStyle.SMALL_GRID

    portion.portion_format.line_format.width = 1
    portion.portion_format.line_format.fill_format.fill_type = slides.FillType.SOLID
    portion.portion_format.line_format.fill_format.solid_fill_color.color = draw.Color.black
결과 텍스트:
다른 WordArt 효과 적용
다음 예제에서는 텍스트에 그림자, 반사, 글로우, 변환 및 3D 효과를 적용하는 방법을 보여줍니다.
외부 그림자 효과 적용
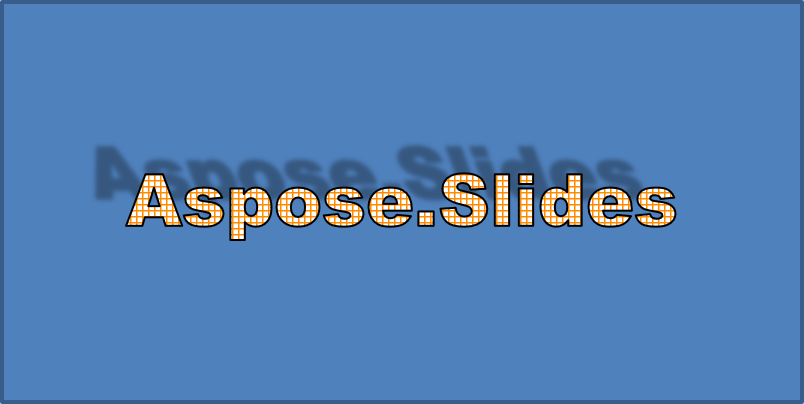
외부 그림자는 텍스트 뒤에 그림자를 배치하여 깊이를 추가합니다. 색상, 방향, 거리, 블러 반경, 스케일 및 스큐를 사용자 지정할 수 있습니다.
이 예제는 enable_outer_shadow_effect를 호출하고 4포인트 블러 반경, 230도 방향 및 30포인트 거리를 갖는 검은색 그림자를 설정합니다. 스케일 값 100은 그림자 크기를 유지하고, 수평 스큐는 20도 기울입니다. 알파 변환은 불투명도를 32%로 설정합니다:
import aspose.slides as slides
import aspose.pydrawing as draw

with slides.Presentation() as presentation:
    slide = presentation.slides[0]

    auto_shape = slide.shapes.add_auto_shape(slides.ShapeType.RECTANGLE, 20, 20, 400, 200)

    portion = auto_shape.text_frame.paragraphs[0].portions[0]
    portion.text = "Aspose.Slides"
    portion.portion_format.latin_font = slides.FontData("Arial Black")
    portion.portion_format.font_height = 36

    portion.portion_format.effect_format.enable_outer_shadow_effect()
    portion.portion_format.effect_format.outer_shadow_effect.shadow_color.color = draw.Color.black
    portion.portion_format.effect_format.outer_shadow_effect.scale_horizontal = 100
    portion.portion_format.effect_format.outer_shadow_effect.scale_vertical = 100
    portion.portion_format.effect_format.outer_shadow_effect.blur_radius = 4
    portion.portion_format.effect_format.outer_shadow_effect.direction = 230
    portion.portion_format.effect_format.outer_shadow_effect.distance = 30
    portion.portion_format.effect_format.outer_shadow_effect.skew_horizontal = 20
    portion.portion_format.effect_format.outer_shadow_effect.skew_vertical = 0
    portion.portion_format.effect_format.outer_shadow_effect.shadow_color.color_transform.add(slides.ColorTransformOperation.SET_ALPHA, 0.32)
결과 텍스트:
Note
- 외부 그림자와 사전 설정 그림자를 함께 사용할 경우 외부 그림자만 적용됩니다.
- 외부 그림자와 내부 그림자를 동시에 사용할 경우 결과 효과는 PowerPoint 버전에 따라 달라집니다. 예를 들어 PowerPoint 2013에서는 효과가 두 배가 되지만 PowerPoint 2007에서는 외부 그림자만 적용됩니다.
반사 효과 적용
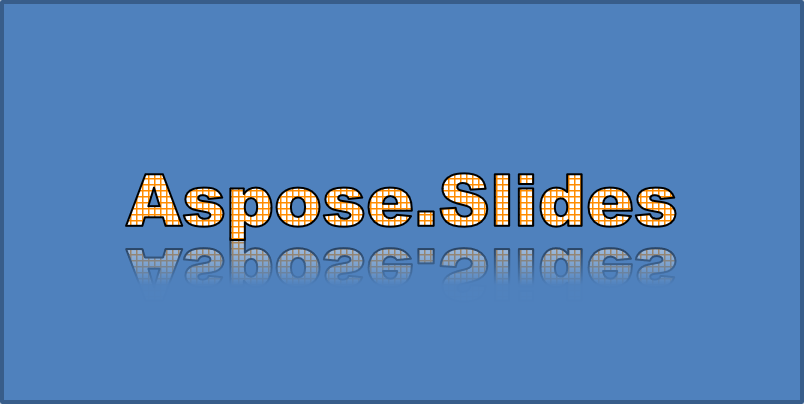
반사는 텍스트의 거울 복사본을 생성합니다. 위치, 스케일, 블러 및 불투명도를 조정하여 모양을 제어합니다.
이 예제는 enable_reflection_effect를 호출하고 스케일을 -100%로 설정하여 반사를 수직으로 뒤집습니다. 0.5포인트 블러 반경과 4.72포인트 거리를 사용합니다. 불투명도는 반사 위치 0%에서 60%까지 60%에서 0.9%로 감소합니다:
import aspose.slides as slides

with slides.Presentation() as presentation:
    slide = presentation.slides[0]

    auto_shape = slide.shapes.add_auto_shape(slides.ShapeType.RECTANGLE, 20, 20, 400, 200)

    portion = auto_shape.text_frame.paragraphs[0].portions[0]
    portion.text = "Aspose.Slides"
    portion.portion_format.latin_font = slides.FontData("Arial Black")
    portion.portion_format.font_height = 36

    portion.portion_format.effect_format.enable_reflection_effect()
    portion.portion_format.effect_format.reflection_effect.blur_radius = 0.5
    portion.portion_format.effect_format.reflection_effect.distance = 4.72
    portion.portion_format.effect_format.reflection_effect.start_pos_alpha = 0
    portion.portion_format.effect_format.reflection_effect.end_pos_alpha = 60
    portion.portion_format.effect_format.reflection_effect.direction = 90
    portion.portion_format.effect_format.reflection_effect.scale_horizontal = 100
    portion.portion_format.effect_format.reflection_effect.scale_vertical = -100
    portion.portion_format.effect_format.reflection_effect.start_reflection_opacity = 60
    portion.portion_format.effect_format.reflection_effect.end_reflection_opacity = 0.9
    portion.portion_format.effect_format.reflection_effect.rectangle_align = slides.RectangleAlignment.BOTTOM_LEFT
결과 텍스트:
글로우 효과 적용
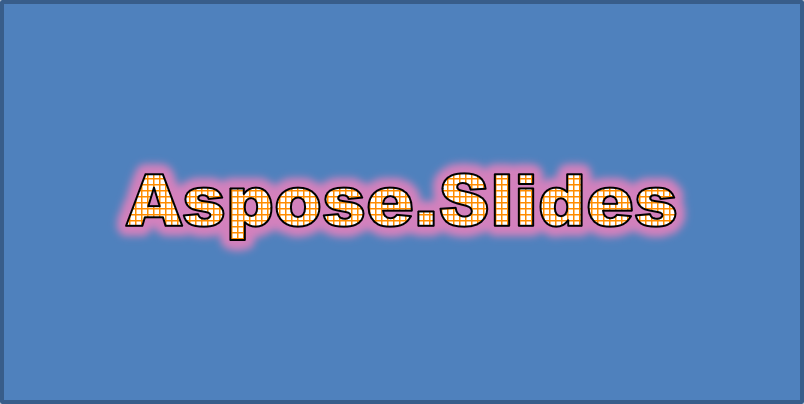
글로우는 텍스트 주변에 부드러운 색상 외곽선을 추가합니다. 색상, 불투명도 및 반경을 조정하여 효과를 제어합니다.
이 예제는 enable_glow_effect를 호출하고 54% 불투명도와 7포인트 반경의 빨간색 글로우를 적용합니다:
import aspose.slides as slides
import aspose.pydrawing as draw

with slides.Presentation() as presentation:
    slide = presentation.slides[0]

    auto_shape = slide.shapes.add_auto_shape(slides.ShapeType.RECTANGLE, 20, 20, 400, 200)

    portion = auto_shape.text_frame.paragraphs[0].portions[0]
    portion.text = "Aspose.Slides"
    portion.portion_format.latin_font = slides.FontData("Arial Black")
    portion.portion_format.font_height = 36

    portion.portion_format.effect_format.enable_glow_effect()
    portion.portion_format.effect_format.glow_effect.color.color = draw.Color.red
    portion.portion_format.effect_format.glow_effect.color.color_transform.add(slides.ColorTransformOperation.SET_ALPHA, 0.54)
    portion.portion_format.effect_format.glow_effect.radius = 7
결과 텍스트:
WordArt 변환 적용
WordArt 변환은 텍스트 블록을 굽히거나 늘리거나 뒤틀 수 있습니다.
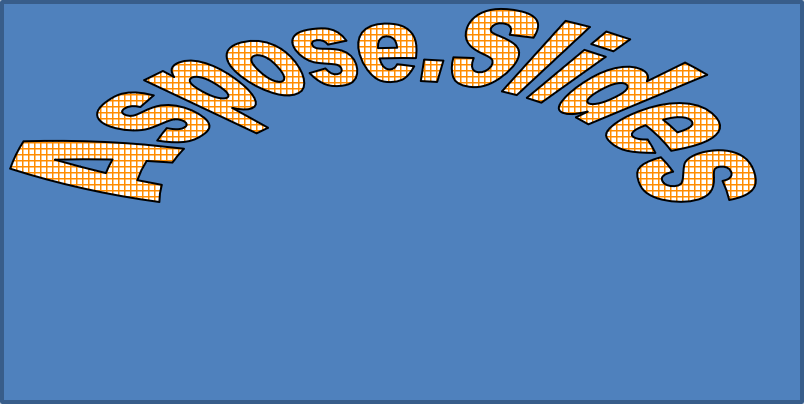
transform을 ARCH_UP_POUR으로 설정하여 전체 텍스트 프레임을 위쪽으로 곡선 형태로 만듭니다:
import aspose.slides as slides

with slides.Presentation() as presentation:
    slide = presentation.slides[0]

    auto_shape = slide.shapes.add_auto_shape(slides.ShapeType.RECTANGLE, 20, 20, 400, 200)

    text_frame = auto_shape.text_frame
    text_frame.text = "Aspose.Slides"
    text_frame.text_frame_format.transform = slides.TextShapeType.ARCH_UP_POUR
결과 텍스트:
Note
Aspose.Slides for Python via .NET은 미리 정의된 변환 유형 집합을 제공합니다.도형 및 텍스트에 3D 효과 적용
도형이나 텍스트에 3D 효과를 적용할 수 있습니다. 베벨, 압출, 조명 및 카메라 설정이 최종 모양을 제어합니다.
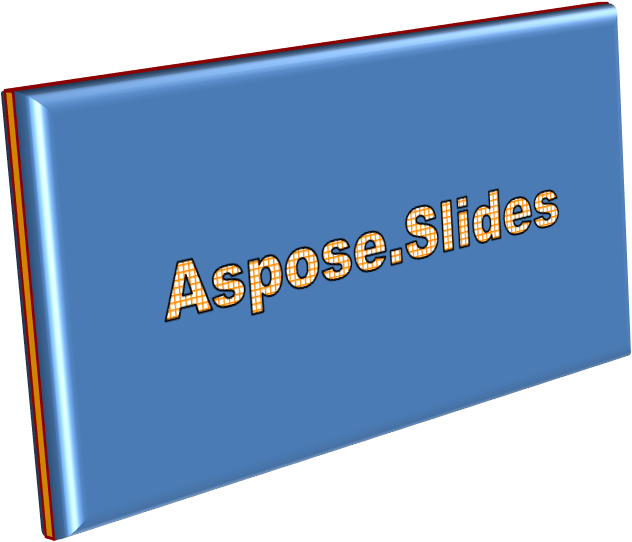
다음 예제는 ThreeDFormat을 사용하여 사각형에 원형 베벨, 주황색 압출 및 어두운 빨간색 외곽선을 추가합니다. 베벨 치수, 압출 높이, 외곽선 폭 및 깊이는 포인트 단위로 측정됩니다. 플라스틱 재질, Z축을 중심으로 40도 회전된 균형 조명 및 원근 카메라가 모양의 외관을 정의합니다:
import aspose.slides as slides
import aspose.pydrawing as draw

with slides.Presentation() as presentation:
    slide = presentation.slides[0]

    auto_shape = slide.shapes.add_auto_shape(slides.ShapeType.RECTANGLE, 20, 20, 400, 200)
    auto_shape.text_frame.text = "Aspose.Slides"

    auto_shape.three_d_format.bevel_bottom.bevel_type = slides.BevelPresetType.CIRCLE
    auto_shape.three_d_format.bevel_bottom.height = 10.5
    auto_shape.three_d_format.bevel_bottom.width = 10.5

    auto_shape.three_d_format.bevel_top.bevel_type = slides.BevelPresetType.CIRCLE
    auto_shape.three_d_format.bevel_top.height = 12.5
    auto_shape.three_d_format.bevel_top.width = 11

    auto_shape.three_d_format.extrusion_color.color = draw.Color.orange
    auto_shape.three_d_format.extrusion_height = 6

    auto_shape.three_d_format.contour_color.color = draw.Color.dark_red
    auto_shape.three_d_format.contour_width = 1.5

    auto_shape.three_d_format.depth = 3

    auto_shape.three_d_format.material = slides.MaterialPresetType.PLASTIC

    auto_shape.three_d_format.light_rig.direction = slides.LightingDirection.TOP
    auto_shape.three_d_format.light_rig.light_type = slides.LightRigPresetType.BALANCED
    auto_shape.three_d_format.light_rig.set_rotation(0, 0, 40)

    auto_shape.three_d_format.camera.camera_type = slides.CameraPresetType.PERSPECTIVE_CONTRASTING_RIGHT_FACING
결과 도형:
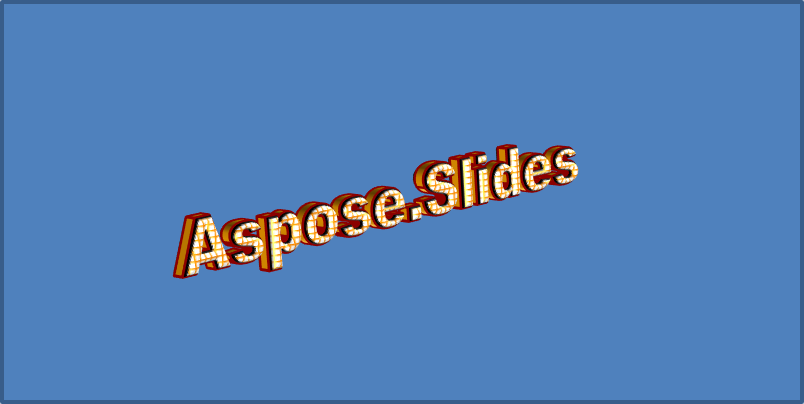
이 예제는 TextFrameFormat.three_d_format을 통해 텍스트에도 유사한 3D 서식을 적용합니다. 작은 베벨이 문자 가장자리를 형성하고, 압출과 조명이 텍스트에 깊이를 부여합니다:
import aspose.slides as slides
import aspose.pydrawing as draw

with slides.Presentation() as presentation:
    slide = presentation.slides[0]

    auto_shape = slide.shapes.add_auto_shape(slides.ShapeType.RECTANGLE, 20, 20, 400, 200)
    text_frame = auto_shape.text_frame
    text_frame.text = "Aspose.Slides"

    text_frame.text_frame_format.three_d_format.bevel_bottom.bevel_type = slides.BevelPresetType.CIRCLE
    text_frame.text_frame_format.three_d_format.bevel_bottom.height = 3.5
    text_frame.text_frame_format.three_d_format.bevel_bottom.width = 3.5

    text_frame.text_frame_format.three_d_format.bevel_top.bevel_type = slides.BevelPresetType.CIRCLE
    text_frame.text_frame_format.three_d_format.bevel_top.height = 4
    text_frame.text_frame_format.three_d_format.bevel_top.width = 4

    text_frame.text_frame_format.three_d_format.extrusion_color.color = draw.Color.orange
    text_frame.text_frame_format.three_d_format.extrusion_height = 6

    text_frame.text_frame_format.three_d_format.contour_color.color = draw.Color.dark_red
    text_frame.text_frame_format.three_d_format.contour_width = 1.5

    text_frame.text_frame_format.three_d_format.depth = 3

    text_frame.text_frame_format.three_d_format.material = slides.MaterialPresetType.PLASTIC

    text_frame.text_frame_format.three_d_format.light_rig.direction = slides.LightingDirection.TOP
    text_frame.text_frame_format.three_d_format.light_rig.light_type = slides.LightRigPresetType.BALANCED
    text_frame.text_frame_format.three_d_format.light_rig.set_rotation(0, 0, 40)

    text_frame.text_frame_format.three_d_format.camera.camera_type = slides.CameraPresetType.PERSPECTIVE_CONTRASTING_RIGHT_FACING
결과 텍스트:
Note
텍스트 또는 도형에 3D 효과를 적용하고 이들 효과 간의 상호 작용은 특정 규칙에 의해 제어됩니다. 텍스트와 이를 포함하는 도형이 모두 포함된 장면을 고려하십시오. 3D 효과에는 객체의 3D 표현과 해당 객체가 배치되는 장면이 포함됩니다.
- 도형과 텍스트 모두에 장면이 설정된 경우 도형의 장면이 우선하고 텍스트의 장면은 무시됩니다.
- 도형에 자체 장면이 없지만 3D 표현이 있는 경우 텍스트의 장면이 사용됩니다.
- 도형에 3D 효과가 전혀 없으면 평면으로 처리되며 3D 효과는 텍스트에만 적용됩니다.
이 동작은 ThreeDFormat.light_rig 및 ThreeDFormat.camera 속성과 관련됩니다.
텍스트를 평면으로 유지하면서 도형의 3D 서식을 보존하려면 3D 도형에서 텍스트 평면 유지를 참조하여 두 설정을 비교하고 전체 Python 예제를 확인하십시오.
자주 묻는 질문
다른 글꼴이나 스크립트(예: 아라비아어, 중국어)와 함께 WordArt 효과를 사용할 수 있나요?
네, Aspose.Slides for Python via .NET은 Unicode를 지원하며 모든 주요 글꼴과 스크립트와 함께 작동합니다. 언어에 관계없이 그림자, 채우기 및 외곽선과 같은 WordArt 효과를 적용할 수 있지만 글꼴 가용성 및 렌더링은 시스템 글꼴에 따라 달라질 수 있습니다.
슬라이드 마스터 요소에 WordArt 효과를 적용할 수 있나요?
네, 마스터 슬라이드의 도형(제목 자리 표시자, 바닥글 또는 배경 텍스트 등)에 WordArt 효과를 적용할 수 있습니다. 마스터 레이아웃에 적용한 변경 사항은 해당 슬라이드에 연결된 모든 슬라이드에 반영됩니다.
WordArt 효과가 프레젠테이션 파일 크기에 영향을 미치나요?
약간 영향을 미칩니다. 그림자, 글로우 및 그라데이션 채우기와 같은 WordArt 효과는 추가 서식 메타데이터로 인해 파일 크기를 약간 증가시킬 수 있지만 차이는 일반적으로 무시할 수준입니다.
프레젠테이션을 저장하지 않고 WordArt 효과 결과를 미리 볼 수 있나요?
네, Slide.get_image를 사용하여 WordArt가 포함된 슬라이드를 이미지(PNG, JPEG 등)로 렌더링하거나 Shape.get_image를 사용하여 개별 도형을 렌더링할 수 있습니다. 이를 통해 전체 프레젠테이션을 저장하거나 내보내기 전에 메모리 또는 화면에서 결과를 미리 볼 수 있습니다.