
ایجاد و اعمال افکتهای WordArt در پایتون
بررسی کلی
افکتهای WordArt به شما امکان میدهند متن را با پر کردنها، خطوط حاشیه، سایهها، بازتابها، درخشندگی، تبدیلها و فرمتبندیهای 3بعدی سبکدهی کنید. این مقاله نحوه ایجاد و سفارشیسازی این افکتها را در ارائههای PowerPoint با استفاده از Aspose.Slides برای Python از طریق .NET، بدون نصب Microsoft Office، توضیح میدهد.
ایجاد یک قالب ساده WordArt و اعمال آن بر متن
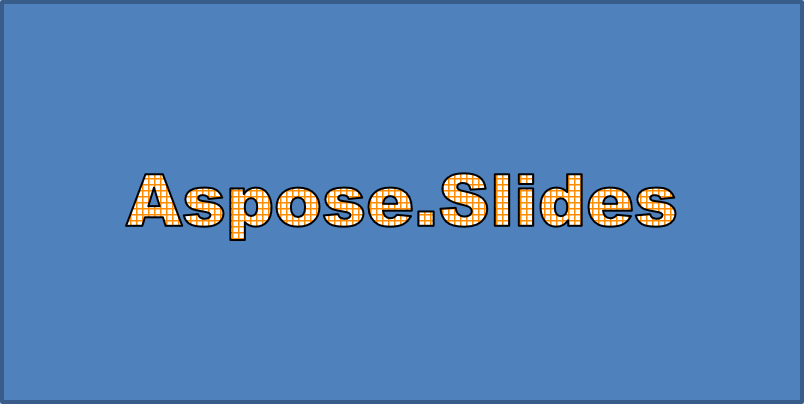
مثالهای زیر یک سبک ساده WordArt را با تنظیم متن، قلم، پر کردن الگو و حاشیه ایجاد میکنند.
هر مثال یک ارائه جدید ایجاد میکند و یک مستطیل را به اسلاید اول آن اضافه میکند؛ نیازی به فایل ورودی نیست. مثال اول متن را به “Aspose.Slides” تنظیم میکند. موقعیت و ابعاد شکل بر حسب نقطه اندازهگیری میشوند:
import aspose.slides as slides

with slides.Presentation() as presentation:
    slide = presentation.slides[0]

    auto_shape = slide.shapes.add_auto_shape(slides.ShapeType.RECTANGLE, 20, 20, 400, 200)
    text_frame = auto_shape.text_frame

    portion = text_frame.paragraphs[0].portions[0]
    portion.text = "Aspose.Slides"
قلم را به Arial Black با اندازه 36 نقطه تنظیم کنید تا فرمتبندی برجستهتر باشد:
import aspose.slides as slides

with slides.Presentation() as presentation:
    slide = presentation.slides[0]

    auto_shape = slide.shapes.add_auto_shape(slides.ShapeType.RECTANGLE, 20, 20, 400, 200)

    portion = auto_shape.text_frame.paragraphs[0].portions[0]
    portion.text = "Aspose.Slides"
    portion.portion_format.latin_font = slides.FontData("Arial Black")
    portion.portion_format.font_height = 36
یک الگوی SMALL_GRID با پیشزمینه نارنجی تیره و پسزمینه سفید اعمال کنید، سپس یک حاشیه متن سیاه با عرض 1 نقطه اضافه کنید:
import aspose.slides as slides
import aspose.pydrawing as draw

with slides.Presentation() as presentation:
    slide = presentation.slides[0]

    auto_shape = slide.shapes.add_auto_shape(slides.ShapeType.RECTANGLE, 20, 20, 400, 200)

    portion = auto_shape.text_frame.paragraphs[0].portions[0]
    portion.text = "Aspose.Slides"
    portion.portion_format.latin_font = slides.FontData("Arial Black")
    portion.portion_format.font_height = 36

    portion.portion_format.fill_format.fill_type = slides.FillType.PATTERN
    portion.portion_format.fill_format.pattern_format.fore_color.color = draw.Color.dark_orange
    portion.portion_format.fill_format.pattern_format.back_color.color = draw.Color.white
    portion.portion_format.fill_format.pattern_format.pattern_style = slides.PatternStyle.SMALL_GRID

    portion.portion_format.line_format.width = 1
    portion.portion_format.line_format.fill_format.fill_type = slides.FillType.SOLID
    portion.portion_format.line_format.fill_format.solid_fill_color.color = draw.Color.black
متن حاصل:
اعمال سایر افکتهای WordArt
مثالهای زیر نشان میدهند چگونه سایهها، بازتابها، درخشندگی، تبدیلها و افکتهای 3بعدی را بر متن اعمال کنید.
اعمال افکتهای سایه خارجی
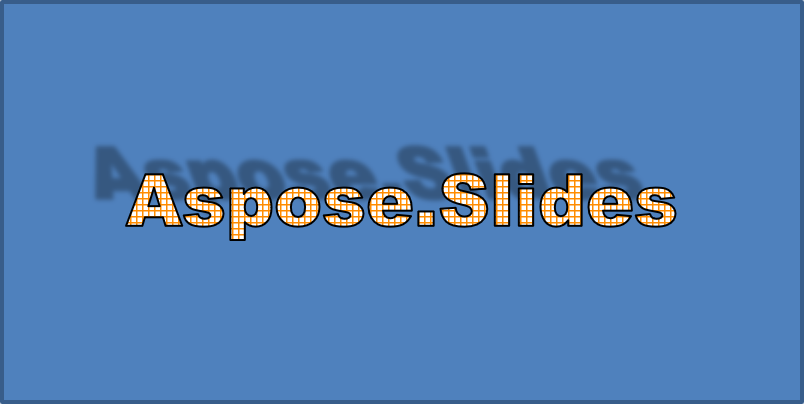
سایه خارجی عمق میافزاید با قرار دادن سایهای پشت متن. میتوانید رنگ، جهت، فاصله، شعاع محو شدن، مقیاس و کجشدگی آن را سفارشی کنید.
این مثال متد enable_outer_shadow_effect را فراخوانی میکند و سایهای سیاه با شعاع محو 4 نقطه، جهت 230 درجه و فاصله 30 نقطه تنظیم میکند. مقادیر مقیاس 100 اندازه سایه را حفظ میکند، در حالی که کجشدگی افقی آن را 20 درجه میچرخاند. تبدیل آلفا شفافیت آن را به 32% تنظیم میکند:
import aspose.slides as slides
import aspose.pydrawing as draw

with slides.Presentation() as presentation:
    slide = presentation.slides[0]

    auto_shape = slide.shapes.add_auto_shape(slides.ShapeType.RECTANGLE, 20, 20, 400, 200)

    portion = auto_shape.text_frame.paragraphs[0].portions[0]
    portion.text = "Aspose.Slides"
    portion.portion_format.latin_font = slides.FontData("Arial Black")
    portion.portion_format.font_height = 36

    portion.portion_format.effect_format.enable_outer_shadow_effect()
    portion.portion_format.effect_format.outer_shadow_effect.shadow_color.color = draw.Color.black
    portion.portion_format.effect_format.outer_shadow_effect.scale_horizontal = 100
    portion.portion_format.effect_format.outer_shadow_effect.scale_vertical = 100
    portion.portion_format.effect_format.outer_shadow_effect.blur_radius = 4
    portion.portion_format.effect_format.outer_shadow_effect.direction = 230
    portion.portion_format.effect_format.outer_shadow_effect.distance = 30
    portion.portion_format.effect_format.outer_shadow_effect.skew_horizontal = 20
    portion.portion_format.effect_format.outer_shadow_effect.skew_vertical = 0
    portion.portion_format.effect_format.outer_shadow_effect.shadow_color.color_transform.add(slides.ColorTransformOperation.SET_ALPHA, 0.32)
متن حاصل:
Note
- وقتی سایههای خارجی و پیشتنظیمشده همزمان استفاده شوند، فقط سایهٔ خارجی اعمال میشود.
- اگر سایهٔ خارجی و داخلی همزمان استفاده شوند، افکت نهایی بستگی به نسخهٔ PowerPoint دارد. به عنوان مثال، در PowerPoint 2013 افکت دو برابر میشود، در حالی که در PowerPoint 2007 فقط سایهٔ خارجی اعمال میشود.
اعمال افکتهای بازتاب
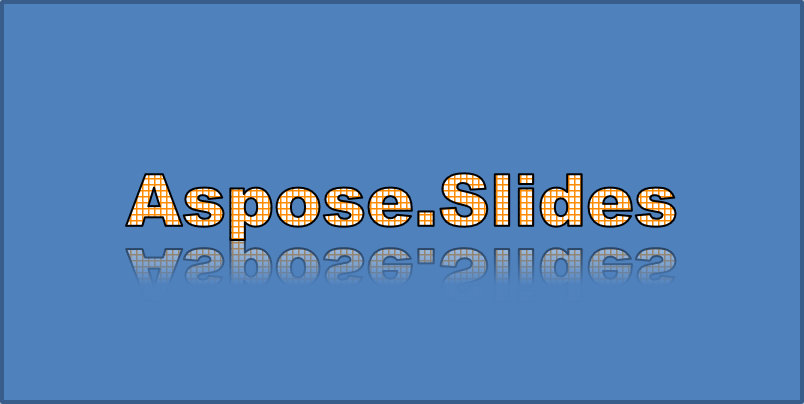
یک بازتاب یک نسخهٔ آینهای از متن ایجاد میکند. میتوانید موقعیت، مقیاس، محو شدن و شفافیت آن را تنظیم کنید تا ظاهر دلخواهتان حاصل شود.
این مثال متد enable_reflection_effect را فراخوانی میکند و بازتاب را به طور عمودی با مقیاس -100% برعکس میکند. از شعاع محو 0.5 نقطه و فاصله 4.72 نقطه استفاده میکند. شفافیت از 60% به 0.9% بین موقعیتهای 0% و 60% در طول بازتاب کاهش مییابد:
import aspose.slides as slides

with slides.Presentation() as presentation:
    slide = presentation.slides[0]

    auto_shape = slide.shapes.add_auto_shape(slides.ShapeType.RECTANGLE, 20, 20, 400, 200)

    portion = auto_shape.text_frame.paragraphs[0].portions[0]
    portion.text = "Aspose.Slides"
    portion.portion_format.latin_font = slides.FontData("Arial Black")
    portion.portion_format.font_height = 36

    portion.portion_format.effect_format.enable_reflection_effect()
    portion.portion_format.effect_format.reflection_effect.blur_radius = 0.5
    portion.portion_format.effect_format.reflection_effect.distance = 4.72
    portion.portion_format.effect_format.reflection_effect.start_pos_alpha = 0
    portion.portion_format.effect_format.reflection_effect.end_pos_alpha = 60
    portion.portion_format.effect_format.reflection_effect.direction = 90
    portion.portion_format.effect_format.reflection_effect.scale_horizontal = 100
    portion.portion_format.effect_format.reflection_effect.scale_vertical = -100
    portion.portion_format.effect_format.reflection_effect.start_reflection_opacity = 60
    portion.portion_format.effect_format.reflection_effect.end_reflection_opacity = 0.9
    portion.portion_format.effect_format.reflection_effect.rectangle_align = slides.RectangleAlignment.BOTTOM_LEFT
متن حاصل:
اعمال افکتهای درخشندگی
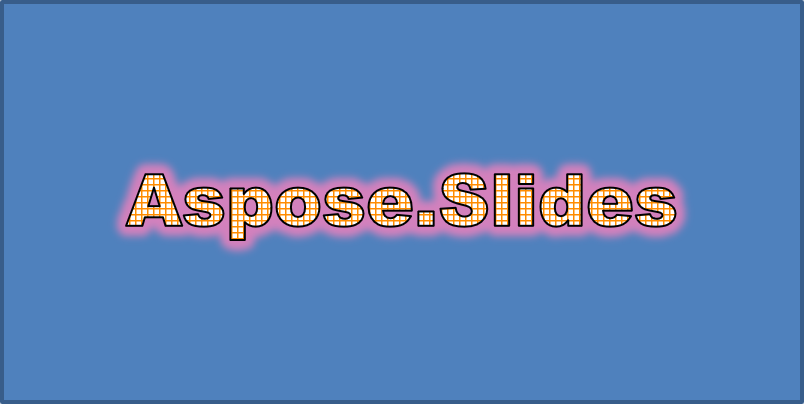
درخشندگی یک حاشیهٔ رنگی نرم autour متن اضافه میکند. میتوانید رنگ، شفافیت و شعاع آن را برای کنترل افکت تنظیم کنید.
این مثال متد enable_glow_effect را فراخوانی میکند و درخشانی قرمز با شفافیت 54% و شعاع 7 نقطه اعمال میکند:
import aspose.slides as slides
import aspose.pydrawing as draw

with slides.Presentation() as presentation:
    slide = presentation.slides[0]

    auto_shape = slide.shapes.add_auto_shape(slides.ShapeType.RECTANGLE, 20, 20, 400, 200)

    portion = auto_shape.text_frame.paragraphs[0].portions[0]
    portion.text = "Aspose.Slides"
    portion.portion_format.latin_font = slides.FontData("Arial Black")
    portion.portion_format.font_height = 36

    portion.portion_format.effect_format.enable_glow_effect()
    portion.portion_format.effect_format.glow_effect.color.color = draw.Color.red
    portion.portion_format.effect_format.glow_effect.color.color_transform.add(slides.ColorTransformOperation.SET_ALPHA, 0.54)
    portion.portion_format.effect_format.glow_effect.radius = 7
متن حاصل:
اعمال تبدیلات WordArt
تبدیلات WordArt بلوک متنی را خم، کشیده یا پیچیده میکنند.
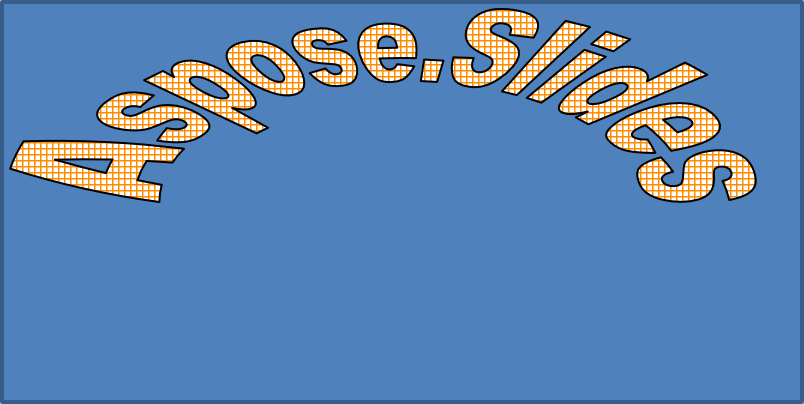
transform را به ARCH_UP_POUR تنظیم کنید تا کل قاب متن به سمت بالا منحنی شود:
import aspose.slides as slides

with slides.Presentation() as presentation:
    slide = presentation.slides[0]

    auto_shape = slide.shapes.add_auto_shape(slides.ShapeType.RECTANGLE, 20, 20, 400, 200)

    text_frame = auto_shape.text_frame
    text_frame.text = "Aspose.Slides"
    text_frame.text_frame_format.transform = slides.TextShapeType.ARCH_UP_POUR
متن حاصل:
Note
Aspose.Slides برای Python از طریق .NET مجموعهای از transformation types از پیش تعریفشده را فراهم میکند.اعمال افکتهای 3بعدی بر اشکال و متن
میتوانید افکتهای 3بعدی را بر یک شکل یا متن آن اعمال کنید. bevelها، برونزنی، نوردهی و تنظیمات دوربین ظاهر نهایی را کنترل میکنند.
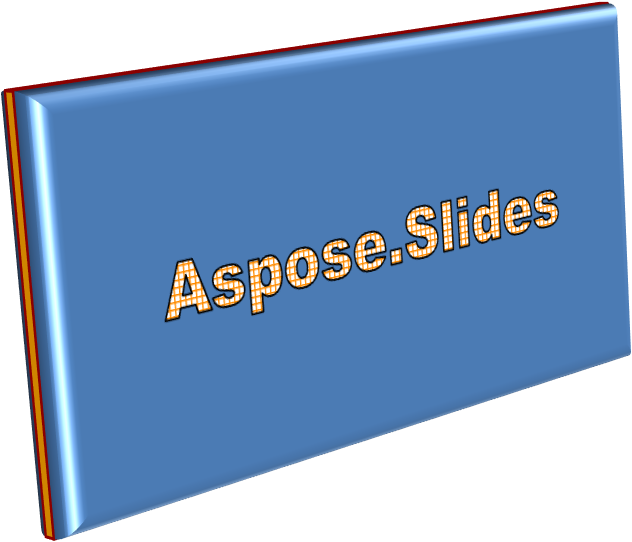
مثال زیر از ThreeDFormat برای افزودن bevelهای دایرهای، برونزنی نارنجی و حاشیهٔ قرمز تیره به مستطیل استفاده میکند. ابعاد bevel، ارتفاع برونزنی، عرض حاشیه و عمق بر حسب نقطه محاسبه میشوند. یک مادهٔ پلاستیکی، نوردهی متعادل که 40 درجه حول محور Z چرخیده و دوربین پرسپکتیو ظاهر آن را تعریف میکند:
import aspose.slides as slides
import aspose.pydrawing as draw

with slides.Presentation() as presentation:
    slide = presentation.slides[0]

    auto_shape = slide.shapes.add_auto_shape(slides.ShapeType.RECTANGLE, 20, 20, 400, 200)
    auto_shape.text_frame.text = "Aspose.Slides"

    auto_shape.three_d_format.bevel_bottom.bevel_type = slides.BevelPresetType.CIRCLE
    auto_shape.three_d_format.bevel_bottom.height = 10.5
    auto_shape.three_d_format.bevel_bottom.width = 10.5

    auto_shape.three_d_format.bevel_top.bevel_type = slides.BevelPresetType.CIRCLE
    auto_shape.three_d_format.bevel_top.height = 12.5
    auto_shape.three_d_format.bevel_top.width = 11

    auto_shape.three_d_format.extrusion_color.color = draw.Color.orange
    auto_shape.three_d_format.extrusion_height = 6

    auto_shape.three_d_format.contour_color.color = draw.Color.dark_red
    auto_shape.three_d_format.contour_width = 1.5

    auto_shape.three_d_format.depth = 3

    auto_shape.three_d_format.material = slides.MaterialPresetType.PLASTIC

    auto_shape.three_d_format.light_rig.direction = slides.LightingDirection.TOP
    auto_shape.three_d_format.light_rig.light_type = slides.LightRigPresetType.BALANCED
    auto_shape.three_d_format.light_rig.set_rotation(0, 0, 40)

    auto_shape.three_d_format.camera.camera_type = slides.CameraPresetType.PERSPECTIVE_CONTRASTING_RIGHT_FACING
شکل حاصل:
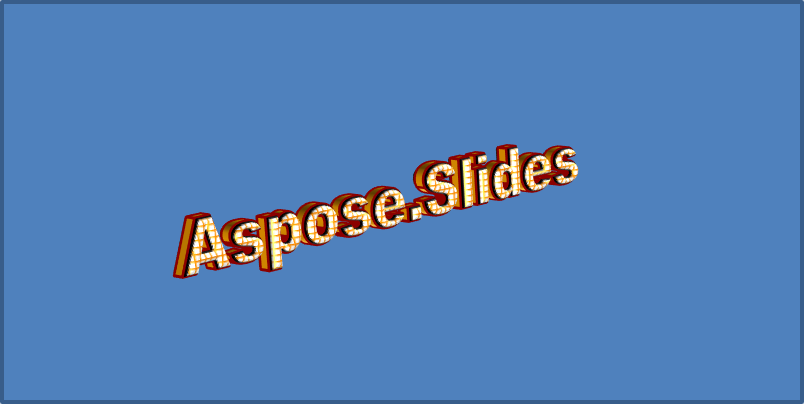
این مثال فرمتبندی 3بعدی مشابهی را بر متن از طریق TextFrameFormat.three_d_format اعمال میکند. bevelهای کوچکتر لبههای حروف را شکل میدهند، در حالی که برونزنی و نوردهی عمق به متن میبخشند:
import aspose.slides as slides
import aspose.pydrawing as draw

with slides.Presentation() as presentation:
    slide = presentation.slides[0]

    auto_shape = slide.shapes.add_auto_shape(slides.ShapeType.RECTANGLE, 20, 20, 400, 200)
    text_frame = auto_shape.text_frame
    text_frame.text = "Aspose.Slides"

    text_frame.text_frame_format.three_d_format.bevel_bottom.bevel_type = slides.BevelPresetType.CIRCLE
    text_frame.text_frame_format.three_d_format.bevel_bottom.height = 3.5
    text_frame.text_frame_format.three_d_format.bevel_bottom.width = 3.5

    text_frame.text_frame_format.three_d_format.bevel_top.bevel_type = slides.BevelPresetType.CIRCLE
    text_frame.text_frame_format.three_d_format.bevel_top.height = 4
    text_frame.text_frame_format.three_d_format.bevel_top.width = 4

    text_frame.text_frame_format.three_d_format.extrusion_color.color = draw.Color.orange
    text_frame.text_frame_format.three_d_format.extrusion_height = 6

    text_frame.text_frame_format.three_d_format.contour_color.color = draw.Color.dark_red
    text_frame.text_frame_format.three_d_format.contour_width = 1.5

    text_frame.text_frame_format.three_d_format.depth = 3

    text_frame.text_frame_format.three_d_format.material = slides.MaterialPresetType.PLASTIC

    text_frame.text_frame_format.three_d_format.light_rig.direction = slides.LightingDirection.TOP
    text_frame.text_frame_format.three_d_format.light_rig.light_type = slides.LightRigPresetType.BALANCED
    text_frame.text_frame_format.three_d_format.light_rig.set_rotation(0, 0, 40)

    text_frame.text_frame_format.three_d_format.camera.camera_type = slides.CameraPresetType.PERSPECTIVE_CONTRASTING_RIGHT_FACING
متن حاصل:
Note
اعمال افکتهای 3بعدی بر متن یا شکلهای آن—و تعامل بین این افکتها—به قواعد خاصی بستگی دارد. صحنهای را در نظر بگیرید که هم متن و هم شکل حاوی آن حضور دارند. یک افکت 3بعدی شامل نمایش 3بعدی شیء و صحنهای است که در آن قرار دارد.
- اگر صحنهای برای هر دو، شکل و متن تنظیم شده باشد، صحنهٔ شکل اولویت دارد و صحنهٔ متن نادیده گرفته میشود.
- اگر شکل صحنهای نداشته باشد اما نمای 3بعدی داشته باشد، صحنهٔ متن استفاده میشود.
- اگر شکل هیچ افکت 3بعدی نداشته باشد، بهصورت مسطح در نظر گرفته میشود و افکت 3بعدی فقط بر متن اعمال میشود.
این رفتارها به خواص ThreeDFormat.light_rig و ThreeDFormat.camera مربوط میشوند.
برای نگه داشتن متن بهصورت مسطح و قابل خواندن در حالی که فرمتبندی 3بعدی شکل حفظ میشود، به Keep Text Flat on a 3D Shape برای مقایسهٔ هر دو تنظیم و مثال کامل Python مراجعه کنید.
FAQ
آیا میتوانم افکتهای WordArt را با فونتها یا اسکریپتهای مختلف (مثلاً عربی، چینی) استفاده کنم؟
بله، Aspose.Slides برای Python از طریق .NET پشتیبانی Unicode دارد و با تمام فونتها و اسکریپتهای اصلی کار میکند. افکتهای WordArt مانند سایه، پر کردن و حاشیه میتوانند صرفنظر از زبان اعمال شوند، اگرچه دسترسی به فونت و رندرینگ ممکن است به فونتهای سیستم وابسته باشد.
آیا میتوانم افکتهای WordArt را بر عناصر مستر اسلاید اعمال کنم؟
بله، میتوانید افکتهای WordArt را بر اشکال موجود در اسلایدهای مستر، از جمله نگهدارندههای عنوان، فوترها یا متن پسزمینه اعمال کنید. تغییرات اعمالشده به طرح مستر در تمام اسلایدهای مرتبط منعکس میشود.
آیا افکتهای WordArt بر اندازهٔ فایل ارائه تأثیر میگذارد؟
بهخوبی. افکتهای WordArt مانند سایهها، درخشندگیها و پر کردنهای گرادیان ممکن است کمی اندازهٔ فایل را به دلیل افزودن متادیتای فرمتبندی افزایش دهند، اما اختلاف معمولاً ناچیز است.
آیا میتوانم پیشنمایش نتیجه افکتهای WordArt را بدون ذخیرهٔ ارائه دریافت کنم؟
بله، میتوانید اسلایدهای حاوی WordArt را به تصاویر (مثلاً PNG، JPEG) با استفاده از Slide.get_image رندر کنید، یا اشکال فردی را با استفاده از Shape.get_image رندر کنید. این امکان پیشنمایش نتیجه را در حافظه یا روی صفحه نمایش قبل از ذخیره یا استخراج کل ارائه فراهم میکند.