
C++'ta WordArt Efektleri Oluşturma ve Uygulama
Genel Bakış
WordArt efektleri, metni dolgu, kenarlık, gölge, yansıma, parıltı, dönüşüm ve 3D biçimlendirme ile biçimlendirmenizi sağlar. Bu makale, Microsoft Office yüklü olmadan Aspose.Slides for C++ kullanarak PowerPoint sunumlarında bu efektleri oluşturmayı ve özelleştirmeyi açıklar.
Basit bir WordArt Şablonu Oluşturun ve Metne Uygulayın
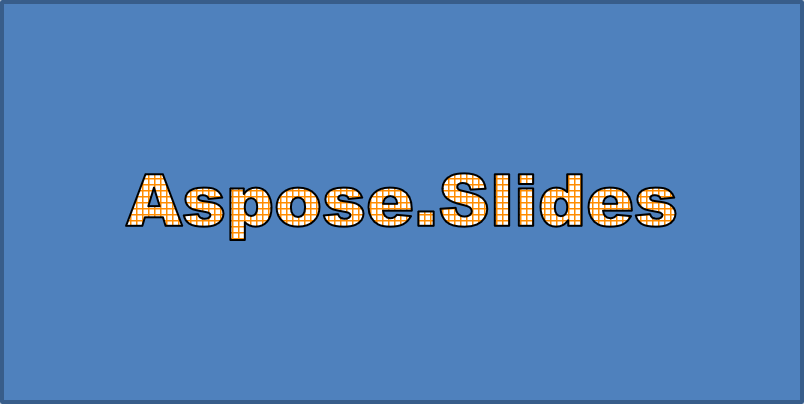
Aşağıdaki örnekler, metin, yazı tipi, desen dolgu ve kenarlık ayarlanarak basit bir WordArt stili oluşturur.
Her örnek yeni bir sunum oluşturur ve ilk slaytına bir dikdörtgen ekler; herhangi bir girdi dosyasına ihtiyaç yoktur. İlk örnek, metni “Aspose.Slides” olarak ayarlar. Şeklin konumu ve boyutları puan cinsindendir:
#include <DOM/IAutoShape.h>
#include <DOM/IParagraph.h>
#include <DOM/IParagraphCollection.h>
#include <DOM/IPortion.h>
#include <DOM/IPortionCollection.h>
#include <DOM/IShapeCollection.h>
#include <DOM/ISlide.h>
#include <DOM/ITextFrame.h>
#include <DOM/Presentation.h>
#include <DOM/ShapeType.h>

using namespace Aspose::Slides;

auto presentation = System::MakeObject<Presentation>();
auto slide = presentation->get_Slide(0);

auto autoShape = slide->get_Shapes()->AddAutoShape(ShapeType::Rectangle, 20.0f, 20.0f, 400.0f, 200.0f);
auto textFrame = autoShape->get_TextFrame();

auto portion = textFrame->get_Paragraphs()->idx_get(0)->get_Portions()->idx_get(0);
portion->set_Text(u"Aspose.Slides");
Biçimlendirmenin daha belirgin olması için yazı tipini Arial Black ve 36 puan olarak ayarlayın:
#include <DOM/Fonts/FontData.h>
#include <DOM/IAutoShape.h>
#include <DOM/IParagraph.h>
#include <DOM/IParagraphCollection.h>
#include <DOM/IPortion.h>
#include <DOM/IPortionCollection.h>
#include <DOM/IPortionFormat.h>
#include <DOM/IShapeCollection.h>
#include <DOM/ISlide.h>
#include <DOM/ITextFrame.h>
#include <DOM/Presentation.h>
#include <DOM/ShapeType.h>

using namespace Aspose::Slides;

auto presentation = System::MakeObject<Presentation>();
auto slide = presentation->get_Slide(0);

auto autoShape = slide->get_Shapes()->AddAutoShape(ShapeType::Rectangle, 20.0f, 20.0f, 400.0f, 200.0f);
auto textFrame = autoShape->get_TextFrame();

auto portion = textFrame->get_Paragraphs()->idx_get(0)->get_Portions()->idx_get(0);
portion->set_Text(u"Aspose.Slides");

auto fontData = System::MakeObject<FontData>(u"Arial Black");
portion->get_PortionFormat()->set_LatinFont(fontData);
portion->get_PortionFormat()->set_FontHeight(36.0f);
Bir SmallGrid deseni uygulayın; ön planı koyu turuncu, arka planı beyaz olsun ve ardından 1 puan genişliğinde siyah bir metin kenarlığı ekleyin:
#include <DOM/Fonts/FontData.h>
#include <DOM/FillType.h>
#include <DOM/IAutoShape.h>
#include <DOM/IColorFormat.h>
#include <DOM/IFillFormat.h>
#include <DOM/ILineFillFormat.h>
#include <DOM/ILineFormat.h>
#include <DOM/IParagraph.h>
#include <DOM/IParagraphCollection.h>
#include <DOM/IPortion.h>
#include <DOM/IPortionCollection.h>
#include <DOM/IPortionFormat.h>
#include <DOM/IShapeCollection.h>
#include <DOM/ISlide.h>
#include <DOM/ITextFrame.h>
#include <DOM/IPatternFormat.h>
#include <DOM/PatternStyle.h>
#include <DOM/Presentation.h>
#include <DOM/ShapeType.h>
#include <drawing/color.h>

using namespace Aspose::Slides;
using namespace System::Drawing;

auto presentation = System::MakeObject<Presentation>();
auto slide = presentation->get_Slide(0);

auto autoShape = slide->get_Shapes()->AddAutoShape(ShapeType::Rectangle, 20.0f, 20.0f, 400.0f, 200.0f);
auto textFrame = autoShape->get_TextFrame();

auto portion = textFrame->get_Paragraphs()->idx_get(0)->get_Portions()->idx_get(0);
portion->set_Text(u"Aspose.Slides");

auto fontData = System::MakeObject<FontData>(u"Arial Black");
portion->get_PortionFormat()->set_LatinFont(fontData);
portion->get_PortionFormat()->set_FontHeight(36.0f);

auto fillFormat = portion->get_PortionFormat()->get_FillFormat();
fillFormat->set_FillType(FillType::Pattern);
fillFormat->get_PatternFormat()->get_ForeColor()->set_Color(Color::get_DarkOrange());
fillFormat->get_PatternFormat()->get_BackColor()->set_Color(Color::get_White());
fillFormat->get_PatternFormat()->set_PatternStyle(PatternStyle::SmallGrid);

portion->get_PortionFormat()->get_LineFormat()->set_Width(1);
auto lineFillFormat = portion->get_PortionFormat()->get_LineFormat()->get_FillFormat();
lineFillFormat->set_FillType(FillType::Solid);
lineFillFormat->get_SolidFillColor()->set_Color(Color::get_Black());
Elde edilen metin:
Diğer WordArt Efektlerini Uygula
Aşağıdaki örnekler, gölgeler, yansımalar, parıltılar, dönüşümler ve 3D efektlerini metne nasıl uygulayacağınızı gösterir.
Dış Gölge Efektlerini Uygula
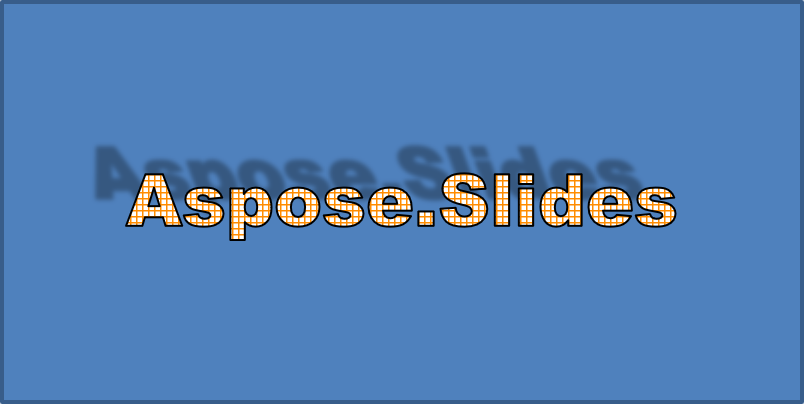
Bir dış gölge, metnin arkasına gölge ekleyerek derinlik kazandırır. Rengini, yönünü, uzaklığını, bulanıklaştırma yarıçapını, ölçeğini ve eğimini özelleştirebilirsiniz.
Bu örnek, EnableOuterShadowEffect metodunu çağırır ve 4 puan bulanıklaştırma yarıçapı, 230 derece yön ve 30 puan uzaklıkta siyah bir gölge ayarlar. Ölçek değeri 100 gölgenin boyutunu korur, yatay eğim ise 20 derece eğilir. Alfa dönüşümü opaklığı %32 olarak belirler:
#include <DOM/Fonts/FontData.h>
#include <DOM/ColorTransformOperation.h>
#include <DOM/Effects/IOuterShadow.h>
#include <DOM/IAutoShape.h>
#include <DOM/IColorFormat.h>
#include <DOM/IColorOperationCollection.h>
#include <DOM/IEffectFormat.h>
#include <DOM/IParagraph.h>
#include <DOM/IParagraphCollection.h>
#include <DOM/IPortion.h>
#include <DOM/IPortionCollection.h>
#include <DOM/IPortionFormat.h>
#include <DOM/IShapeCollection.h>
#include <DOM/ISlide.h>
#include <DOM/ITextFrame.h>
#include <DOM/Presentation.h>
#include <DOM/ShapeType.h>
#include <drawing/color.h>

using namespace Aspose::Slides;
using namespace System::Drawing;

auto presentation = System::MakeObject<Presentation>();
auto slide = presentation->get_Slide(0);

auto autoShape = slide->get_Shapes()->AddAutoShape(ShapeType::Rectangle, 20.0f, 20.0f, 400.0f, 200.0f);
auto textFrame = autoShape->get_TextFrame();

auto portion = textFrame->get_Paragraphs()->idx_get(0)->get_Portions()->idx_get(0);
portion->set_Text(u"Aspose.Slides");

auto fontData = System::MakeObject<FontData>(u"Arial Black");
portion->get_PortionFormat()->set_LatinFont(fontData);
portion->get_PortionFormat()->set_FontHeight(36.0f);

auto effectFormat = portion->get_PortionFormat()->get_EffectFormat();
effectFormat->EnableOuterShadowEffect();

auto outerShadowEffect = effectFormat->get_OuterShadowEffect();
outerShadowEffect->get_ShadowColor()->set_Color(Color::get_Black());
outerShadowEffect->set_ScaleHorizontal(100);
outerShadowEffect->set_ScaleVertical(100);
outerShadowEffect->set_BlurRadius(4);
outerShadowEffect->set_Direction(230.0f);
outerShadowEffect->set_Distance(30);
outerShadowEffect->set_SkewHorizontal(20);
outerShadowEffect->set_SkewVertical(0);
outerShadowEffect->get_ShadowColor()->get_ColorTransform()->Add(ColorTransformOperation::SetAlpha, 0.32f);
Elde edilen metin:
Note
- Dış ve ön ayarlı gölgeler birlikte kullanıldığında, yalnızca dış gölge uygulanır.
- Dış ve iç gölgeler aynı anda kullanıldığında, oluşan efekt PowerPoint sürümüne bağlıdır. Örneğin, PowerPoint 2013’te efekt iki katına çıkar, PowerPoint 2007’de ise yalnızca dış gölge uygulanır.
Yansıma Efektlerini Uygula
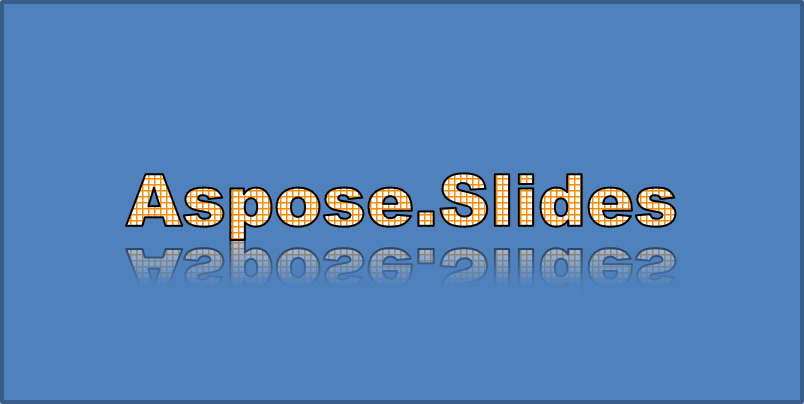
Bir yansıma, metnin ayna gibi bir kopyasını oluşturur. Konumunu, ölçeğini, bulanıklığını ve opaklığını ayarlayarak görünümünü kontrol edebilirsiniz.
Bu örnek, EnableReflectionEffect metodunu çağırır ve yansımayı dikey olarak -100% ölçekle ters çevirir. 0,5 puan bulanıklaştırma yarıçapı ve 4,72 puan uzaklık kullanır. Opaklık, yansımanın %0 konumundan %60 konumuna kadar %60’tan %0,9’a düşer:
#include <DOM/Fonts/FontData.h>
#include <DOM/Effects/IReflection.h>
#include <DOM/IAutoShape.h>
#include <DOM/IEffectFormat.h>
#include <DOM/IParagraph.h>
#include <DOM/IParagraphCollection.h>
#include <DOM/IPortion.h>
#include <DOM/IPortionCollection.h>
#include <DOM/IPortionFormat.h>
#include <DOM/IShapeCollection.h>
#include <DOM/ISlide.h>
#include <DOM/ITextFrame.h>
#include <DOM/Presentation.h>
#include <DOM/RectangleAlignment.h>
#include <DOM/ShapeType.h>

using namespace Aspose::Slides;

auto presentation = System::MakeObject<Presentation>();
auto slide = presentation->get_Slide(0);

auto autoShape = slide->get_Shapes()->AddAutoShape(ShapeType::Rectangle, 20.0f, 20.0f, 400.0f, 200.0f);
auto textFrame = autoShape->get_TextFrame();

auto portion = textFrame->get_Paragraphs()->idx_get(0)->get_Portions()->idx_get(0);
portion->set_Text(u"Aspose.Slides");

auto fontData = System::MakeObject<FontData>(u"Arial Black");
portion->get_PortionFormat()->set_LatinFont(fontData);
portion->get_PortionFormat()->set_FontHeight(36.0f);

auto effectFormat = portion->get_PortionFormat()->get_EffectFormat();
effectFormat->EnableReflectionEffect();

auto reflectionEffect = effectFormat->get_ReflectionEffect();
reflectionEffect->set_BlurRadius(0.5);
reflectionEffect->set_Distance(4.72);
reflectionEffect->set_StartPosAlpha(0.f);
reflectionEffect->set_EndPosAlpha(60.f);
reflectionEffect->set_Direction(90.0f);
reflectionEffect->set_ScaleHorizontal(100);
reflectionEffect->set_ScaleVertical(-100);
reflectionEffect->set_StartReflectionOpacity(60.f);
reflectionEffect->set_EndReflectionOpacity(0.9f);
reflectionEffect->set_RectangleAlign(RectangleAlignment::BottomLeft);
Elde edilen metin:
Parıltı Efektlerini Uygula
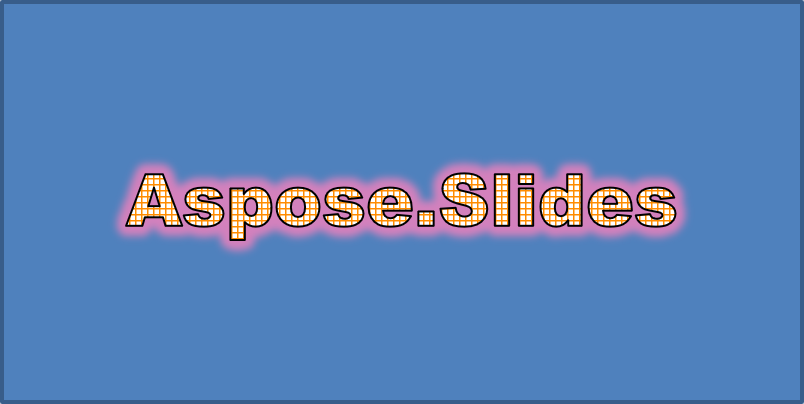
Bir parıltı, metnin etrafına yumuşak renkli bir kenarlık ekler. Rengini, opaklığını ve yarıçapını ayarlayarak efekti kontrol edebilirsiniz.
Bu örnek, EnableGlowEffect metodunu çağırır ve %54 opaklıkta, 7 puan yarıçapta kırmızı bir parıltı uygular:
#include <drawing/color.h>
#include <DOM/Fonts/FontData.h>
#include <DOM/ColorTransformOperation.h>
#include <DOM/Effects/IGlow.h>
#include <DOM/IAutoShape.h>
#include <DOM/IColorFormat.h>
#include <DOM/IColorOperationCollection.h>
#include <DOM/IEffectFormat.h>
#include <DOM/IParagraph.h>
#include <DOM/IParagraphCollection.h>
#include <DOM/IPortion.h>
#include <DOM/IPortionCollection.h>
#include <DOM/IPortionFormat.h>
#include <DOM/IShapeCollection.h>
#include <DOM/ISlide.h>
#include <DOM/ITextFrame.h>
#include <DOM/Presentation.h>
#include <DOM/ShapeType.h>

using namespace Aspose::Slides;
using namespace System::Drawing;

auto presentation = System::MakeObject<Presentation>();
auto slide = presentation->get_Slide(0);

auto autoShape = slide->get_Shapes()->AddAutoShape(ShapeType::Rectangle, 20.0f, 20.0f, 400.0f, 200.0f);
auto textFrame = autoShape->get_TextFrame();

auto portion = textFrame->get_Paragraphs()->idx_get(0)->get_Portions()->idx_get(0);
portion->set_Text(u"Aspose.Slides");

auto fontData = System::MakeObject<FontData>(u"Arial Black");
portion->get_PortionFormat()->set_LatinFont(fontData);
portion->get_PortionFormat()->set_FontHeight(36.0f);

auto effectFormat = portion->get_PortionFormat()->get_EffectFormat();
effectFormat->EnableGlowEffect();

auto glowEffect = effectFormat->get_GlowEffect();
glowEffect->get_Color()->set_Color(Color::get_Red());
glowEffect->get_Color()->get_ColorTransform()->Add(ColorTransformOperation::SetAlpha, 0.54f);
glowEffect->set_Radius(7);
Elde edilen metin:
WordArt Dönüşümlerini Uygula
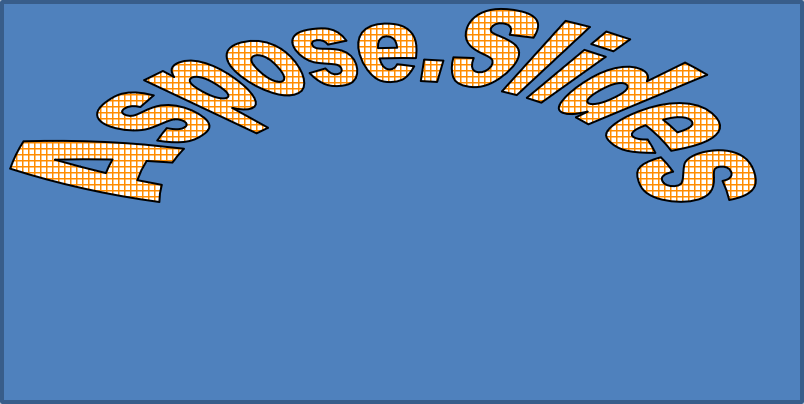
WordArt dönüşümleri, bir metin bloğunu bükebilir, uzatabilir veya şekillendirebilir.
İTextFrameFormat::set_Transform yöntemini ArchUpPour değerine ayarlayarak tüm metin çerçevesini yukarı doğru eğebilirsiniz:
#include <DOM/IAutoShape.h>
#include <DOM/IShapeCollection.h>
#include <DOM/ISlide.h>
#include <DOM/ITextFrame.h>
#include <DOM/ITextFrameFormat.h>
#include <DOM/Presentation.h>
#include <DOM/ShapeType.h>
#include <DOM/TextShapeType.h>

using namespace Aspose::Slides;

auto presentation = System::MakeObject<Presentation>();
auto slide = presentation->get_Slide(0);

auto autoShape = slide->get_Shapes()->AddAutoShape(ShapeType::Rectangle, 20.0f, 20.0f, 400.0f, 200.0f);

auto textFrame = autoShape->get_TextFrame();
textFrame->set_Text(u"Aspose.Slides");
textFrame->get_TextFrameFormat()->set_Transform(TextShapeType::ArchUpPour);
Elde edilen metin:
Note
Aspose.Slides for C++ önceden tanımlanmış bir dizi dönüşüm türü sunar.Şekillere ve Metne 3D Efektleri Uygula
Bir şekle veya metnine 3D efektler uygulayabilirsiniz. Kenar yuvarlamaları, ekstrüzyon, aydınlatma ve kamera ayarları ortaya çıkan görünümü kontrol eder.
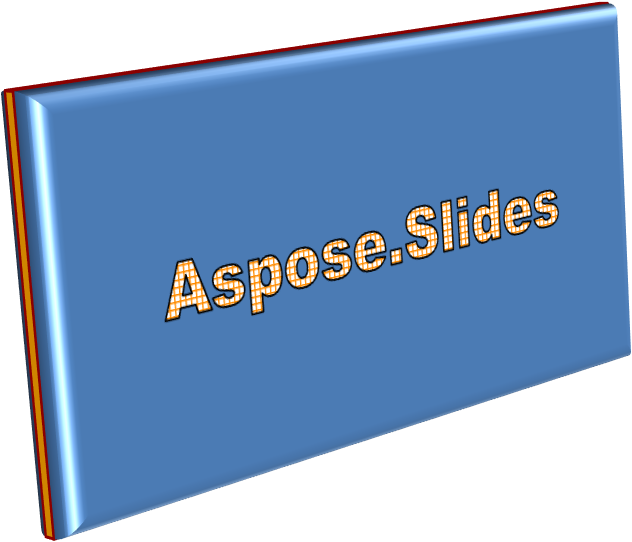
Aşağıdaki örnek, IThreeDFormat kullanarak dikdörtgene dairesel kenar yuvarlamaları, turuncu ekstrüzyon ve koyu kırmızı kontur ekler. Kenar yuvarlama ölçüleri, ekstrüzyon yüksekliği, kontur genişliği ve derinlik puan cinsindendir. Plastik bir malzeme, Z ekseni etrafında 40 derece döndürülmüş dengeli aydınlatma ve perspektif kamera görünümünü belirler:
#include <DOM/BevelPresetType.h>
#include <DOM/CameraPresetType.h>
#include <DOM/IAutoShape.h>
#include <DOM/ICamera.h>
#include <DOM/IColorFormat.h>
#include <DOM/ILightRig.h>
#include <DOM/IShapeBevel.h>
#include <DOM/IShapeCollection.h>
#include <DOM/ISlide.h>
#include <DOM/ITextFrame.h>
#include <DOM/IThreeDFormat.h>
#include <DOM/LightRigPresetType.h>
#include <DOM/LightingDirection.h>
#include <DOM/MaterialPresetType.h>
#include <DOM/Presentation.h>
#include <DOM/ShapeType.h>
#include <drawing/color.h>

using namespace Aspose::Slides;
using namespace System::Drawing;

auto presentation = System::MakeObject<Presentation>();
auto slide = presentation->get_Slide(0);

auto autoShape = slide->get_Shapes()->AddAutoShape(ShapeType::Rectangle, 20.0f, 20.0f, 400.0f, 200.0f);
autoShape->get_TextFrame()->set_Text(u"Aspose.Slides");

auto threeDFormat = autoShape->get_ThreeDFormat();

threeDFormat->get_BevelBottom()->set_BevelType(BevelPresetType::Circle);
threeDFormat->get_BevelBottom()->set_Height(10.5);
threeDFormat->get_BevelBottom()->set_Width(10.5);

threeDFormat->get_BevelTop()->set_BevelType(BevelPresetType::Circle);
threeDFormat->get_BevelTop()->set_Height(12.5);
threeDFormat->get_BevelTop()->set_Width(11);

threeDFormat->get_ExtrusionColor()->set_Color(Color::get_Orange());
threeDFormat->set_ExtrusionHeight(6);

threeDFormat->get_ContourColor()->set_Color(Color::get_DarkRed());
threeDFormat->set_ContourWidth(1.5);

threeDFormat->set_Depth(3);

threeDFormat->set_Material(MaterialPresetType::Plastic);

threeDFormat->get_LightRig()->set_Direction(LightingDirection::Top);
threeDFormat->get_LightRig()->set_LightType(LightRigPresetType::Balanced);
threeDFormat->get_LightRig()->SetRotation(0.0f, 0.0f, 40.0f);

threeDFormat->get_Camera()->set_CameraType(CameraPresetType::PerspectiveContrastingRightFacing);
Elde edilen şekil:
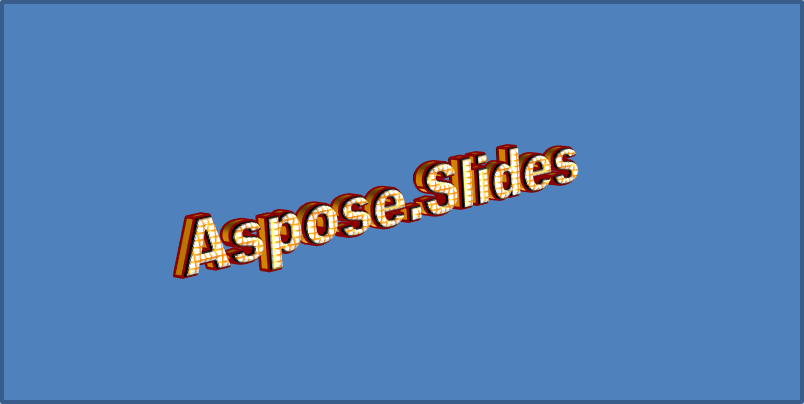
Bu örnek, ITextFrameFormat::get_ThreeDFormat aracılığıyla metne benzer bir 3D biçimlendirme uygular. Daha küçük kenar yuvarlamaları harf kenarlarını şekillendirirken, ekstrüzyon ve aydınlatma metne derinlik kazandırır:
#include <DOM/BevelPresetType.h>
#include <DOM/CameraPresetType.h>
#include <DOM/IAutoShape.h>
#include <DOM/ICamera.h>
#include <DOM/IColorFormat.h>
#include <DOM/ILightRig.h>
#include <DOM/IShapeBevel.h>
#include <DOM/IShapeCollection.h>
#include <DOM/ISlide.h>
#include <DOM/ITextFrame.h>
#include <DOM/ITextFrameFormat.h>
#include <DOM/IThreeDFormat.h>
#include <DOM/LightRigPresetType.h>
#include <DOM/LightingDirection.h>
#include <DOM/MaterialPresetType.h>
#include <DOM/Presentation.h>
#include <DOM/ShapeType.h>
#include <drawing/color.h>

using namespace Aspose::Slides;
using namespace System::Drawing;

auto presentation = System::MakeObject<Presentation>();
auto slide = presentation->get_Slide(0);

auto autoShape = slide->get_Shapes()->AddAutoShape(ShapeType::Rectangle, 20.0f, 20.0f, 400.0f, 200.0f);

auto textFrame = autoShape->get_TextFrame();
textFrame->set_Text(u"Aspose.Slides");

auto threeDFormat = textFrame->get_TextFrameFormat()->get_ThreeDFormat();

threeDFormat->get_BevelBottom()->set_BevelType(BevelPresetType::Circle);
threeDFormat->get_BevelBottom()->set_Height(3.5);
threeDFormat->get_BevelBottom()->set_Width(3.5);

threeDFormat->get_BevelTop()->set_BevelType(BevelPresetType::Circle);
threeDFormat->get_BevelTop()->set_Height(4);
threeDFormat->get_BevelTop()->set_Width(4);

threeDFormat->get_ExtrusionColor()->set_Color(Color::get_Orange());
threeDFormat->set_ExtrusionHeight(6);

threeDFormat->get_ContourColor()->set_Color(Color::get_DarkRed());
threeDFormat->set_ContourWidth(1.5);

threeDFormat->set_Depth(3);

threeDFormat->set_Material(MaterialPresetType::Plastic);

threeDFormat->get_LightRig()->set_Direction(LightingDirection::Top);
threeDFormat->get_LightRig()->set_LightType(LightRigPresetType::Balanced);
threeDFormat->get_LightRig()->SetRotation(0.0f, 0.0f, 40.0f);

threeDFormat->get_Camera()->set_CameraType(CameraPresetType::PerspectiveContrastingRightFacing);
Elde edilen metin:
Note
Metne veya şekillere 3D efektlerinin uygulanması ve bu efektler arasındaki etkileşim belirli kurallara tabidir. Metni ve onu içeren şekli içeren bir sahneyi düşünün. Bir 3D efekt, nesnenin 3D temsilini ve yer aldığı sahneyi içerir.
- Eğer sahne hem şekil hem de metin için ayarlanmışsa, şeklin sahnesi öncelikli olur ve metnin sahnesi yok sayılır.
- Şeklin kendi sahnesi yok ama bir 3D temsili varsa, metnin sahnesi kullanılır.
- Şeklin hiç 3D efekti yoksa, düz olarak ele alınır ve 3D efekt yalnızca metne uygulanır.
Bu davranışlar, IThreeDFormat::get_LightRig ve IThreeDFormat::get_Camera yöntemleriyle ilgilidir.
Metni düz ve okunaklı tutarken şeklin 3D formatlamasını korumak için, hem ayarların karşılaştırmasını hem de tam bir C++ örneğini görmek üzere Keep Text Flat on a 3D Shape sayfasına bakın.
SSS
WordArt efektlerini farklı yazı tipleri veya betiklerle (ör. Arapça, Çince) kullanabilir miyim?
Evet, Aspose.Slides for C++ Unicode’u destekler ve tüm büyük yazı tipleri ve betiklerle çalışır. Gölge, dolgu ve kenarlık gibi WordArt efektleri dil bağımsız olarak uygulanabilir; ancak yazı tipi bulunabilirliği ve render alma sistemdeki yazı tiplerine bağlı olabilir.
WordArt efektlerini slayt ana düzeni (master) öğelerine uygulayabilir miyim?
Evet, ana slayt düzenindeki şekillere, başlık yer tutucularına, alt bilgi alanlarına veya arka plan metnine WordArt efektleri uygulayabilirsiniz. Ana düzente yapılan değişiklikler ilişkili tüm slaytlara yansır.
WordArt efektleri sunum dosya boyutunu etkiler mi?
Biraz. Gölge, parıltı ve degrade dolgu gibi WordArt efektleri, ek biçimlendirme meta verileri eklediği için dosya boyutunu hafifçe artırabilir, ancak fark genellikle ihmal edilebilir düzeydedir.
Sunumu kaydetmeden WordArt efektlerinin sonucunu ön izleyebilir miyim?
Evet, ISlide::GetImage kullanarak WordArt içeren slaytları görüntülere (ör. PNG, JPEG) renderleyebilir veya IShape::GetImage ile tek tek şekilleri renderleyebilirsiniz. Bu sayede sunumu kaydetmeden veya dışa aktarmadan önce bellekte veya ekranda sonucu ön izleyebilirsiniz.