
Criar e Aplicar Efeitos WordArt em C++
Visão geral
Os efeitos de WordArt permitem estilizar texto com preenchimentos, contornos, sombras, reflexos, brilho, transformações e formatação 3D. Este artigo explica como criar e personalizar esses efeitos em apresentações PowerPoint usando Aspose.Slides para C++, sem a necessidade de ter o Microsoft Office instalado.
Criar um Modelo WordArt Simples e Aplicá-lo ao Texto
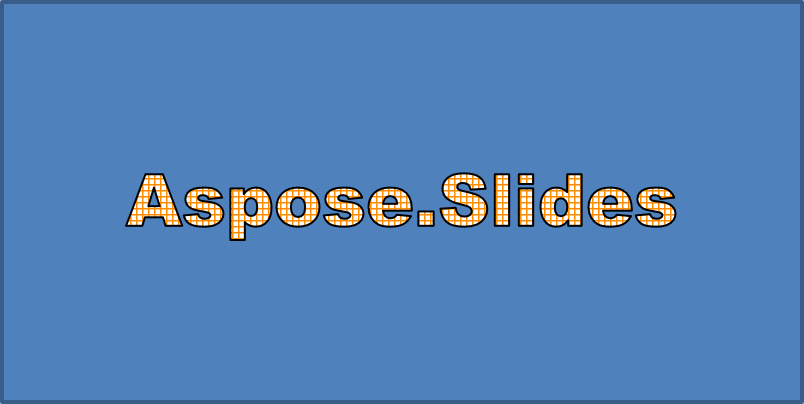
Os exemplos a seguir criam um estilo WordArt simples definindo o texto, a fonte, o preenchimento de padrão e o contorno.
Cada exemplo cria uma nova apresentação e adiciona um retângulo ao seu primeiro slide; nenhum arquivo de entrada é necessário. O primeiro exemplo define o texto como “Aspose.Slides”. A posição e as dimensões da forma são medidas em pontos:
#include <DOM/IAutoShape.h>
#include <DOM/IParagraph.h>
#include <DOM/IParagraphCollection.h>
#include <DOM/IPortion.h>
#include <DOM/IPortionCollection.h>
#include <DOM/IShapeCollection.h>
#include <DOM/ISlide.h>
#include <DOM/ITextFrame.h>
#include <DOM/Presentation.h>
#include <DOM/ShapeType.h>

using namespace Aspose::Slides;

auto presentation = System::MakeObject<Presentation>();
auto slide = presentation->get_Slide(0);

auto autoShape = slide->get_Shapes()->AddAutoShape(ShapeType::Rectangle, 20.0f, 20.0f, 400.0f, 200.0f);
auto textFrame = autoShape->get_TextFrame();

auto portion = textFrame->get_Paragraphs()->idx_get(0)->get_Portions()->idx_get(0);
portion->set_Text(u"Aspose.Slides");
Defina a fonte como Arial Black em 36 pontos para tornar a formatação mais perceptível:
#include <DOM/Fonts/FontData.h>
#include <DOM/IAutoShape.h>
#include <DOM/IParagraph.h>
#include <DOM/IParagraphCollection.h>
#include <DOM/IPortion.h>
#include <DOM/IPortionCollection.h>
#include <DOM/IPortionFormat.h>
#include <DOM/IShapeCollection.h>
#include <DOM/ISlide.h>
#include <DOM/ITextFrame.h>
#include <DOM/Presentation.h>
#include <DOM/ShapeType.h>

using namespace Aspose::Slides;

auto presentation = System::MakeObject<Presentation>();
auto slide = presentation->get_Slide(0);

auto autoShape = slide->get_Shapes()->AddAutoShape(ShapeType::Rectangle, 20.0f, 20.0f, 400.0f, 200.0f);
auto textFrame = autoShape->get_TextFrame();

auto portion = textFrame->get_Paragraphs()->idx_get(0)->get_Portions()->idx_get(0);
portion->set_Text(u"Aspose.Slides");

auto fontData = System::MakeObject<FontData>(u"Arial Black");
portion->get_PortionFormat()->set_LatinFont(fontData);
portion->get_PortionFormat()->set_FontHeight(36.0f);
Aplique um padrão SmallGrid com primeiro plano laranja escuro e fundo branco, então adicione um contorno de texto preto com largura de 1 ponto:
#include <DOM/Fonts/FontData.h>
#include <DOM/FillType.h>
#include <DOM/IAutoShape.h>
#include <DOM/IColorFormat.h>
#include <DOM/IFillFormat.h>
#include <DOM/ILineFillFormat.h>
#include <DOM/ILineFormat.h>
#include <DOM/IParagraph.h>
#include <DOM/IParagraphCollection.h>
#include <DOM/IPortion.h>
#include <DOM/IPortionCollection.h>
#include <DOM/IPortionFormat.h>
#include <DOM/IShapeCollection.h>
#include <DOM/ISlide.h>
#include <DOM/ITextFrame.h>
#include <DOM/IPatternFormat.h>
#include <DOM/PatternStyle.h>
#include <DOM/Presentation.h>
#include <DOM/ShapeType.h>
#include <drawing/color.h>

using namespace Aspose::Slides;
using namespace System::Drawing;

auto presentation = System::MakeObject<Presentation>();
auto slide = presentation->get_Slide(0);

auto autoShape = slide->get_Shapes()->AddAutoShape(ShapeType::Rectangle, 20.0f, 20.0f, 400.0f, 200.0f);
auto textFrame = autoShape->get_TextFrame();

auto portion = textFrame->get_Paragraphs()->idx_get(0)->get_Portions()->idx_get(0);
portion->set_Text(u"Aspose.Slides");

auto fontData = System::MakeObject<FontData>(u"Arial Black");
portion->get_PortionFormat()->set_LatinFont(fontData);
portion->get_PortionFormat()->set_FontHeight(36.0f);

auto fillFormat = portion->get_PortionFormat()->get_FillFormat();
fillFormat->set_FillType(FillType::Pattern);
fillFormat->get_PatternFormat()->get_ForeColor()->set_Color(Color::get_DarkOrange());
fillFormat->get_PatternFormat()->get_BackColor()->set_Color(Color::get_White());
fillFormat->get_PatternFormat()->set_PatternStyle(PatternStyle::SmallGrid);

portion->get_PortionFormat()->get_LineFormat()->set_Width(1);
auto lineFillFormat = portion->get_PortionFormat()->get_LineFormat()->get_FillFormat();
lineFillFormat->set_FillType(FillType::Solid);
lineFillFormat->get_SolidFillColor()->set_Color(Color::get_Black());
O texto resultante:
Aplicar Outros Efeitos WordArt
Os exemplos a seguir demonstram como aplicar sombras, reflexos, brilho, transformações e efeitos 3D ao texto.
Aplicar Efeitos de Sombra Externa
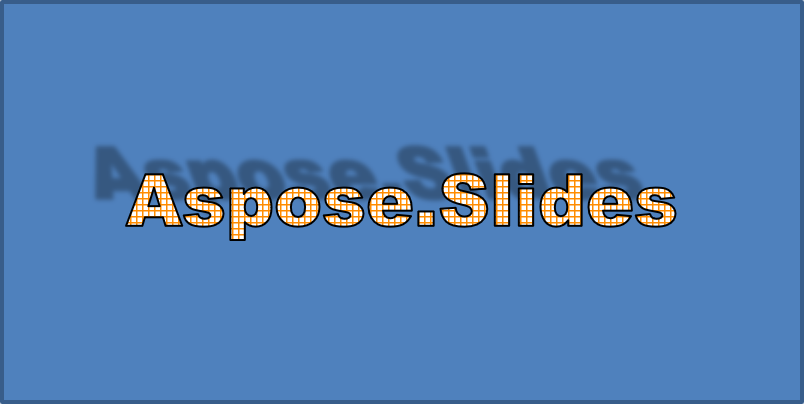
Uma sombra externa adiciona profundidade ao colocar uma sombra atrás do texto. Você pode personalizar sua cor, direção, distância, raio de desfoque, escala e inclinação.
Este exemplo chama EnableOuterShadowEffect e define uma sombra preta com raio de desfoque de 4 pontos, direção de 230 graus e distância de 30 pontos. Valores de escala de 100 preservam o tamanho da sombra, enquanto a inclinação horizontal a inclina em 20 graus. A transformação alfa define sua opacidade em 32%:
#include <DOM/Fonts/FontData.h>
#include <DOM/ColorTransformOperation.h>
#include <DOM/Effects/IOuterShadow.h>
#include <DOM/IAutoShape.h>
#include <DOM/IColorFormat.h>
#include <DOM/IColorOperationCollection.h>
#include <DOM/IEffectFormat.h>
#include <DOM/IParagraph.h>
#include <DOM/IParagraphCollection.h>
#include <DOM/IPortion.h>
#include <DOM/IPortionCollection.h>
#include <DOM/IPortionFormat.h>
#include <DOM/IShapeCollection.h>
#include <DOM/ISlide.h>
#include <DOM/ITextFrame.h>
#include <DOM/Presentation.h>
#include <DOM/ShapeType.h>
#include <drawing/color.h>

using namespace Aspose::Slides;
using namespace System::Drawing;

auto presentation = System::MakeObject<Presentation>();
auto slide = presentation->get_Slide(0);

auto autoShape = slide->get_Shapes()->AddAutoShape(ShapeType::Rectangle, 20.0f, 20.0f, 400.0f, 200.0f);
auto textFrame = autoShape->get_TextFrame();

auto portion = textFrame->get_Paragraphs()->idx_get(0)->get_Portions()->idx_get(0);
portion->set_Text(u"Aspose.Slides");

auto fontData = System::MakeObject<FontData>(u"Arial Black");
portion->get_PortionFormat()->set_LatinFont(fontData);
portion->get_PortionFormat()->set_FontHeight(36.0f);

auto effectFormat = portion->get_PortionFormat()->get_EffectFormat();
effectFormat->EnableOuterShadowEffect();

auto outerShadowEffect = effectFormat->get_OuterShadowEffect();
outerShadowEffect->get_ShadowColor()->set_Color(Color::get_Black());
outerShadowEffect->set_ScaleHorizontal(100);
outerShadowEffect->set_ScaleVertical(100);
outerShadowEffect->set_BlurRadius(4);
outerShadowEffect->set_Direction(230.0f);
outerShadowEffect->set_Distance(30);
outerShadowEffect->set_SkewHorizontal(20);
outerShadowEffect->set_SkewVertical(0);
outerShadowEffect->get_ShadowColor()->get_ColorTransform()->Add(ColorTransformOperation::SetAlpha, 0.32f);
O texto resultante:
Note
- Quando sombras externas e predefinidas são usadas juntas, apenas a sombra externa é aplicada.
- Se sombras externas e internas são usadas simultaneamente, o efeito resultante depende da versão do PowerPoint. Por exemplo, no PowerPoint 2013, o efeito é dobrado, enquanto no PowerPoint 2007, apenas a sombra externa é aplicada.
Aplicar Efeitos de Reflexo
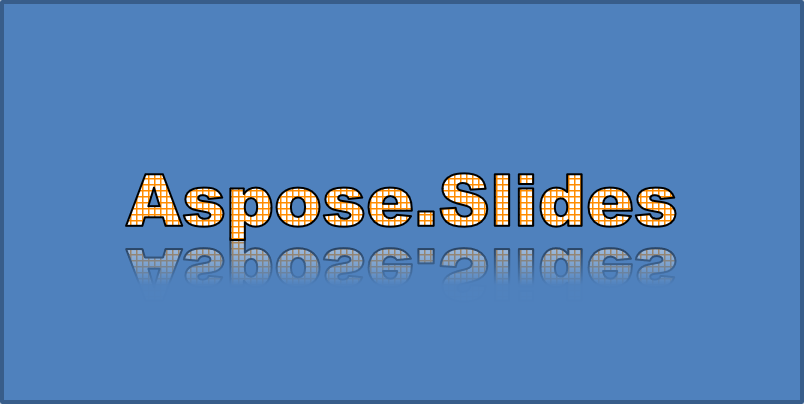
Um reflexo cria uma cópia espelhada do texto. Ajuste sua posição, escala, desfoque e opacidade para controlar sua aparência.
Este exemplo chama EnableReflectionEffect e inverte o reflexo verticalmente com escala de -100%. Ele usa raio de desfoque de 0.5‑point e distância de 4.72‑point. A opacidade diminui de 60% para 0.9% entre as posições 0% e 60% ao longo do reflexo:
#include <DOM/Fonts/FontData.h>
#include <DOM/Effects/IReflection.h>
#include <DOM/IAutoShape.h>
#include <DOM/IEffectFormat.h>
#include <DOM/IParagraph.h>
#include <DOM/IParagraphCollection.h>
#include <DOM/IPortion.h>
#include <DOM/IPortionCollection.h>
#include <DOM/IPortionFormat.h>
#include <DOM/IShapeCollection.h>
#include <DOM/ISlide.h>
#include <DOM/ITextFrame.h>
#include <DOM/Presentation.h>
#include <DOM/RectangleAlignment.h>
#include <DOM/ShapeType.h>

using namespace Aspose::Slides;

auto presentation = System::MakeObject<Presentation>();
auto slide = presentation->get_Slide(0);

auto autoShape = slide->get_Shapes()->AddAutoShape(ShapeType::Rectangle, 20.0f, 20.0f, 400.0f, 200.0f);
auto textFrame = autoShape->get_TextFrame();

auto portion = textFrame->get_Paragraphs()->idx_get(0)->get_Portions()->idx_get(0);
portion->set_Text(u"Aspose.Slides");

auto fontData = System::MakeObject<FontData>(u"Arial Black");
portion->get_PortionFormat()->set_LatinFont(fontData);
portion->get_PortionFormat()->set_FontHeight(36.0f);

auto effectFormat = portion->get_PortionFormat()->get_EffectFormat();
effectFormat->EnableReflectionEffect();

auto reflectionEffect = effectFormat->get_ReflectionEffect();
reflectionEffect->set_BlurRadius(0.5);
reflectionEffect->set_Distance(4.72);
reflectionEffect->set_StartPosAlpha(0.f);
reflectionEffect->set_EndPosAlpha(60.f);
reflectionEffect->set_Direction(90.0f);
reflectionEffect->set_ScaleHorizontal(100);
reflectionEffect->set_ScaleVertical(-100);
reflectionEffect->set_StartReflectionOpacity(60.f);
reflectionEffect->set_EndReflectionOpacity(0.9f);
reflectionEffect->set_RectangleAlign(RectangleAlignment::BottomLeft);
O texto resultante:
Aplicar Efeitos de Brilho
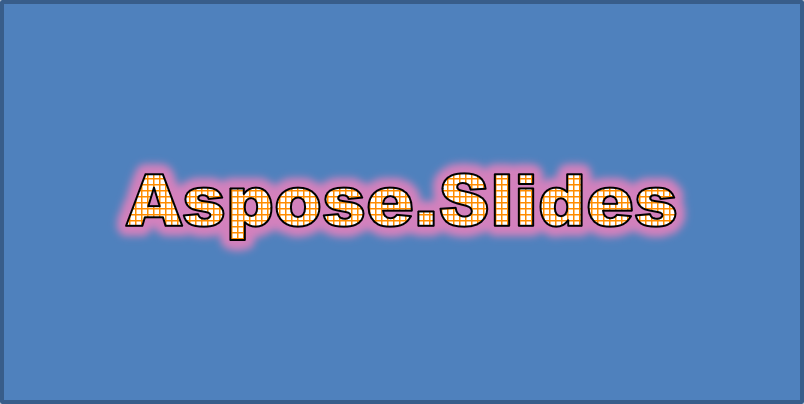
Um brilho adiciona um contorno suave colorido ao redor do texto. Ajuste sua cor, opacidade e raio para controlar o efeito.
Este exemplo chama EnableGlowEffect e aplica um brilho vermelho com 54% de opacidade e raio de 7 pontos:
#include <drawing/color.h>
#include <DOM/Fonts/FontData.h>
#include <DOM/ColorTransformOperation.h>
#include <DOM/Effects/IGlow.h>
#include <DOM/IAutoShape.h>
#include <DOM/IColorFormat.h>
#include <DOM/IColorOperationCollection.h>
#include <DOM/IEffectFormat.h>
#include <DOM/IParagraph.h>
#include <DOM/IParagraphCollection.h>
#include <DOM/IPortion.h>
#include <DOM/IPortionCollection.h>
#include <DOM/IPortionFormat.h>
#include <DOM/IShapeCollection.h>
#include <DOM/ISlide.h>
#include <DOM/ITextFrame.h>
#include <DOM/Presentation.h>
#include <DOM/ShapeType.h>

using namespace Aspose::Slides;
using namespace System::Drawing;

auto presentation = System::MakeObject<Presentation>();
auto slide = presentation->get_Slide(0);

auto autoShape = slide->get_Shapes()->AddAutoShape(ShapeType::Rectangle, 20.0f, 20.0f, 400.0f, 200.0f);
auto textFrame = autoShape->get_TextFrame();

auto portion = textFrame->get_Paragraphs()->idx_get(0)->get_Portions()->idx_get(0);
portion->set_Text(u"Aspose.Slides");

auto fontData = System::MakeObject<FontData>(u"Arial Black");
portion->get_PortionFormat()->set_LatinFont(fontData);
portion->get_PortionFormat()->set_FontHeight(36.0f);

auto effectFormat = portion->get_PortionFormat()->get_EffectFormat();
effectFormat->EnableGlowEffect();

auto glowEffect = effectFormat->get_GlowEffect();
glowEffect->get_Color()->set_Color(Color::get_Red());
glowEffect->get_Color()->get_ColorTransform()->Add(ColorTransformOperation::SetAlpha, 0.54f);
glowEffect->set_Radius(7);
O texto resultante:
Aplicar Transformações WordArt
As transformações WordArt curvam, esticam ou deformam um bloco de texto.
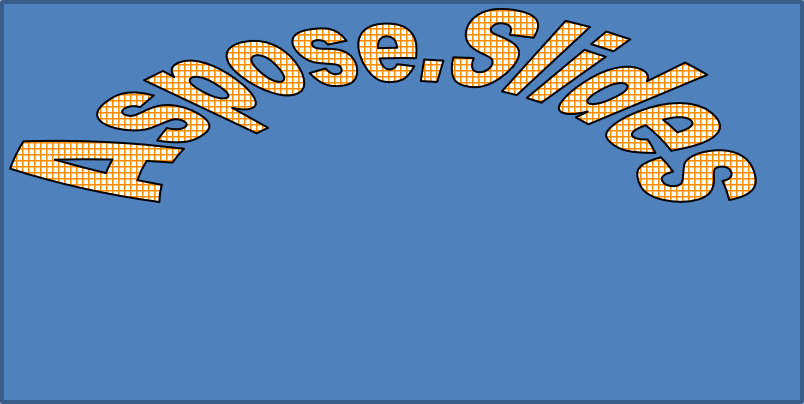
Defina ITextFrameFormat::set_Transform como ArchUpPour para curvar todo o quadro de texto para cima:
#include <DOM/IAutoShape.h>
#include <DOM/IShapeCollection.h>
#include <DOM/ISlide.h>
#include <DOM/ITextFrame.h>
#include <DOM/ITextFrameFormat.h>
#include <DOM/Presentation.h>
#include <DOM/ShapeType.h>
#include <DOM/TextShapeType.h>

using namespace Aspose::Slides;

auto presentation = System::MakeObject<Presentation>();
auto slide = presentation->get_Slide(0);

auto autoShape = slide->get_Shapes()->AddAutoShape(ShapeType::Rectangle, 20.0f, 20.0f, 400.0f, 200.0f);

auto textFrame = autoShape->get_TextFrame();
textFrame->set_Text(u"Aspose.Slides");
textFrame->get_TextFrameFormat()->set_Transform(TextShapeType::ArchUpPour);
O texto resultante:
Note
Aspose.Slides para C++ fornece um conjunto de tipos de transformação pré‑definidos.Aplicar Efeitos 3D a Formas e Texto
Você pode aplicar efeitos 3D a uma forma ou ao seu texto. Chanfros, extrusão, iluminação e configurações de câmera controlam a aparência resultante.
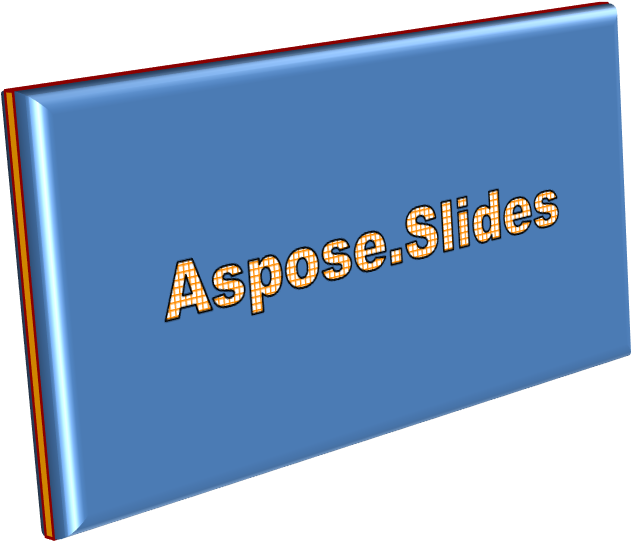
O exemplo a seguir usa IThreeDFormat para adicionar chanfros circulares, extrusão laranja e contorno vermelho escuro ao retângulo. As dimensões do chanfrado, altura da extrusão, largura do contorno e profundidade são medidas em pontos. Um material plástico, iluminação balanceada girada 40 graus ao redor do eixo Z, e uma câmera em perspectiva definem sua aparência:
#include <DOM/BevelPresetType.h>
#include <DOM/CameraPresetType.h>
#include <DOM/IAutoShape.h>
#include <DOM/ICamera.h>
#include <DOM/IColorFormat.h>
#include <DOM/ILightRig.h>
#include <DOM/IShapeBevel.h>
#include <DOM/IShapeCollection.h>
#include <DOM/ISlide.h>
#include <DOM/ITextFrame.h>
#include <DOM/IThreeDFormat.h>
#include <DOM/LightRigPresetType.h>
#include <DOM/LightingDirection.h>
#include <DOM/MaterialPresetType.h>
#include <DOM/Presentation.h>
#include <DOM/ShapeType.h>
#include <drawing/color.h>

using namespace Aspose::Slides;
using namespace System::Drawing;

auto presentation = System::MakeObject<Presentation>();
auto slide = presentation->get_Slide(0);

auto autoShape = slide->get_Shapes()->AddAutoShape(ShapeType::Rectangle, 20.0f, 20.0f, 400.0f, 200.0f);
autoShape->get_TextFrame()->set_Text(u"Aspose.Slides");

auto threeDFormat = autoShape->get_ThreeDFormat();

threeDFormat->get_BevelBottom()->set_BevelType(BevelPresetType::Circle);
threeDFormat->get_BevelBottom()->set_Height(10.5);
threeDFormat->get_BevelBottom()->set_Width(10.5);

threeDFormat->get_BevelTop()->set_BevelType(BevelPresetType::Circle);
threeDFormat->get_BevelTop()->set_Height(12.5);
threeDFormat->get_BevelTop()->set_Width(11);

threeDFormat->get_ExtrusionColor()->set_Color(Color::get_Orange());
threeDFormat->set_ExtrusionHeight(6);

threeDFormat->get_ContourColor()->set_Color(Color::get_DarkRed());
threeDFormat->set_ContourWidth(1.5);

threeDFormat->set_Depth(3);

threeDFormat->set_Material(MaterialPresetType::Plastic);

threeDFormat->get_LightRig()->set_Direction(LightingDirection::Top);
threeDFormat->get_LightRig()->set_LightType(LightRigPresetType::Balanced);
threeDFormat->get_LightRig()->SetRotation(0.0f, 0.0f, 40.0f);

threeDFormat->get_Camera()->set_CameraType(CameraPresetType::PerspectiveContrastingRightFacing);
A forma resultante:
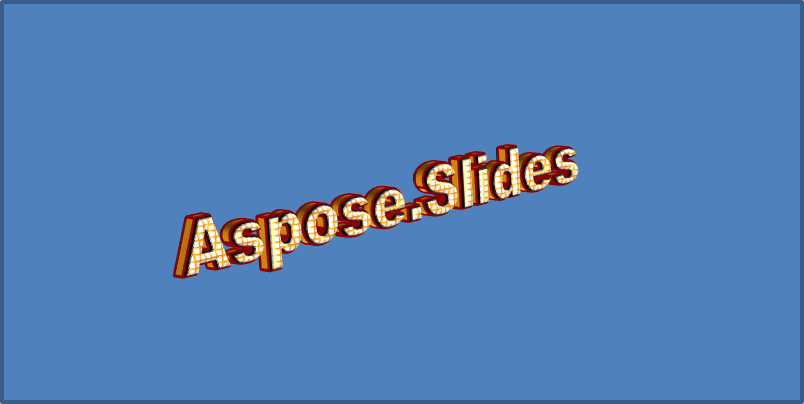
Este exemplo aplica formatação 3D semelhante ao texto através de ITextFrameFormat::get_ThreeDFormat. Chanfros menores modelam as bordas das letras, enquanto a extrusão e a iluminação dão profundidade ao texto:
#include <DOM/BevelPresetType.h>
#include <DOM/CameraPresetType.h>
#include <DOM/IAutoShape.h>
#include <DOM/ICamera.h>
#include <DOM/IColorFormat.h>
#include <DOM/ILightRig.h>
#include <DOM/IShapeBevel.h>
#include <DOM/IShapeCollection.h>
#include <DOM/ISlide.h>
#include <DOM/ITextFrame.h>
#include <DOM/ITextFrameFormat.h>
#include <DOM/IThreeDFormat.h>
#include <DOM/LightRigPresetType.h>
#include <DOM/LightingDirection.h>
#include <DOM/MaterialPresetType.h>
#include <DOM/Presentation.h>
#include <DOM/ShapeType.h>
#include <drawing/color.h>

using namespace Aspose::Slides;
using namespace System::Drawing;

auto presentation = System::MakeObject<Presentation>();
auto slide = presentation->get_Slide(0);

auto autoShape = slide->get_Shapes()->AddAutoShape(ShapeType::Rectangle, 20.0f, 20.0f, 400.0f, 200.0f);

auto textFrame = autoShape->get_TextFrame();
textFrame->set_Text(u"Aspose.Slides");

auto threeDFormat = textFrame->get_TextFrameFormat()->get_ThreeDFormat();

threeDFormat->get_BevelBottom()->set_BevelType(BevelPresetType::Circle);
threeDFormat->get_BevelBottom()->set_Height(3.5);
threeDFormat->get_BevelBottom()->set_Width(3.5);

threeDFormat->get_BevelTop()->set_BevelType(BevelPresetType::Circle);
threeDFormat->get_BevelTop()->set_Height(4);
threeDFormat->get_BevelTop()->set_Width(4);

threeDFormat->get_ExtrusionColor()->set_Color(Color::get_Orange());
threeDFormat->set_ExtrusionHeight(6);

threeDFormat->get_ContourColor()->set_Color(Color::get_DarkRed());
threeDFormat->set_ContourWidth(1.5);

threeDFormat->set_Depth(3);

threeDFormat->set_Material(MaterialPresetType::Plastic);

threeDFormat->get_LightRig()->set_Direction(LightingDirection::Top);
threeDFormat->get_LightRig()->set_LightType(LightRigPresetType::Balanced);
threeDFormat->get_LightRig()->SetRotation(0.0f, 0.0f, 40.0f);

threeDFormat->get_Camera()->set_CameraType(CameraPresetType::PerspectiveContrastingRightFacing);
O texto resultante:
Note
A aplicação de efeitos 3D ao texto ou às suas formas — e a interação entre esses efeitos — é regida por regras específicas. Considere uma cena envolvendo tanto o texto quanto a forma que o contém. Um efeito 3D inclui a representação 3D do objeto e a cena em que ele está colocado.
- Se uma cena for definida tanto para a forma quanto para o texto, a cena da forma tem prioridade e a cena do texto é ignorada.
- Se a forma não possuir sua própria cena, mas tiver uma representação 3D, a cena do texto será usada.
- Se a forma não possuir nenhum efeito 3D, ela será tratada como plana, e o efeito 3D será aplicado apenas ao texto.
Esses comportamentos referem‑se aos métodos IThreeDFormat::get_LightRig e IThreeDFormat::get_Camera.
Para manter o texto plano e legível enquanto preserva a formatação 3D da forma, veja Manter Texto Plano em uma Forma 3D para uma comparação de ambas as configurações e um exemplo completo em C++.
Perguntas Frequentes
Posso usar efeitos WordArt com diferentes fontes ou scripts (por exemplo, Árabe, Chinês)?
Sim, Aspose.Slides para C++ suporta Unicode e funciona com todas as principais fontes e scripts. Efeitos WordArt como sombra, preenchimento e contorno podem ser aplicados independentemente do idioma, embora a disponibilidade da fonte e a renderização possam depender das fontes do sistema.
Posso aplicar efeitos WordArt a elementos do mestre de slides?
Sim, você pode aplicar efeitos WordArt a formas nos slides mestres, incluindo marcadores de posição de título, rodapés ou texto de plano de fundo. Alterações feitas no layout mestre serão refletidas em todos os slides associados.
Os efeitos WordArt afetam o tamanho do arquivo da apresentação?
Um pouco. Efeitos WordArt como sombras, brilhos e preenchimentos em degradê podem aumentar ligeiramente o tamanho do arquivo devido a metadados de formatação adicionais, mas a diferença costuma ser insignificante.
Posso visualizar o resultado dos efeitos WordArt sem salvar a apresentação?
Sim, você pode renderizar slides que contêm WordArt em imagens (por exemplo, PNG, JPEG) usando ISlide::GetImage, ou renderizar formas individuais usando IShape::GetImage. Isso permite pré‑visualizar o resultado na memória ou na tela antes de salvar ou exportar a apresentação completa.