
จัดการย่อหน้าข้อความ PowerPoint ใน .NET
ภาพรวม
Aspose.Slides for .NET แสดงข้อความเป็นโครงสร้างลำดับชั้นของ text frames, paragraphs, และ portions:
- ITextFrame เป็นตัวบรรจุข้อความใน shape และให้การเข้าถึงคอลเลกชันของ paragraph
- IParagraph แทนหนึ่ง paragraph ใน text frame และให้การเข้าถึง portions และการจัดรูปแบบระดับ paragraph
- IPortion แทนชุดข้อความภายใน paragraph แต่ละ portion สามารถมีข้อความและการจัดรูปแบบระดับอักขระของตนเองได้
ดังนั้น paragraph สามารถบรรจุข้อความที่มีฟอนท์ สี ขนาด และการจัดรูปแบบอื่น ๆ แตกต่างกันโดยใช้หลาย portion
สร้างและจัดรูปแบบย่อหน้า
สร้างย่อหน้าด้วยหลาย Portion
ขั้นตอนต่อไปนี้สร้าง text frame ที่มีสาม paragraph โดยแต่ละ paragraph มีสาม portion:
- สร้างอินสแตนซ์ของคลาส Presentation
- เข้าถึงสไลด์ที่ต้องการโดยอ้างอิงจากดัชนีของมัน
- เพิ่ม IAutoShape แบบสี่เหลี่ยมลงในสไลด์
- เข้าถึง ITextFrame ของ shape
- ใช้ paragraph เริ่มต้นและเพิ่มอีกสองอ็อบเจกต์ IParagraph ลงใน text frame
- เพิ่มอ็อบเจกต์ IPortion ให้พอเพียงสำหรับแต่ละ paragraph เพื่อให้มีสาม portion แต่ละอัน paragraph เริ่มต้นมีหนึ่ง portion ว่างอยู่แล้ว
- ตั้งค่าข้อความของแต่ละ portion
- ใช้การจัดรูปแบบระดับอักขระผ่าน IPortion.PortionFormat
- บันทึก presentation ที่แก้ไขแล้ว
ตัวอย่าง C# นี้ดำเนินตามขั้นตอนดังกล่าว:
using System.Drawing;
using Aspose.Slides;
using Aspose.Slides.Export;

using var presentation = new Presentation();
var slide = presentation.Slides[0];
var shape = slide.Shapes.AddAutoShape(ShapeType.Rectangle, 50, 150, 300, 150);
var textFrame = shape.TextFrame;

var firstParagraph = textFrame.Paragraphs[0];
firstParagraph.Portions.Add(new Portion());
firstParagraph.Portions.Add(new Portion());

var secondParagraph = new Paragraph();
secondParagraph.Portions.Add(new Portion());
secondParagraph.Portions.Add(new Portion());
secondParagraph.Portions.Add(new Portion());
textFrame.Paragraphs.Add(secondParagraph);

var thirdParagraph = new Paragraph();
thirdParagraph.Portions.Add(new Portion());
thirdParagraph.Portions.Add(new Portion());
thirdParagraph.Portions.Add(new Portion());
textFrame.Paragraphs.Add(thirdParagraph);

var paragraphCount = textFrame.Paragraphs.Count;
for (var paragraphIndex = 0; paragraphIndex < paragraphCount; paragraphIndex++)
{
    var paragragaph = textFrame.Paragraphs[paragraphIndex];
    var portionCount = paragragaph.Portions.Count;
    for (var portionIndex = 0; portionIndex < portionCount; portionIndex++)
    {
        var portion = paragragaph.Portions[portionIndex];
        portion.Text = $"Portion {paragraphIndex + 1}.{portionIndex + 1}";

        if (portionIndex == 0)
        {
            portion.PortionFormat.FillFormat.FillType = FillType.Solid;
            portion.PortionFormat.FillFormat.SolidFillColor.Color = Color.Red;
            portion.PortionFormat.FontBold = NullableBool.True;
            portion.PortionFormat.FontHeight = 15;
        }
        else if (portionIndex == 1)
        {
            portion.PortionFormat.FillFormat.FillType = FillType.Solid;
            portion.PortionFormat.FillFormat.SolidFillColor.Color = Color.Blue;
            portion.PortionFormat.FontItalic = NullableBool.True;
            portion.PortionFormat.FontHeight = 18;
        }
    }
}

presentation.Save("paragraphs_with_portions.pptx", SaveFormat.Pptx);
สร้างรายการแบบหัวข้อแบบ Bullet และ Numbered
สร้างรายการแบบ Bullet หรือ Numbered
Bullet และ numbering ทำให้รายการที่เกี่ยวข้องอ่านง่ายขึ้น ใน Aspose.Slides การตั้งค่ารายการกำหนดโดยใช้ IBulletFormat
- สร้างอินสแตนซ์ของคลาส Presentation
- เข้าถึงสไลด์ที่ต้องการโดยอ้างอิงจากดัชนีของมัน
- เพิ่ม IAutoShape ลงในสไลด์ที่เลือก
- เข้าถึง ITextFrame ของ shape
- ลบ paragraph เริ่มต้นออกจาก text frame
- สร้าง Paragraph สำหรับ bullet แบบสัญลักษณ์
- ตั้งค่า IBulletFormat.Type เป็น BulletType.Symbol และระบุอักขระ bullet
- ตั้งค่าข้อความของ paragraph, ระยะเยื้อง, สี bullet, และความสูงของ bullet
- เพิ่ม paragraph ลงใน text frame
- สร้าง paragraph ที่สองและตั้งค่า IBulletFormat.Type เป็น BulletType.Numbered
- กำหนดสไตล์ bullet แบบหมายเลขและเพิ่ม paragraph ลงใน text frame
- บันทึก presentation
ตัวอย่าง C# นี้สร้าง bullet สัญลักษณ์และ bullet แบบหมายเลข:
using System;
using System.Drawing;
using Aspose.Slides;
using Aspose.Slides.Export;

using var presentation = new Presentation();
var slide = presentation.Slides[0];
var shape = slide.Shapes.AddAutoShape(ShapeType.Rectangle, 200, 200, 400, 200);
var textFrame = shape.TextFrame;
textFrame.Paragraphs.Clear();

var symbolParagraph = new Paragraph { Text = "Welcome to Aspose.Slides" };
symbolParagraph.ParagraphFormat.Bullet.Type = BulletType.Symbol;
symbolParagraph.ParagraphFormat.Bullet.Char = Convert.ToChar(0x2022);
symbolParagraph.ParagraphFormat.Indent = 25;
symbolParagraph.ParagraphFormat.Bullet.Color.ColorType = ColorType.RGB;
symbolParagraph.ParagraphFormat.Bullet.Color.Color = Color.Black;
symbolParagraph.ParagraphFormat.Bullet.IsBulletHardColor = NullableBool.True;
symbolParagraph.ParagraphFormat.Bullet.Height = 100;
textFrame.Paragraphs.Add(symbolParagraph);

var numberedParagraph = new Paragraph { Text = "This is a numbered item" };
numberedParagraph.ParagraphFormat.Bullet.Type = BulletType.Numbered;
numberedParagraph.ParagraphFormat.Bullet.NumberedBulletStyle = NumberedBulletStyle.BulletCircleNumWDBlackPlain;
numberedParagraph.ParagraphFormat.Indent = 25;
numberedParagraph.ParagraphFormat.Bullet.Color.ColorType = ColorType.RGB;
numberedParagraph.ParagraphFormat.Bullet.Color.Color = Color.Black;
numberedParagraph.ParagraphFormat.Bullet.IsBulletHardColor = NullableBool.True;
numberedParagraph.ParagraphFormat.Bullet.Height = 100;
textFrame.Paragraphs.Add(numberedParagraph);

presentation.Save("bulleted_and_numbered_list.pptx", SaveFormat.Pptx);
ใช้ Picture Bullets
Picture bullets ให้คุณใช้รูปภาพที่กำหนดเองแทนสัญลักษณ์หรือหมายเลข
- สร้างอินสแตนซ์ของคลาส Presentation
- เข้าถึงสไลด์ที่ต้องการโดยอ้างอิงจากดัชนีของมัน
- เพิ่ม IAutoShape แล้วเข้าถึง ITextFrame ของมัน
- ลบ paragraph เริ่มต้นออกจาก text frame
- โหลดรูปภาพ bullet แล้วเพิ่มเข้าไปในคอลเลกชันรูปภาพของ presentation เป็น IPPImage
- สร้าง Paragraph แล้วตั้งค่าข้อความของมัน
- ตั้งค่า IBulletFormat.Type เป็น BulletType.Picture
- กำหนดรูปภาพผ่าน IBulletFormat.Picture แล้วตั้งค่าความสูงของ bullet
- เพิ่ม paragraph ลงใน text frame
- บันทึก presentation ที่แก้ไขแล้ว
ตัวอย่าง C# นี้สร้าง picture bullet:
using Aspose.Slides;
using Aspose.Slides.Export;

using var presentation = new Presentation();
var slide = presentation.Slides[0];

using var bulletImage = Images.FromFile("bullets.png");
var presentationImage = presentation.Images.AddImage(bulletImage);

var shape = slide.Shapes.AddAutoShape(ShapeType.Rectangle, 200, 200, 400, 200);
var textFrame = shape.TextFrame;
textFrame.Paragraphs.Clear();

var paragraph = new Paragraph { Text = "Welcome to Aspose.Slides" };
paragraph.ParagraphFormat.Bullet.Type = BulletType.Picture;
paragraph.ParagraphFormat.Bullet.Picture.Image = presentationImage;
paragraph.ParagraphFormat.Bullet.Height = 100;
textFrame.Paragraphs.Add(paragraph);

presentation.Save("picture_bullet.pptx", SaveFormat.Pptx);
presentation.Save("picture_bullet.ppt", SaveFormat.Ppt);
สร้าง Multilevel List
ตั้งค่า IParagraphFormat.Depth เพื่อกำหนดระดับของ paragraph ในรายการ ระดับบนสุดมีค่า depth เป็น 0
- สร้าง Presentation แล้วเข้าถึงสไลด์หนึ่ง
- เพิ่ม IAutoShape แล้วล้าง paragraph เริ่มต้นออกจาก text frame ของมัน
- สร้างสี่ paragraph และกำหนดสัญลักษณ์ bullet ให้แต่ละรายการ
- ตั้งค่าค่า IParagraphFormat.Depth เป็น
0,1,2, และ3 - เพิ่ม paragraph ทั้งหมดลงใน text frame แล้วบันทึก presentation
ตัวอย่าง C# นี้สร้างรายการ bullet สี่ระดับ:
using System;
using System.Drawing;
using Aspose.Slides;
using Aspose.Slides.Export;

using var presentation = new Presentation();
var slide = presentation.Slides[0];
var shape = slide.Shapes.AddAutoShape(ShapeType.Rectangle, 200, 200, 400, 200);
var textFrame = shape.TextFrame;
textFrame.Paragraphs.Clear();

var firstParagraph = new Paragraph { Text = "Content" };
firstParagraph.ParagraphFormat.Bullet.Type = BulletType.Symbol;
firstParagraph.ParagraphFormat.Bullet.Char = Convert.ToChar(0x2022);
firstParagraph.ParagraphFormat.DefaultPortionFormat.FillFormat.FillType = FillType.Solid;
firstParagraph.ParagraphFormat.DefaultPortionFormat.FillFormat.SolidFillColor.Color = Color.Black;
firstParagraph.ParagraphFormat.Depth = 0;

var secondParagraph = new Paragraph { Text = "Second level" };
secondParagraph.ParagraphFormat.Bullet.Type = BulletType.Symbol;
secondParagraph.ParagraphFormat.Bullet.Char = '-';
secondParagraph.ParagraphFormat.DefaultPortionFormat.FillFormat.FillType = FillType.Solid;
secondParagraph.ParagraphFormat.DefaultPortionFormat.FillFormat.SolidFillColor.Color = Color.Black;
secondParagraph.ParagraphFormat.Depth = 1;

var thirdParagraph = new Paragraph { Text = "Third level" };
thirdParagraph.ParagraphFormat.Bullet.Type = BulletType.Symbol;
thirdParagraph.ParagraphFormat.Bullet.Char = Convert.ToChar(0x2022);
thirdParagraph.ParagraphFormat.DefaultPortionFormat.FillFormat.FillType = FillType.Solid;
thirdParagraph.ParagraphFormat.DefaultPortionFormat.FillFormat.SolidFillColor.Color = Color.Black;
thirdParagraph.ParagraphFormat.Depth = 2;

var fourthParagraph = new Paragraph { Text = "Fourth level" };
fourthParagraph.ParagraphFormat.Bullet.Type = BulletType.Symbol;
fourthParagraph.ParagraphFormat.Bullet.Char = '-';
fourthParagraph.ParagraphFormat.DefaultPortionFormat.FillFormat.FillType = FillType.Solid;
fourthParagraph.ParagraphFormat.DefaultPortionFormat.FillFormat.SolidFillColor.Color = Color.Black;
fourthParagraph.ParagraphFormat.Depth = 3;

textFrame.Paragraphs.Add(firstParagraph);
textFrame.Paragraphs.Add(secondParagraph);
textFrame.Paragraphs.Add(thirdParagraph);
textFrame.Paragraphs.Add(fourthParagraph);

presentation.Save("multilevel_list.pptx", SaveFormat.Pptx);
กำหนดจุดเริ่มต้นของ Numbered List ให้เป็นค่า Customized
ใช้ IBulletFormat.NumberedBulletStartWith เพื่อกำหนดหมายเลขเริ่มต้นที่แสดงสำหรับ paragraph ที่เป็น numbered
- สร้าง Presentation แล้วเพิ่ม IAutoShape ลงในสไลด์
- ลบ paragraph เริ่มต้นออกจาก text frame ของ shape
- สร้าง paragraph numbered สามรายการ
- ตั้งค่า IBulletFormat.NumberedBulletStartWith เป็น
2,3, และ7สำหรับแต่ละ paragraph ที่เกี่ยวข้อง - เพิ่ม paragraph เหล่านั้นลงใน text frame แล้วบันทึก presentation
ตัวอย่าง C# นี้กำหนดหมายเลขเริ่มต้นแบบกำหนดเองให้กับแต่ละ paragraph:
using Aspose.Slides;
using Aspose.Slides.Export;

using var presentation = new Presentation();
var slide = presentation.Slides[0];
var shape = slide.Shapes.AddAutoShape(ShapeType.Rectangle, 200, 200, 400, 200);
var textFrame = shape.TextFrame;
textFrame.Paragraphs.Clear();

var firstParagraph = new Paragraph { Text = "Start at 2" };
firstParagraph.ParagraphFormat.Bullet.Type = BulletType.Numbered;
firstParagraph.ParagraphFormat.Bullet.NumberedBulletStartWith = 2;
textFrame.Paragraphs.Add(firstParagraph);

var secondParagraph = new Paragraph { Text = "Start at 3" };
secondParagraph.ParagraphFormat.Bullet.Type = BulletType.Numbered;
secondParagraph.ParagraphFormat.Bullet.NumberedBulletStartWith = 3;
textFrame.Paragraphs.Add(secondParagraph);

var thirdParagraph = new Paragraph { Text = "Start at 7" };
thirdParagraph.ParagraphFormat.Bullet.Type = BulletType.Numbered;
thirdParagraph.ParagraphFormat.Bullet.NumberedBulletStartWith = 7;
textFrame.Paragraphs.Add(thirdParagraph);

presentation.Save("custom_numbered_list.pptx", SaveFormat.Pptx);
ควบคุมการจัดวางและคุณสมบัติ End ของ Paragraph
ตั้งค่า First-Line Indent
ใช้คุณสมบัติ IParagraphFormat.Indent เพื่อควบคุมการเยื้องบรรทัดแรกของ paragraph ค่าติดลบหรือบวกจะย้ายบรรทัดแรกเทียบกับขอบซ้ายของ paragraph เท่านั้น ค่าบวกจะทำให้บรรทัดแรกเลื่อนไปขวา ส่วนบรรทัดที่เหลือคงที่
ใช้ IParagraphFormat.MarginLeft เมื่อคุณต้องการย้ายทั้ง paragraph ใช้ IParagraphFormat.Indent หากต้องการย้ายเฉพาะบรรทัดแรก
ตัวอย่างด้านล่างสร้างหลาย paragraph และใช้ค่า IParagraphFormat.Indent ที่ต่างกันเพื่อแสดงผลของการเยื้องบรรทัดแรกต่อการจัดวางของ paragraph
- สร้างอินสแตนซ์ของคลาส Presentation
- เข้าถึงสไลด์เป้าหมาย
- เพิ่ม IAutoShape แบบสี่เหลี่ยมลงในสไลด์
- เข้าถึง ITextFrame ของ shape แล้วลบ paragraph เริ่มต้น
- สร้างหลาย paragraph แล้วตั้งค่า Indent ที่ต่างกันสำหรับแต่ละอัน
- เพิ่ม paragraph เหล่านั้นลงใน text frame
- บันทึก presentation ที่แก้ไขแล้ว
โค้ดนี้แสดงวิธีตั้งค่าเยื้องของ paragraph:
using System.Drawing;
using Aspose.Slides;
using Aspose.Slides.Export;

using var presentation = new Presentation();
var slide = presentation.Slides[0];
var shape = slide.Shapes.AddAutoShape(ShapeType.Rectangle, 50, 50, 420, 220);
shape.FillFormat.FillType = FillType.NoFill;
shape.LineFormat.FillFormat.FillType = FillType.Solid;
shape.LineFormat.FillFormat.SolidFillColor.Color = Color.Gray;

var textFrame = shape.TextFrame;
textFrame.TextFrameFormat.AutofitType = TextAutofitType.Shape;
textFrame.Paragraphs.Clear();

var firstParagraph = new Paragraph { Text = "No first-line indent. Wrapped lines start at the same position as the first line." };
firstParagraph.ParagraphFormat.DefaultPortionFormat.FillFormat.FillType = FillType.Solid;
firstParagraph.ParagraphFormat.DefaultPortionFormat.FillFormat.SolidFillColor.Color = Color.Black;
firstParagraph.ParagraphFormat.MarginLeft = 20;
firstParagraph.ParagraphFormat.Indent = 0;

var secondParagraph = new Paragraph { Text = "First-line indent of 20 points. The first line moves to the right, while wrapped lines remain aligned to the paragraph body." };
secondParagraph.ParagraphFormat.DefaultPortionFormat.FillFormat.FillType = FillType.Solid;
secondParagraph.ParagraphFormat.DefaultPortionFormat.FillFormat.SolidFillColor.Color = Color.Black;
secondParagraph.ParagraphFormat.MarginLeft = 20;
secondParagraph.ParagraphFormat.Indent = 20;

var thirdParagraph = new Paragraph { Text = "First-line indent of 40 points. This paragraph shows a larger first-line offset to make the effect easier to see." };
thirdParagraph.ParagraphFormat.DefaultPortionFormat.FillFormat.FillType = FillType.Solid;
thirdParagraph.ParagraphFormat.DefaultPortionFormat.FillFormat.SolidFillColor.Color = Color.Black;
thirdParagraph.ParagraphFormat.MarginLeft = 20;
thirdParagraph.ParagraphFormat.Indent = 40;

textFrame.Paragraphs.Add(firstParagraph);
textFrame.Paragraphs.Add(secondParagraph);
textFrame.Paragraphs.Add(thirdParagraph);

presentation.Save("paragraph_indent.pptx", SaveFormat.Pptx);
ผลลัพธ์:

ตั้งค่า Hanging Indent
Hanging indent คือการจัดวาง paragraph ที่บรรทัดแรกเริ่มอยู่ทางซ้ายของบรรทัดที่เหลือ ใน Aspose.Slides คุณสร้างเอฟเฟกต์นี้ด้วยคุณสมบัติ IParagraphFormat.Indent ตั้งค่า Indent เป็นค่าลบเพื่อย้ายบรรทัดแรกไปซ้ายเมื่อเทียบกับเนื้อหา paragraph
โดยปกติ IParagraphFormat.MarginLeft กำหนดตำแหน่งซ้ายของเนื้อหา paragraph ส่วน IParagraphFormat.Indent กำหนดตำแหน่งของบรรทัดแรกเทียบกับ margin นั้น การสร้าง hanging indent ทำได้โดยตั้งค่า MarginLeft เป็นค่าบวกและ Indent เป็นค่าลบ
การจัดรูปแบบนี้มีประโยชน์สำหรับบรรณานุกรม, การอ้างอิง, รายการอภิธานศัพท์, และ paragraph อื่น ๆ ที่บรรทัดพับต้องจัดแนวใต้เนื้อหา paragraph แทนที่จะอยู่ใต้ตัวอักษรแรกของบรรทัดแรก
- สร้างอินสแตนซ์ของคลาส Presentation
- เข้าถึงสไลด์เป้าหมาย
- เพิ่ม IAutoShape แบบสี่เหลี่ยมลงในสไลด์
- เข้าถึง ITextFrame ของ shape แล้วลบ paragraph เริ่มต้น
- สร้าง paragraph และตั้งค่า MarginLeft เป็นค่าบวกสำหรับแต่ละ paragraph
- ตั้งค่า Indent เป็นค่าลบเพื่อสร้างเอฟเฟกต์ hanging indent
- เพิ่ม paragraph เหล่านั้นลงใน text frame
- บันทึก presentation ที่แก้ไขแล้ว
โค้ดนี้แสดงวิธีตั้งค่า hanging indent สำหรับ paragraph:
using System.Drawing;
using Aspose.Slides;
using Aspose.Slides.Export;

using var presentation = new Presentation();
var slide = presentation.Slides[0];
var shape = slide.Shapes.AddAutoShape(ShapeType.Rectangle, 50, 50, 420, 220);
shape.FillFormat.FillType = FillType.NoFill;
shape.LineFormat.FillFormat.FillType = FillType.Solid;
shape.LineFormat.FillFormat.SolidFillColor.Color = Color.Gray;

var textFrame = shape.TextFrame;
textFrame.TextFrameFormat.AutofitType = TextAutofitType.Shape;
textFrame.Paragraphs.Clear();

var firstParagraph = new Paragraph { Text = "A hanging indent is created by combining a positive left margin with a negative indent. The first line starts to the left, while wrapped lines align with the paragraph body." };
firstParagraph.ParagraphFormat.DefaultPortionFormat.FillFormat.FillType = FillType.Solid;
firstParagraph.ParagraphFormat.DefaultPortionFormat.FillFormat.SolidFillColor.Color = Color.Black;
firstParagraph.ParagraphFormat.MarginLeft = 40;
firstParagraph.ParagraphFormat.Indent = -20;

var secondParagraph = new Paragraph { Text = "This second example uses a deeper hanging indent so the difference between the first line and the wrapped lines is easier to compare." };
secondParagraph.ParagraphFormat.DefaultPortionFormat.FillFormat.FillType = FillType.Solid;
secondParagraph.ParagraphFormat.DefaultPortionFormat.FillFormat.SolidFillColor.Color = Color.Black;
secondParagraph.ParagraphFormat.MarginLeft = 60;
secondParagraph.ParagraphFormat.Indent = -30;

textFrame.Paragraphs.Add(firstParagraph);
textFrame.Paragraphs.Add(secondParagraph);

presentation.Save("hanging_indent.pptx", SaveFormat.Pptx);
ผลลัพธ์:

ตั้งค่า End Paragraph Run Properties
คุณสมบัติ IParagraph.EndParagraphPortionFormat ควบคุมการจัดรูปแบบของสัญลักษณ์จบ paragraph ตัวอย่างต่อไปนี้กำหนดขนาดฟอนท์และฟอนท์ Latin ให้กับสัญลักษณ์จบของ paragraph ที่สอง:
- โหลด Presentation แล้วเข้าถึงสไลด์หนึ่ง
- เพิ่ม IAutoShape แล้วลบ paragraph เริ่มต้น
- สร้างสอง paragraph แล้วเพิ่ม portion ของข้อความลงไป
- สร้าง PortionFormat สำหรับสัญลักษณ์จบของ paragraph ที่สอง
- ตั้งค่า IBasePortionFormat.FontHeight และ IBasePortionFormat.LatinFont
- กำหนดรูปแบบให้กับ IParagraph.EndParagraphPortionFormat แล้วบันทึก presentation
using Aspose.Slides;
using Aspose.Slides.Export;

using var presentation = new Presentation("Test.pptx");
var slide = presentation.Slides[0];
var shape = slide.Shapes.AddAutoShape(ShapeType.Rectangle, 10, 10, 200, 250);
var textFrame = shape.TextFrame;
textFrame.Paragraphs.Clear();

var firstParagraph = new Paragraph();
firstParagraph.Portions.Add(new Portion("Sample text"));

var secondParagraph = new Paragraph();
secondParagraph.Portions.Add(new Portion("Sample text 2"));

var endParagraphFormat = new PortionFormat();
endParagraphFormat.FontHeight = 48;
endParagraphFormat.LatinFont = new FontData("Times New Roman");
secondParagraph.EndParagraphPortionFormat = endParagraphFormat;

textFrame.Paragraphs.Add(firstParagraph);
textFrame.Paragraphs.Add(secondParagraph);

presentation.Save("end_paragraph_format.pptx", SaveFormat.Pptx);
นับจำนวนบรรทัดที่แสดงผล
สำหรับกฎของ paragraph ที่ส่งผลต่อการตัดบรรทัดอัตโนมัติและเครื่องหมายวรรคตอนที่ปลายบรรทัด โปรดดู Control Line Breaking และ Control Hanging Punctuation
ใช้ IParagraph.GetLinesCount เพื่อให้นับจำนวนบรรทัดที่ paragraph ใช้หลังจากการจัด layout ของข้อความ รวมถึงการตัดบรรทัดอัตโนมัติ ซึ่งมีประโยชน์เมื่อทำการตรวจสอบความยาวของข้อความและการจัด layout ในเทมเพลต presentation
paragraph คือรายการหนึ่งใน ITextFrame.Paragraphs และอาจใช้หลายบรรทัดที่แสดงผล การใส่ line break แบบชัดเจนภายใน paragraph จะสร้างบรรทัดใหม่โดยไม่ต้องสร้าง paragraph เพิ่มเติม การตัดบรรทัดอัตโนมัติสร้างบรรทัดตามความกว้างที่มีอยู่โดยไม่แทรก line break ลงในข้อความ ดังนั้นการนับ paragraph หรือตัวอักษร line‑break จะไม่ให้จำนวนบรรทัดที่แสดงผลได้
ตัวอย่างต่อไปนี้สร้างรูปทรงข้อความ, นับบรรทัด, ลดความกว้างของรูปทรง, แล้วเปลี่ยนข้อความเป็นสตริงสั้นกว่า เปิดการตัดบรรทัดและปิด autofit เพื่อให้ความกว้างของรูปทรงควบคุมการตัดบรรทัดโดยไม่ปรับขนาดข้อความหรือรูปทรงโดยอัตโนมัติ ขนาดของรูปทรงกำหนดเป็นพอยต์ สุดท้ายตัวอย่างเพิ่ม paragraph อีกหนึ่งรายการและรวมจำนวนบรรทัดทั้งหมดใน text frame
using System;
using Aspose.Slides;

using var presentation = new Presentation();
var slide = presentation.Slides[0];

var shape = slide.Shapes.AddAutoShape(ShapeType.Rectangle, 50, 50, 400, 200);
var textFrame = shape.TextFrame;
textFrame.TextFrameFormat.WrapText = NullableBool.True;
textFrame.TextFrameFormat.AutofitType = TextAutofitType.None;

var paragraph = textFrame.Paragraphs[0];
paragraph.ParagraphFormat.DefaultPortionFormat.FontHeight = 20;
paragraph.Text = "This text demonstrates how automatic wrapping changes the number of rendered lines.";
Console.WriteLine($"Original width: {paragraph.GetLinesCount()}");

shape.Width = 150;
Console.WriteLine($"Narrower shape: {paragraph.GetLinesCount()}");

paragraph.Text = "Short text.";
Console.WriteLine($"Shorter text: {paragraph.GetLinesCount()}");

var secondParagraph = new Paragraph { Text = "Another paragraph." };
secondParagraph.ParagraphFormat.DefaultPortionFormat.FontHeight = 20;
textFrame.Paragraphs.Add(secondParagraph);

var totalLineCount = 0;
foreach (var currentParagraph in textFrame.Paragraphs)
{
    totalLineCount += currentParagraph.GetLinesCount();
}
Console.WriteLine($"Total lines in the text frame: {totalLineCount}");
ด้วยข้อความและขนาดเหล่านี้ การทำให้รูปทรงแคบลงจะเพิ่มจำนวนบรรทัด ส่วนการเปลี่ยนข้อความเป็นสตริงสั้นจะลดจำนวนบรรทัด จำนวนที่แน่นอนอาจแตกต่างตามฟอนท์ที่มีอยู่และการแทนที่, ขนาดฟอนท์, margin, การเยื้อง, การตัดบรรทัด, และการตั้งค่า autofit ใช้ฟอนท์และการตั้งค่า layout ที่ตั้งใจสำหรับสภาพแวดล้อมเป้าหมายเมื่อทำการตรวจสอบเทมเพลต
จำนวนบรรทัดเพียงอย่างเดียวไม่บ่งบอกว่าข้อความล้นพื้นที่ของคอนเทนเนอร์หรือไม่ ความสูงที่มีอยู่, ความสูงของบรรทัด, ระยะห่างของ paragraph และบรรทัด, และพฤติกรรม autofit ยังมีส่วนสำคัญ; แม้บรรทัดเดียวก็อาจเกินความกว้างที่มีอยู่เมื่อปิดการตัดบรรทัด
นำเข้าและส่งออกเนื้อหา Paragraph
นำเข้า HTML Text ไปยัง Paragraphs
ใช้ ParagraphCollection.AddFromHtml เพื่อแปลง markup HTML เป็น paragraph และ portion ภายใน text frame
- สร้างอินสแตนซ์ของคลาส Presentation
- เข้าถึงสไลด์และเพิ่ม IAutoShape
- เข้าถึง ITextFrame ของ shape แล้วลบ paragraph เริ่มต้น
- อ่านไฟล์ HTML ต้นทาง
- ส่งสตริง HTML ไปยัง ParagraphCollection.AddFromHtml
- บันทึก presentation ที่แก้ไขแล้ว
ตัวอย่าง C# นี้นำเข้า HTML ไปยัง text frame:
using System.IO;
using Aspose.Slides;
using Aspose.Slides.Export;

using var presentation = new Presentation();
var slide = presentation.Slides[0];
var shapeWidth = presentation.SlideSize.Size.Width - 20;
var shapeHeight = presentation.SlideSize.Size.Height - 20;
var shape = slide.Shapes.AddAutoShape(ShapeType.Rectangle, 10, 10, shapeWidth, shapeHeight);
shape.FillFormat.FillType = FillType.NoFill;
shape.TextFrame.Paragraphs.Clear();

using var reader = new StreamReader("file.html");
var html = reader.ReadToEnd();
shape.TextFrame.Paragraphs.AddFromHtml(html);

presentation.Save("html_text.pptx", SaveFormat.Pptx);
ส่งออกข้อความ Paragraph เป็น HTML
ใช้ ParagraphCollection.ExportToHtml เพื่อส่งออกช่วงของ paragraph ที่เลือกเป็น HTML
- สร้างอินสแตนซ์ของคลาส Presentation แล้วโหลด presentation ที่ต้องการ
- เข้าถึงสไลด์และค้นหา IAutoShape ที่มีข้อความอยู่
- เข้าถึง ITextFrame ของ shape
- เรียก ParagraphCollection.ExportToHtml พร้อมกับดัชนี paragraph เริ่มต้นและจำนวน paragraph ที่ต้องการส่งออก
- เขียนสตริง HTML ที่ได้ไปยังไฟล์
ตัวอย่าง C# นี้ส่งออก paragraph ทั้งหมดจาก shape ข้อความแรก:
using System;
using System.IO;
using System.Text;
using Aspose.Slides;

using var presentation = new Presentation("ExportingHTMLText.pptx");
var shape = presentation.Slides[0].Shapes[0];

if (shape is IAutoShape textShape && textShape.TextFrame != null)
{
    var paragraphs = textShape.TextFrame.Paragraphs;
    var html = paragraphs.ExportToHtml(0, paragraphs.Count, null);
    using var writer = new StreamWriter("paragraphs.html", false, Encoding.UTF8);
    writer.Write(html);
}
else
{
    Console.WriteLine("The first shape is not a text shape.");
}
เรนเดอร์ Paragraph ให้เป็นภาพ
IParagraph.GetImage เรนเดอร์ paragraph แยกแต่ละอันโดยตรงและคืนค่า IImage คุณสามารถบันทึกผลลัพธ์เป็นไฟล์หรือสตรีมด้วย IImage.Save ไม่จำเป็นต้องเรนเดอร์ shape ที่บรรจุหรือครอภาพด้วยตนเอง
IParagraph.GetImage อาจคืนค่า null หากไม่พบ paragraph ในคอลเลกชันแม่, ไม่มีขอบเขตการเรนเดอร์ที่ถูกต้อง, หรือไม่สามารถเรนเดอร์ได้ ตรวจสอบผลลัพธ์ก่อนบันทึกและทำลายภาพที่คืนค่าหลังใช้
เรนเดอร์ Paragraph ที่สเกลเริ่มต้น
สมมติว่าเรามีไฟล์ presentation ชื่อ sample.pptx มีหนึ่งสไลด์ ซึ่ง shape แรกเป็น text box ที่มีสาม paragraph
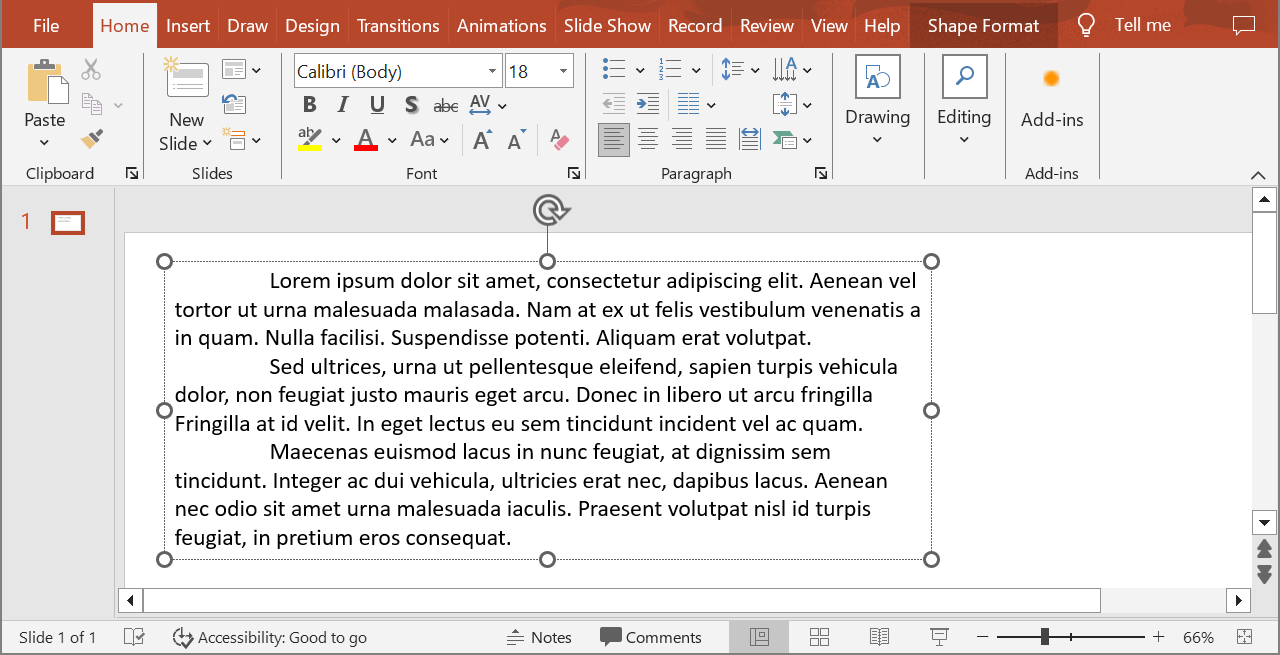
ตัวอย่างต่อไปนี้เรนเดอร์ paragraph ที่สองใน text shape ปกติที่สเกลเริ่มต้นและบันทึกภาพที่ได้เป็น PNG การใช้ using ทำให้แน่ใจว่าภาพถูกทำลายอย่างถูกต้อง
using System;
using Aspose.Slides;

using var presentation = new Presentation("sample.pptx");

var shape = presentation.Slides[0].Shapes[0];
if (shape is IAutoShape textShape &&
    textShape.TextFrame != null &&
    textShape.TextFrame.Paragraphs.Count > 1)
{
    var paragraph = textShape.TextFrame.Paragraphs[1];
    using var paragraphImage = paragraph.GetImage();

    if (paragraphImage != null)
    {
        paragraphImage.Save("paragraph.png", ImageFormat.Png);
    }
    else
    {
        Console.WriteLine("The paragraph could not be rendered.");
    }
}
else
{
    Console.WriteLine("The expected text shape or paragraph was not found.");
}
ผลลัพธ์:

เรนเดอร์ Paragraph ในเซลล์ตารางพร้อมสเกล
ใช้การโอเวอร์โหลดของ IParagraph.GetImage ที่รับพารามิเตอร์ float scaleX และ float scaleY เพื่อตั้งค่าปัจจัยสเกลแนวนอนและแนวตั้ง ตัวอย่างต่อไปนี้สร้างตาราง, เรนเดอร์ paragraph ในเซลล์แรกโดยขยายความกว้างและความสูงเป็นสองเท่าของค่ามาตรฐาน, แล้วบันทึกผลเป็นภาพ PNG
using System;
using Aspose.Slides;

var scaleX = 2f;
var scaleY = 2f;

using var presentation = new Presentation();
var slide = presentation.Slides[0];
var table = slide.Shapes.AddTable(50, 50, new[] { 300d }, new[] { 80d });
var paragraph = table[0, 0].TextFrame.Paragraphs[0];
paragraph.Text = "Text in a table cell";

using var paragraphImage = paragraph.GetImage(scaleX, scaleY);
if (paragraphImage != null)
{
    paragraphImage.Save("table_paragraph.png", ImageFormat.Png);
}
else
{
    Console.WriteLine("The paragraph could not be rendered.");
}
ปัจจัยสเกล 1 รักษาขนาดพิกเซลเริ่มต้น ตัวอย่างเช่น 2 สำหรับทั้งสองปัจจัยจะให้ภาพที่กว้างและสูงประมาณสองเท่าของขนาดมาตรฐาน ทำให้จำนวนพิกเซลเพิ่มเป็นสี่เท่า ปัจจัยที่สูงกว่าให้ข้อความคมชัดมากขึ้นสำหรับการซูมหรือการส่งออกความละเอียดสูง แต่ก็เพิ่มการใช้หน่วยความจำและขนาดไฟล์ ปัจจัยที่ต่ำกว่า 1 ให้ภาพเล็กลงและรายละเอียดน้อยลง ใช้ปัจจัยเท่ากันเพื่อรักษาอัตราส่วนของ paragraph; ปัจจัยแนวนอนและแนวตั้งที่แตกต่างกันจะยืดผลลัพธ์อย่างอิสระ
การเรนเดอร์ shape ทั้งหมดด้วย IShape.GetImage ยังคงมีประโยชน์เมื่อผลลัพธ์ต้องรวมการเติมสี, เส้นขอบ หรือบริบทภาพอื่นของ shape สำหรับภาพที่มีเฉพาะ paragraph ให้ใช้ IParagraph.GetImage
FAQ
ฉันสามารถปิดการตัดบรรทัดอัตโนมัติภายใน text frame ได้ทั้งหมดหรือไม่?
ได้. ตั้งค่า ITextFrameFormat.WrapText เพื่อปิดการตัดบรรทัด ทำให้บรรทัดไม่แตกที่ขอบของ text frame
ฉันจะดึงค่าขอบเขตบนสไลด์ของ paragraph เฉพาะได้อย่างไร?
ใช้ IParagraph.GetRect เพื่อรับสี่เหลี่ยมขอบของ paragraph. IPortion.GetRect ให้ขอบเขตของ portion แต่ละอัน
การจัดแนวของ paragraph (ซ้าย, ขวา, กลาง, หรือจัดเต็ม) ถูกควบคุมที่ไหน?
IParagraphFormat.Alignment เป็นการตั้งค่าระดับ paragraph และใช้กับทั้ง paragraph โดยไม่คำนึงถึงการจัดรูปแบบของ portion แยกต่างหาก
ฉันสามารถตั้งค่าภาษาตรวจสอบของส่วนหนึ่งของ paragraph ได้หรือไม่?
ได้. ตั้งค่า IBasePortionFormat.LanguageId สำหรับ portion แต่ละอัน ทำให้ paragraph หนึ่งสามารถมีข้อความหลายภาษาได้