
สร้างและใช้เอฟเฟกต์ WordArt ใน Java
ภาพรวม
เอฟเฟกต์ WordArt ช่วยให้คุณปรับสไตล์ข้อความด้วยการเติมสี, เส้นขอบ, เงา, การสะท้อน, แสงเรืองราว, การแปลงรูป, และการจัดรูปแบบ 3 มิติ บทความนี้อธิบายวิธีสร้างและปรับแต่งเอฟเฟกต์เหล่านี้ในงานนำเสนอ PowerPoint โดยใช้ Aspose.Slides for Java โดยไม่ต้องติดตั้ง Microsoft Office.
สร้างเทมเพลต WordArt แบบง่ายและนำไปใช้กับข้อความ
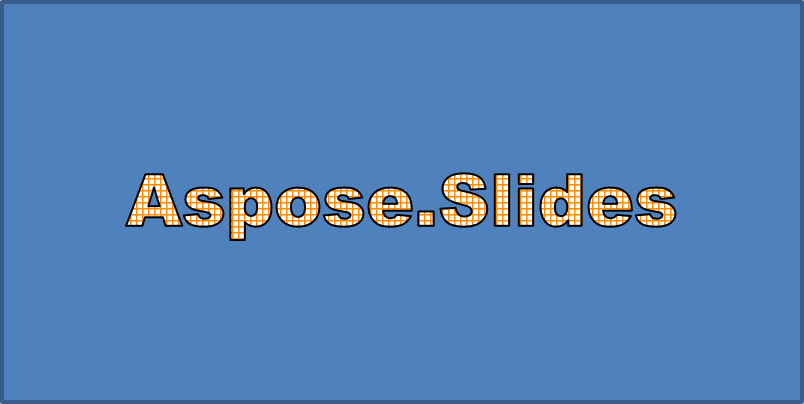
ตัวอย่างต่อไปนี้สร้างสไตล์ WordArt แบบง่ายโดยตั้งค่าข้อความ, ฟอนต์, การเติมลายพิมพ์, และเส้นขอบ.
แต่ละตัวอย่างสร้างงานนำเสนอใหม่และเพิ่มสี่เหลี่ยมผืนผ้าลงบนสไลด์แรก; ไม่ต้องการไฟล์อินพุต ตัวอย่างแรกตั้งข้อความเป็น “Aspose.Slides”. ตำแหน่งและขนาดของรูปร่างวัดเป็นหน่วยจุด:
import com.aspose.slides.*;

Presentation presentation = new Presentation();
try {
    ISlide slide = presentation.getSlides().get_Item(0);

    IAutoShape autoShape = slide.getShapes().addAutoShape(ShapeType.Rectangle, 20, 20, 400, 200);
    ITextFrame textFrame = autoShape.getTextFrame();

    IPortion portion = textFrame.getParagraphs().get_Item(0).getPortions().get_Item(0);
    portion.setText("Aspose.Slides");
} finally {
    presentation.dispose();
}
ตั้งฟอนต์เป็น Arial Black ขนาด 36 จุดเพื่อให้การจัดรูปแบบเด่นชัดยิ่งขึ้น:
import com.aspose.slides.*;

Presentation presentation = new Presentation();
try {
    ISlide slide = presentation.getSlides().get_Item(0);

    IAutoShape autoShape = slide.getShapes().addAutoShape(ShapeType.Rectangle, 20, 20, 400, 200);

    IPortion portion = autoShape.getTextFrame().getParagraphs().get_Item(0).getPortions().get_Item(0);
    portion.setText("Aspose.Slides");
    FontData font = new FontData("Arial Black");
    portion.getPortionFormat().setLatinFont(font);
    portion.getPortionFormat().setFontHeight(36);
} finally {
    presentation.dispose();
}
ใช้ลายแบบ SmallGrid ที่มีสีพื้นหน้าเป็นสีส้มเข้มและพื้นหลังสีขาว จากนั้นเพิ่มเส้นขอบข้อความสีดำที่กว้าง 1 จุด:
import com.aspose.slides.*;
import java.awt.Color;

Presentation presentation = new Presentation();
try {
    ISlide slide = presentation.getSlides().get_Item(0);

    IAutoShape autoShape = slide.getShapes().addAutoShape(ShapeType.Rectangle, 20, 20, 400, 200);

    IPortion portion = autoShape.getTextFrame().getParagraphs().get_Item(0).getPortions().get_Item(0);
    portion.setText("Aspose.Slides");
    FontData font = new FontData("Arial Black");
    portion.getPortionFormat().setLatinFont(font);
    portion.getPortionFormat().setFontHeight(36);

    portion.getPortionFormat().getFillFormat().setFillType(FillType.Pattern);
    Color darkOrange = new Color(255, 140, 0);
    portion.getPortionFormat().getFillFormat().getPatternFormat().getForeColor().setColor(darkOrange);
    portion.getPortionFormat().getFillFormat().getPatternFormat().getBackColor().setColor(Color.WHITE);
    portion.getPortionFormat().getFillFormat().getPatternFormat().setPatternStyle(PatternStyle.SmallGrid);

    portion.getPortionFormat().getLineFormat().setWidth(1);
    portion.getPortionFormat().getLineFormat().getFillFormat().setFillType(FillType.Solid);
    portion.getPortionFormat().getLineFormat().getFillFormat().getSolidFillColor().setColor(Color.BLACK);
} finally {
    presentation.dispose();
}
ข้อความที่ได้:
ใช้เอฟเฟกต์ WordArt อื่น ๆ
ตัวอย่างต่อไปนี้แสดงวิธีการใช้เงา, การสะท้อน, แสงเรืองราว, การแปลงรูป, และเอฟเฟกต์ 3 มิติในข้อความ.
ใช้เอฟเฟกต์เงานอก
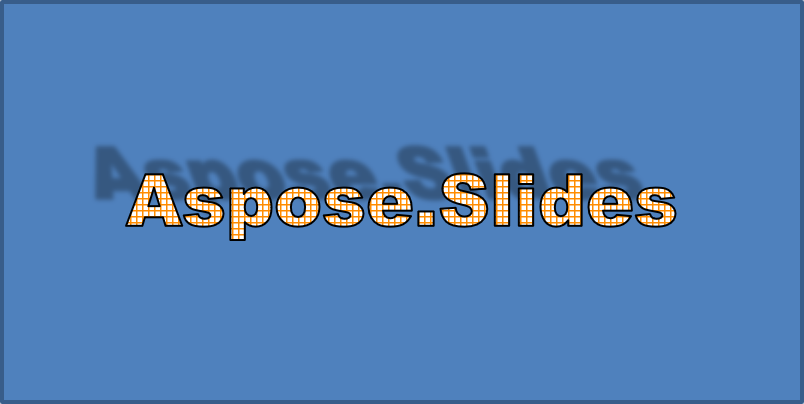
เงานอกช่วยเพิ่มความลึกโดยวางเงาอยู่ด้านหลังข้อความ คุณสามารถปรับแต่งสี, ทิศทาง, ระยะ, รัศมีการเบลอ, อัตราส่วน, และการเอียงของมันได้.
ตัวอย่างนี้เรียก enableOuterShadowEffect และตั้งค่าเงาสีดำที่มีรัศมีการเบลอ 4 จุด, ทิศทาง 230 องศา, และระยะ 30 จุด ค่า Scale 100 รักษาขนาดเงาไว้, ในขณะที่การเอียงแนวนอนทำให้เงาเอียง 20 องศา การแปลงค่า alpha ตั้งค่าความทึบเป็น 32%:
import com.aspose.slides.*;
import java.awt.Color;

Presentation presentation = new Presentation();
try {
    ISlide slide = presentation.getSlides().get_Item(0);

    IAutoShape autoShape = slide.getShapes().addAutoShape(ShapeType.Rectangle, 20, 20, 400, 200);

    IPortion portion = autoShape.getTextFrame().getParagraphs().get_Item(0).getPortions().get_Item(0);
    portion.setText("Aspose.Slides");
    FontData font = new FontData("Arial Black");
    portion.getPortionFormat().setLatinFont(font);
    portion.getPortionFormat().setFontHeight(36);

    portion.getPortionFormat().getEffectFormat().enableOuterShadowEffect();
    portion.getPortionFormat().getEffectFormat().getOuterShadowEffect().getShadowColor().setColor(Color.BLACK);
    portion.getPortionFormat().getEffectFormat().getOuterShadowEffect().setScaleHorizontal(100);
    portion.getPortionFormat().getEffectFormat().getOuterShadowEffect().setScaleVertical(100);
    portion.getPortionFormat().getEffectFormat().getOuterShadowEffect().setBlurRadius(4);
    portion.getPortionFormat().getEffectFormat().getOuterShadowEffect().setDirection(230);
    portion.getPortionFormat().getEffectFormat().getOuterShadowEffect().setDistance(30);
    portion.getPortionFormat().getEffectFormat().getOuterShadowEffect().setSkewHorizontal(20);
    portion.getPortionFormat().getEffectFormat().getOuterShadowEffect().setSkewVertical(0);
    portion.getPortionFormat().getEffectFormat().getOuterShadowEffect().getShadowColor().getColorTransform().add(ColorTransformOperation.SetAlpha, 0.32f);
} finally {
    presentation.dispose();
}
ข้อความที่ได้:
Note
- เมื่อใช้เงานอกและเงาที่ตั้งค่าล่วงหน้าร่วมกัน จะใช้เฉพาะเงานอกเท่านั้น.
- หากใช้เงานอกและเงาในพร้อมกัน ผลลัพธ์จะขึ้นอยู่กับรุ่นของ PowerPoint ตัวอย่างเช่นใน PowerPoint 2013 จะได้ผลลัพธ์เป็นสองเท่า ในขณะที่ PowerPoint 2007 จะใช้เฉพาะเงานอกเท่านั้น.
ใช้เอฟเฟ็กต์การสะท้อน
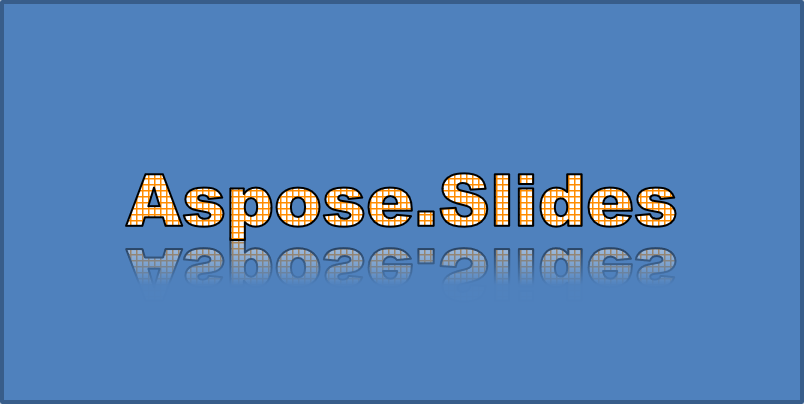
การสะท้อนสร้างสำเนาที่เป็นกระจกของข้อความ ปรับตำแหน่ง, อัตราส่วน, การเบลอ, และความทึบเพื่อควบคุมลักษณะของมัน.
ตัวอย่างนี้เรียก enableReflectionEffect และพลิกการสะท้อนแนวตั้งโดยใช้สเกล -100% ใช้รัศมีการเบลอ 0.5 จุดและระยะ 4.72 จุด ความทึบลดลงจาก 60% ถึง 0.9% ระหว่างตำแหน่ง 0% ถึง 60% ของการสะท้อน:
import com.aspose.slides.*;

Presentation presentation = new Presentation();
try {
    ISlide slide = presentation.getSlides().get_Item(0);

    IAutoShape autoShape = slide.getShapes().addAutoShape(ShapeType.Rectangle, 20, 20, 400, 200);

    IPortion portion = autoShape.getTextFrame().getParagraphs().get_Item(0).getPortions().get_Item(0);
    portion.setText("Aspose.Slides");
    FontData font = new FontData("Arial Black");
    portion.getPortionFormat().setLatinFont(font);
    portion.getPortionFormat().setFontHeight(36);

    portion.getPortionFormat().getEffectFormat().enableReflectionEffect();
    portion.getPortionFormat().getEffectFormat().getReflectionEffect().setBlurRadius(0.5);
    portion.getPortionFormat().getEffectFormat().getReflectionEffect().setDistance(4.72);
    portion.getPortionFormat().getEffectFormat().getReflectionEffect().setStartPosAlpha(0f);
    portion.getPortionFormat().getEffectFormat().getReflectionEffect().setEndPosAlpha(60f);
    portion.getPortionFormat().getEffectFormat().getReflectionEffect().setDirection(90);
    portion.getPortionFormat().getEffectFormat().getReflectionEffect().setScaleHorizontal(100);
    portion.getPortionFormat().getEffectFormat().getReflectionEffect().setScaleVertical(-100);
    portion.getPortionFormat().getEffectFormat().getReflectionEffect().setStartReflectionOpacity(60f);
    portion.getPortionFormat().getEffectFormat().getReflectionEffect().setEndReflectionOpacity(0.9f);
    portion.getPortionFormat().getEffectFormat().getReflectionEffect().setRectangleAlign(RectangleAlignment.BottomLeft);
} finally {
    presentation.dispose();
}
ข้อความที่ได้:
ใช้เอฟเฟ็กต์แสงเรืองราว
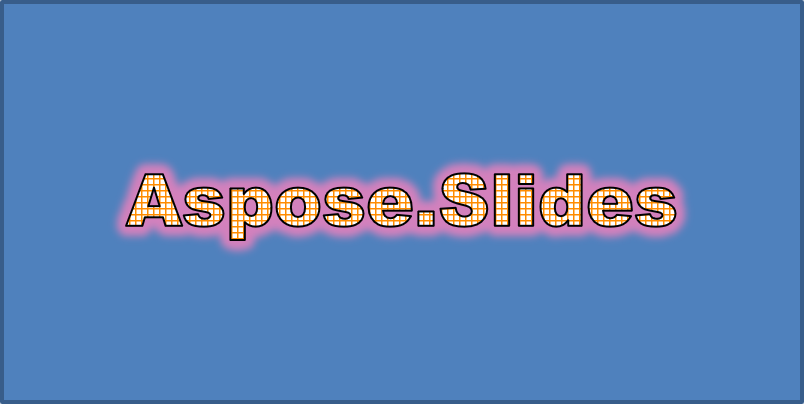
แสงเรืองราวเพิ่มเส้นขอบสีอ่อนรอบข้อความ ปรับสี, ความทึบ, และรัศมีเพื่อควบคุมเอฟเฟ็กต์.
ตัวอย่างนี้เรียก enableGlowEffect และใช้แสงเรืองราวสีแดงที่ความทึบ 54% และรัศมี 7 จุด:
import com.aspose.slides.*;
import java.awt.Color;

Presentation presentation = new Presentation();
try {
    ISlide slide = presentation.getSlides().get_Item(0);

    IAutoShape autoShape = slide.getShapes().addAutoShape(ShapeType.Rectangle, 20, 20, 400, 200);

    IPortion portion = autoShape.getTextFrame().getParagraphs().get_Item(0).getPortions().get_Item(0);
    portion.setText("Aspose.Slides");
    FontData font = new FontData("Arial Black");
    portion.getPortionFormat().setLatinFont(font);
    portion.getPortionFormat().setFontHeight(36);

    portion.getPortionFormat().getEffectFormat().enableGlowEffect();
    portion.getPortionFormat().getEffectFormat().getGlowEffect().getColor().setColor(Color.RED);
    portion.getPortionFormat().getEffectFormat().getGlowEffect().getColor().getColorTransform().add(ColorTransformOperation.SetAlpha, 0.54f);
    portion.getPortionFormat().getEffectFormat().getGlowEffect().setRadius(7);
} finally {
    presentation.dispose();
}
ข้อความที่ได้:
ใช้การแปลง WordArt
การแปลง WordArt ทำให้ข้อความโค้ง, ยืด, หรือบิดเบือนบล็อกข้อความ.
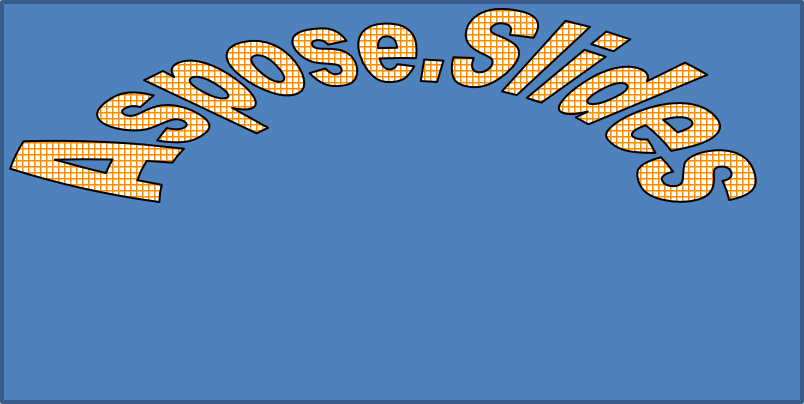
ตั้งค่า setTransform เป็น ArchUpPour เพื่อนำกรอบข้อความทั้งหมดโค้งขึ้นด้านบน:
import com.aspose.slides.*;

Presentation presentation = new Presentation();
try {
    ISlide slide = presentation.getSlides().get_Item(0);

    IAutoShape autoShape = slide.getShapes().addAutoShape(ShapeType.Rectangle, 20, 20, 400, 200);

    ITextFrame textFrame = autoShape.getTextFrame();
    textFrame.setText("Aspose.Slides");
    textFrame.getTextFrameFormat().setTransform(TextShapeType.ArchUpPour);
} finally {
    presentation.dispose();
}
ข้อความที่ได้:
Note
Aspose.Slides for Java มีชุดประเภทการแปลงที่กำหนดล่วงหน้า transformation types.ใช้เอฟเฟ็กต์ 3 มิติกับรูปและข้อความ
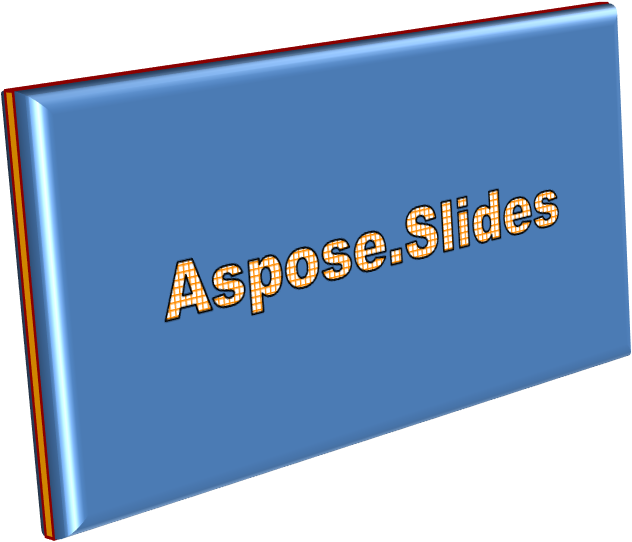
คุณสามารถใช้เอฟเฟ็กต์ 3 มิติกับรูปหรือข้อความของมันได้ ทั้ง bevel, extrusion, การจัดแสง, และการตั้งค่าแคมร่า จะกำหนดลักษณะที่ได้.
ตัวอย่างต่อไปนี้ใช้ ThreeDFormat เพื่อเพิ่ม bevel รูปวงกลม, extrusion สีส้ม, และขอบสีแดงเข้มให้กับสี่เหลี่ยม มิติของ bevel, ความสูง extrusion, ความกว้างและความลึกของขอบวัดเป็นจุด วัสดุพลาสติก, การจัดแสงสมดุลที่หมุน 40 องศารอบแกน Z, และแคมร่ามุมมองกำหนดลักษณะของมัน:
import com.aspose.slides.*;
import java.awt.Color;

Presentation presentation = new Presentation();
try {
    ISlide slide = presentation.getSlides().get_Item(0);

    IAutoShape autoShape = slide.getShapes().addAutoShape(ShapeType.Rectangle, 20, 20, 400, 200);
    autoShape.getTextFrame().setText("Aspose.Slides");

    autoShape.getThreeDFormat().getBevelBottom().setBevelType(BevelPresetType.Circle);
    autoShape.getThreeDFormat().getBevelBottom().setHeight(10.5);
    autoShape.getThreeDFormat().getBevelBottom().setWidth(10.5);

    autoShape.getThreeDFormat().getBevelTop().setBevelType(BevelPresetType.Circle);
    autoShape.getThreeDFormat().getBevelTop().setHeight(12.5);
    autoShape.getThreeDFormat().getBevelTop().setWidth(11);

    Color orange = new Color(255, 165, 0);
    autoShape.getThreeDFormat().getExtrusionColor().setColor(orange);
    autoShape.getThreeDFormat().setExtrusionHeight(6);

    Color darkRed = new Color(139, 0, 0);
    autoShape.getThreeDFormat().getContourColor().setColor(darkRed);
    autoShape.getThreeDFormat().setContourWidth(1.5);

    autoShape.getThreeDFormat().setDepth(3);

    autoShape.getThreeDFormat().setMaterial(MaterialPresetType.Plastic);

    autoShape.getThreeDFormat().getLightRig().setDirection(LightingDirection.Top);
    autoShape.getThreeDFormat().getLightRig().setLightType(LightRigPresetType.Balanced);
    autoShape.getThreeDFormat().getLightRig().setRotation(0, 0, 40);

    autoShape.getThreeDFormat().getCamera().setCameraType(CameraPresetType.PerspectiveContrastingRightFacing);
} finally {
    presentation.dispose();
}
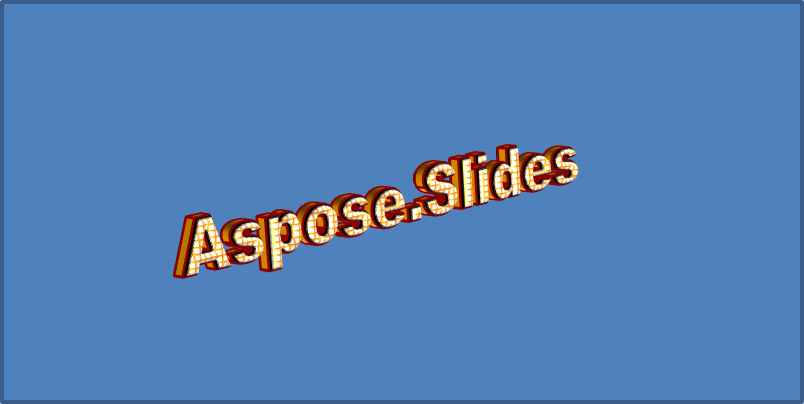
ตัวอย่างนี้ใช้การจัดรูปแบบ 3 มิติที่คล้ายกันกับข้อความผ่าน TextFrameFormat.getThreeDFormat. bevel ขนาดเล็กทำให้ขอบตัวอักษรคมชัด, ส่วน extrusion และการจัดแสงทำให้ข้อความมีความลึก:
import com.aspose.slides.*;
import java.awt.Color;

Presentation presentation = new Presentation();
try {
    ISlide slide = presentation.getSlides().get_Item(0);

    IAutoShape autoShape = slide.getShapes().addAutoShape(ShapeType.Rectangle, 20, 20, 400, 200);
    ITextFrame textFrame = autoShape.getTextFrame();
    textFrame.setText("Aspose.Slides");

    textFrame.getTextFrameFormat().getThreeDFormat().getBevelBottom().setBevelType(BevelPresetType.Circle);
    textFrame.getTextFrameFormat().getThreeDFormat().getBevelBottom().setHeight(3.5);
    textFrame.getTextFrameFormat().getThreeDFormat().getBevelBottom().setWidth(3.5);

    textFrame.getTextFrameFormat().getThreeDFormat().getBevelTop().setBevelType(BevelPresetType.Circle);
    textFrame.getTextFrameFormat().getThreeDFormat().getBevelTop().setHeight(4);
    textFrame.getTextFrameFormat().getThreeDFormat().getBevelTop().setWidth(4);

    Color orange = new Color(255, 165, 0);
    textFrame.getTextFrameFormat().getThreeDFormat().getExtrusionColor().setColor(orange);
    textFrame.getTextFrameFormat().getThreeDFormat().setExtrusionHeight(6);

    Color darkRed = new Color(139, 0, 0);
    textFrame.getTextFrameFormat().getThreeDFormat().getContourColor().setColor(darkRed);
    textFrame.getTextFrameFormat().getThreeDFormat().setContourWidth(1.5);

    textFrame.getTextFrameFormat().getThreeDFormat().setDepth(3);

    textFrame.getTextFrameFormat().getThreeDFormat().setMaterial(MaterialPresetType.Plastic);

    textFrame.getTextFrameFormat().getThreeDFormat().getLightRig().setDirection(LightingDirection.Top);
    textFrame.getTextFrameFormat().getThreeDFormat().getLightRig().setLightType(LightRigPresetType.Balanced);
    textFrame.getTextFrameFormat().getThreeDFormat().getLightRig().setRotation(0, 0, 40);

    textFrame.getTextFrameFormat().getThreeDFormat().getCamera().setCameraType(CameraPresetType.PerspectiveContrastingRightFacing);
} finally {
    presentation.dispose();
}
Note
การใช้เอฟเฟ็กต์ 3 มิติกับข้อความหรือรูปของมัน—และการทำงานร่วมกันของเอฟเฟ็กต์เหล่านี้—ถูกกำหนดด้วยกฎเฉพาะ พิจารณาฉากที่ประกอบด้วยข้อความและรูปร่างที่บรรจุข้อความนั้น เอฟเฟ็กต์ 3 มิติรวมถึงการแสดงผล 3 มิติของวัตถุและฉากที่วัตถุอยู่อยู่ในนั้น
- หากกำหนดฉากทั้งสำหรับรูปร่างและข้อความ ฉากของรูปร่างจะมีลำดับความสำคัญและฉากของข้อความจะถูกละเลย
- หากรูปร่างไม่มีฉากของตัวเองแต่มีการแสดงผล 3 มิติ จะใช้ฉากของข้อความ
- หากรูปร่างไม่มีเอฟเฟ็กต์ 3 มิติเลย จะถือว่าเป็นแบนและเอฟเฟ็กต์ 3 มิติจะถูกนำไปใช้เฉพาะกับข้อความเท่านั้น
พฤติกรรมเหล่านี้เกี่ยวข้องกับเมธอด ThreeDFormat.getLightRig และ ThreeDFormat.getCamera.
เพื่อให้ข้อความแบนและอ่านง่ายขณะยังคงการจัดรูปแบบ 3 มิติของรูปร่างไว้ ดูที่ Keep Text Flat on a 3D Shape เพื่อเปรียบเทียบการตั้งค่าทั้งสองและตัวอย่าง Java ครบถ้วน.
คำถามที่พบบ่อย
ฉันสามารถใช้เอฟเฟ็กต์ WordArt กับฟอนต์หรือสคริปต์ที่แตกต่างกัน (เช่น Arabic, Chinese) ได้หรือไม่?
ได้, Aspose.Slides for Java รองรับ Unicode และทำงานกับฟอนต์และสคริปต์หลักทั้งหมด เอฟเฟ็กต์ WordArt เช่น เงา, การเติมสี, และเส้นขอบสามารถใช้ได้โดยไม่คำนึงถึงภาษา แม้ว่าการมีฟอนต์และการเรนเดอร์อาจขึ้นอยู่กับฟอนต์ของระบบ.
ฉันสามารถใช้เอฟเฟ็กต์ WordArt กับองค์ประกอบในสไลด์มาสเตอร์ได้หรือไม่?
ได้, คุณสามารถใช้เอฟเฟ็กต์ WordArt กับรูปทรงในสไลด์มาสเตอร์ได้ รวมถึงตำแหน่งข้อความหัวเรื่อง, ตัวล่าง, หรือข้อความพื้นหลัง การเปลี่ยนแปลงในเลย์เอาต์มาสเตอร์จะสะท้อนไปยังสไลด์ที่เชื่อมโยงทั้งหมด.
เอฟเฟ็กต์ WordArt มีผลต่อขนาดไฟล์งานนำเสนอหรือไม่?
เล็กน้อย. เอฟเฟ็กต์ WordArt เช่น เงา, แสงเรืองราว, และการเติมแบบไล่สีอาจเพิ่มขนาดไฟล์เล็กน้อยเนื่องจากเมตาดาต้าการจัดรูปแบบที่เพิ่มเข้าไป แต่ความแตกต่างมักจะไม่มีนัยสำคัญ.
ฉันสามารถดูตัวอย่างผลของเอฟเฟ็กต์ WordArt โดยไม่ต้องบันทึกงานนำเสนอได้หรือไม่?
ได้, คุณสามารถแปลงสไลด์ที่มี WordArt เป็นรูปภาพ (เช่น PNG, JPEG) ด้วย ISlide.getImage หรือแปลงรูปทรงเดียวด้วย IShape.getImage ซึ่งช่วยให้คุณดูตัวอย่างผลลัพธ์ในหน่วยความจำหรือบนหน้าจอก่อนบันทึกหรือส่งออกงานนำเสนอเต็มรูปแบบ.