
Beheer PowerPoint-tekstalinea's in C++
Overzicht
Aspose.Slides for C++ stelt tekst voor als een hiërarchie van tekstframes, alinea’s en porties:
- ITextFrame vertegenwoordigt de teksteenheid in een vorm en biedt toegang tot de alinea‑collectie.
- IParagraph vertegenwoordigt één alinea in een tekstframe en biedt toegang tot de porties en op alinea‑niveau instelbare opmaak.
- IPortion vertegenwoordigt een tekstrun binnen een alinea. Elke portie kan eigen tekst en teken‑niveau opmaak hebben.
Een alinea kan dus tekst met verschillende lettertypen, kleuren, groottes en andere opmaak bevatten door meerdere porties te gebruiken.
Alinea’s maken en opmaken
Alinea’s maken met meerdere porties
De volgende stappen maken een tekstframe met drie alinea’s, elk met drie porties:
- Maak een instantie van de Presentation‑klasse.
- Verkrijg de referentie naar de gewenste dia via de index.
- Voeg een rechthoekige IAutoShape toe aan de dia.
- Verkrijg het ITextFrame van de vorm.
- Gebruik de standaardalinea en voeg twee extra IParagraph‑objecten toe aan het tekstframe.
- Voeg voldoende IPortion‑objecten toe zodat elke alinea drie porties bevat. De standaardalinea bevat al één lege portie.
- Stel de tekst van elke portie in.
- Pas teken‑niveau opmaak toe via IPortion::get_PortionFormat .
- Sla de gewijzigde presentatie op.
Dit C++‑voorbeeld implementeert de stappen:
#include <DOM/FillType.h>
#include <DOM/IAutoShape.h>
#include <DOM/IParagraphCollection.h>
#include <DOM/IPortionCollection.h>
#include <DOM/NullableBool.h>
#include <DOM/Paragraph.h>
#include <DOM/Portion.h>
#include <DOM/Presentation.h>
#include <DOM/ShapeType.h>
#include <Export/SaveFormat.h>
#include <drawing/color.h>
#include <system/string.h>

using namespace Aspose::Slides;
using namespace Aspose::Slides::Export;
using namespace System;
using namespace System::Drawing;

auto presentation = MakeObject<Presentation>();
auto slide = presentation->get_Slide(0);
auto shape = slide->get_Shapes()->AddAutoShape(ShapeType::Rectangle, 50, 150, 300, 150);
auto textFrame = shape->get_TextFrame();

auto firstParagraph = textFrame->get_Paragraph(0);
firstParagraph->get_Portions()->Add(MakeObject<Portion>());
firstParagraph->get_Portions()->Add(MakeObject<Portion>());

auto secondParagraph = MakeObject<Paragraph>();
secondParagraph->get_Portions()->Add(MakeObject<Portion>());
secondParagraph->get_Portions()->Add(MakeObject<Portion>());
secondParagraph->get_Portions()->Add(MakeObject<Portion>());
textFrame->get_Paragraphs()->Add(secondParagraph);

auto thirdParagraph = MakeObject<Paragraph>();
thirdParagraph->get_Portions()->Add(MakeObject<Portion>());
thirdParagraph->get_Portions()->Add(MakeObject<Portion>());
thirdParagraph->get_Portions()->Add(MakeObject<Portion>());
textFrame->get_Paragraphs()->Add(thirdParagraph);

auto paragraphCount = textFrame->get_Paragraphs()->get_Count();
for (int paragraphIndex = 0; paragraphIndex < paragraphCount; paragraphIndex++)
{
    auto paragraph = textFrame->get_Paragraph(paragraphIndex);
    auto portionCount = paragraph->get_Portions()->get_Count();
    for (int portionIndex = 0; portionIndex < portionCount; portionIndex++)
    {
        auto portion = paragraph->get_Portion(portionIndex);
        portion->set_Text(String::Format(u"Portion {0}.{1}", paragraphIndex + 1, portionIndex + 1));
        auto portionFormat = portion->get_PortionFormat();

        if (portionIndex == 0)
        {
            portionFormat->get_FillFormat()->set_FillType(FillType::Solid);
            portionFormat->get_FillFormat()->get_SolidFillColor()->set_Color(Color::get_Red());
            portionFormat->set_FontBold(NullableBool::True);
            portionFormat->set_FontHeight(15);
        }
        else if (portionIndex == 1)
        {
            portionFormat->get_FillFormat()->set_FillType(FillType::Solid);
            portionFormat->get_FillFormat()->get_SolidFillColor()->set_Color(Color::get_Blue());
            portionFormat->set_FontItalic(NullableBool::True);
            portionFormat->set_FontHeight(18);
        }
    }
}

presentation->Save(u"paragraphs_with_portions.pptx", SaveFormat::Pptx);
presentation->Dispose();
Opsommingstekens en genummerde lijsten maken
Een opsomming of genummerde lijst maken
Opsommingstekens en nummering maken gerelateerde items makkelijker scanbaar. In Aspose.Slides worden lijstinstellingen gedefinieerd via IBulletFormat .
- Maak een instantie van de Presentation‑klasse.
- Verkrijg de referentie naar de gewenste dia via de index.
- Voeg een IAutoShape toe aan de geselecteerde dia.
- Verkrijg het ITextFrame van de vorm.
- Verwijder de standaardalinea uit het tekstframe.
- Maak een Paragraph voor een symbool‑opsommingsteken.
- Stel IBulletFormat::set_Type in op BulletType::Symbol en specificeer het opsommingsteken.
- Stel de alinea‑tekst, inspringing, kleur en hoogte van het opsommingsteken in.
- Voeg de alinea toe aan het tekstframe.
- Maak een tweede alinea en stel IBulletFormat::set_Type in op BulletType::Numbered .
- Configureer de genummerde opsommingsteken‑stijl en voeg de alinea toe aan het tekstframe.
- Sla de presentatie op.
Dit C++‑voorbeeld maakt een symbool‑opsommingsteken en een genummerd opsommingsteken:
#include <DOM/BulletType.h>
#include <DOM/ColorType.h>
#include <DOM/IAutoShape.h>
#include <DOM/IParagraphCollection.h>
#include <DOM/NullableBool.h>
#include <DOM/NumberedBulletStyle.h>
#include <DOM/Paragraph.h>
#include <DOM/Presentation.h>
#include <DOM/ShapeType.h>
#include <Export/SaveFormat.h>
#include <drawing/color.h>
#include <system/convert.h>

using namespace Aspose::Slides;
using namespace Aspose::Slides::Export;
using namespace System;
using namespace System::Drawing;

auto presentation = MakeObject<Presentation>();
auto slide = presentation->get_Slide(0);
auto shape = slide->get_Shapes()->AddAutoShape(ShapeType::Rectangle, 200, 200, 400, 200);
auto textFrame = shape->get_TextFrame();
textFrame->get_Paragraphs()->Clear();

auto symbolParagraph = MakeObject<Paragraph>();
symbolParagraph->set_Text(u"Welcome to Aspose.Slides");
symbolParagraph->get_ParagraphFormat()->get_Bullet()->set_Type(BulletType::Symbol);
symbolParagraph->get_ParagraphFormat()->get_Bullet()->set_Char(Convert::ToChar(0x2022));
symbolParagraph->get_ParagraphFormat()->set_Indent(25);
symbolParagraph->get_ParagraphFormat()->get_Bullet()->get_Color()->set_ColorType(ColorType::RGB);
symbolParagraph->get_ParagraphFormat()->get_Bullet()->get_Color()->set_Color(Color::get_Black());
symbolParagraph->get_ParagraphFormat()->get_Bullet()->set_IsBulletHardColor(NullableBool::True);
symbolParagraph->get_ParagraphFormat()->get_Bullet()->set_Height(100);
textFrame->get_Paragraphs()->Add(symbolParagraph);

auto numberedParagraph = MakeObject<Paragraph>();
numberedParagraph->set_Text(u"This is a numbered item");
numberedParagraph->get_ParagraphFormat()->get_Bullet()->set_Type(BulletType::Numbered);
numberedParagraph->get_ParagraphFormat()->get_Bullet()->set_NumberedBulletStyle(NumberedBulletStyle::BulletCircleNumWDBlackPlain);
numberedParagraph->get_ParagraphFormat()->set_Indent(25);
numberedParagraph->get_ParagraphFormat()->get_Bullet()->get_Color()->set_ColorType(ColorType::RGB);
numberedParagraph->get_ParagraphFormat()->get_Bullet()->get_Color()->set_Color(Color::get_Black());
numberedParagraph->get_ParagraphFormat()->get_Bullet()->set_IsBulletHardColor(NullableBool::True);
numberedParagraph->get_ParagraphFormat()->get_Bullet()->set_Height(100);
textFrame->get_Paragraphs()->Add(numberedParagraph);

presentation->Save(u"bulleted_and_numbered_list.pptx", SaveFormat::Pptx);
presentation->Dispose();
Afbeeldings‑opsommingstekens gebruiken
Afbeeldings‑opsommingstekens laten je een aangepast beeld gebruiken in plaats van een symbool of cijfer.
- Maak een instantie van de Presentation‑klasse.
- Verkrijg de referentie naar de gewenste dia via de index.
- Voeg een IAutoShape toe en verkrijg het ITextFrame .
- Verwijder de standaardalinea uit het tekstframe.
- Laad de bullet‑afbeelding en voeg deze toe aan de afbeelding‑collectie van de presentatie als een IPPImage .
- Maak een Paragraph en stel de tekst in.
- Stel IBulletFormat::set_Type in op BulletType::Picture .
- Wijs de afbeelding toe via ISlidesPicture::set_Image en stel de bullet‑hoogte in.
- Voeg de alinea toe aan het tekstframe.
- Sla de gewijzigde presentatie op.
Dit C++‑voorbeeld maakt een afbeelding‑opsommingsteken:
#include <DOM/BulletType.h>
#include <DOM/IAutoShape.h>
#include <DOM/IImageCollection.h>
#include <DOM/IParagraphCollection.h>
#include <DOM/Paragraph.h>
#include <DOM/Presentation.h>
#include <DOM/ShapeType.h>
#include <Export/SaveFormat.h>
#include <IImage.h>
#include <Util/Images.h>

using namespace Aspose::Slides;
using namespace Aspose::Slides::Export;
using namespace System;

auto presentation = MakeObject<Presentation>();
auto slide = presentation->get_Slide(0);

auto bulletImage = Images::FromFile(u"bullets.png");
auto presentationImage = presentation->get_Images()->AddImage(bulletImage);
bulletImage->Dispose();

auto shape = slide->get_Shapes()->AddAutoShape(ShapeType::Rectangle, 200, 200, 400, 200);
auto textFrame = shape->get_TextFrame();
textFrame->get_Paragraphs()->Clear();

auto paragraph = MakeObject<Paragraph>();
paragraph->set_Text(u"Welcome to Aspose.Slides");
paragraph->get_ParagraphFormat()->get_Bullet()->set_Type(BulletType::Picture);
paragraph->get_ParagraphFormat()->get_Bullet()->get_Picture()->set_Image(presentationImage);
paragraph->get_ParagraphFormat()->get_Bullet()->set_Height(100);
textFrame->get_Paragraphs()->Add(paragraph);

presentation->Save(u"picture_bullet.pptx", SaveFormat::Pptx);
presentation->Save(u"picture_bullet.ppt", SaveFormat::Ppt);
presentation->Dispose();
Een meerlagige lijst maken
Stel IParagraphFormat::set_Depth in om alinea’s op verschillende niveaus van een lijst te plaatsen. Het bovenste niveau heeft een diepte van 0 .
- Maak een Presentation en verkrijg een dia.
- Voeg een IAutoShape toe en wis de standaardalinea uit het tekstframe.
- Maak vier alinea’s en configureer hun opsommingsteken‑symbolen.
- Stel hun IParagraphFormat::set_Depth waarden in op
0,1,2en3. - Voeg de alinea’s toe aan het tekstframe en sla de presentatie op.
Dit C++‑voorbeeld maakt een vier‑nivaus opsomminglijst:
#include <DOM/BulletType.h>
#include <DOM/FillType.h>
#include <DOM/IAutoShape.h>
#include <DOM/IParagraphCollection.h>
#include <DOM/Paragraph.h>
#include <DOM/Presentation.h>
#include <DOM/ShapeType.h>
#include <Export/SaveFormat.h>
#include <drawing/color.h>
#include <system/convert.h>

using namespace Aspose::Slides;
using namespace Aspose::Slides::Export;
using namespace System;
using namespace System::Drawing;

auto presentation = MakeObject<Presentation>();
auto slide = presentation->get_Slide(0);
auto shape = slide->get_Shapes()->AddAutoShape(ShapeType::Rectangle, 200, 200, 400, 200);
auto textFrame = shape->get_TextFrame();
textFrame->get_Paragraphs()->Clear();

auto firstParagraph = MakeObject<Paragraph>();
firstParagraph->set_Text(u"Content");
firstParagraph->get_ParagraphFormat()->get_Bullet()->set_Type(BulletType::Symbol);
firstParagraph->get_ParagraphFormat()->get_Bullet()->set_Char(Convert::ToChar(0x2022));
firstParagraph->get_ParagraphFormat()->get_DefaultPortionFormat()->get_FillFormat()->set_FillType(FillType::Solid);
firstParagraph->get_ParagraphFormat()->get_DefaultPortionFormat()->get_FillFormat()->get_SolidFillColor()->set_Color(Color::get_Black());
firstParagraph->get_ParagraphFormat()->set_Depth(0);

auto secondParagraph = MakeObject<Paragraph>();
secondParagraph->set_Text(u"Second level");
secondParagraph->get_ParagraphFormat()->get_Bullet()->set_Type(BulletType::Symbol);
secondParagraph->get_ParagraphFormat()->get_Bullet()->set_Char(u'-');
secondParagraph->get_ParagraphFormat()->get_DefaultPortionFormat()->get_FillFormat()->set_FillType(FillType::Solid);
secondParagraph->get_ParagraphFormat()->get_DefaultPortionFormat()->get_FillFormat()->get_SolidFillColor()->set_Color(Color::get_Black());
secondParagraph->get_ParagraphFormat()->set_Depth(1);

auto thirdParagraph = MakeObject<Paragraph>();
thirdParagraph->set_Text(u"Third level");
thirdParagraph->get_ParagraphFormat()->get_Bullet()->set_Type(BulletType::Symbol);
thirdParagraph->get_ParagraphFormat()->get_Bullet()->set_Char(Convert::ToChar(0x2022));
thirdParagraph->get_ParagraphFormat()->get_DefaultPortionFormat()->get_FillFormat()->set_FillType(FillType::Solid);
thirdParagraph->get_ParagraphFormat()->get_DefaultPortionFormat()->get_FillFormat()->get_SolidFillColor()->set_Color(Color::get_Black());
thirdParagraph->get_ParagraphFormat()->set_Depth(2);

auto fourthParagraph = MakeObject<Paragraph>();
fourthParagraph->set_Text(u"Fourth level");
fourthParagraph->get_ParagraphFormat()->get_Bullet()->set_Type(BulletType::Symbol);
fourthParagraph->get_ParagraphFormat()->get_Bullet()->set_Char(u'-');
fourthParagraph->get_ParagraphFormat()->get_DefaultPortionFormat()->get_FillFormat()->set_FillType(FillType::Solid);
fourthParagraph->get_ParagraphFormat()->get_DefaultPortionFormat()->get_FillFormat()->get_SolidFillColor()->set_Color(Color::get_Black());
fourthParagraph->get_ParagraphFormat()->set_Depth(3);

textFrame->get_Paragraphs()->Add(firstParagraph);
textFrame->get_Paragraphs()->Add(secondParagraph);
textFrame->get_Paragraphs()->Add(thirdParagraph);
textFrame->get_Paragraphs()->Add(fourthParagraph);

presentation->Save(u"multilevel_list.pptx", SaveFormat::Pptx);
presentation->Dispose();
Genummerde lijstitems beginnen met aangepaste waarden
Gebruik IBulletFormat::set_NumberedBulletStartWith om het initiële nummer voor een genummerde alinea in te stellen.
- Maak een Presentation en voeg een IAutoShape toe aan een dia.
- Wis de standaardalinea uit het tekstframe van de vorm.
- Maak drie genummerde alinea’s.
- Stel IBulletFormat::set_NumberedBulletStartWith in op
2,3en7voor de respectieve alinea’s. - Voeg de alinea’s toe aan het tekstframe en sla de presentatie op.
Dit C++‑voorbeeld kent een aangepast startnummer toe aan elke alinea:
#include <DOM/BulletType.h>
#include <DOM/IAutoShape.h>
#include <DOM/IParagraphCollection.h>
#include <DOM/Paragraph.h>
#include <DOM/Presentation.h>
#include <DOM/ShapeType.h>
#include <Export/SaveFormat.h>

using namespace Aspose::Slides;
using namespace Aspose::Slides::Export;
using namespace System;

auto presentation = MakeObject<Presentation>();
auto slide = presentation->get_Slide(0);
auto shape = slide->get_Shapes()->AddAutoShape(ShapeType::Rectangle, 200, 200, 400, 200);
auto textFrame = shape->get_TextFrame();
textFrame->get_Paragraphs()->Clear();

auto firstParagraph = MakeObject<Paragraph>();
firstParagraph->set_Text(u"Start at 2");
firstParagraph->get_ParagraphFormat()->get_Bullet()->set_Type(BulletType::Numbered);
firstParagraph->get_ParagraphFormat()->get_Bullet()->set_NumberedBulletStartWith(2);
textFrame->get_Paragraphs()->Add(firstParagraph);

auto secondParagraph = MakeObject<Paragraph>();
secondParagraph->set_Text(u"Start at 3");
secondParagraph->get_ParagraphFormat()->get_Bullet()->set_Type(BulletType::Numbered);
secondParagraph->get_ParagraphFormat()->get_Bullet()->set_NumberedBulletStartWith(3);
textFrame->get_Paragraphs()->Add(secondParagraph);

auto thirdParagraph = MakeObject<Paragraph>();
thirdParagraph->set_Text(u"Start at 7");
thirdParagraph->get_ParagraphFormat()->get_Bullet()->set_Type(BulletType::Numbered);
thirdParagraph->get_ParagraphFormat()->get_Bullet()->set_NumberedBulletStartWith(7);
textFrame->get_Paragraphs()->Add(thirdParagraph);

presentation->Save(u"custom_numbered_list.pptx", SaveFormat::Pptx);
presentation->Dispose();
Alinea‑lay-out en eigeigenschappen beheren
Eerste‑regelinsspringing instellen
Gebruik IParagraphFormat::set_Indent om de eerste‑regelinsspringing van een alinea te regelen. Deze methode verschuift alleen de eerste regel ten opzichte van de linkermarge van de alinea. Een positieve waarde verschuift de eerste regel naar rechts, terwijl de overige regels uitgelijnd blijven met de alinea‑inhoud.
Gebruik IParagraphFormat::set_MarginLeft wanneer je de hele alinea wilt verplaatsen. Gebruik IParagraphFormat::set_Indent wanneer je alleen de eerste regel wilt verplaatsen.
Het onderstaande voorbeeld maakt verschillende alinea’s en past verschillende IParagraphFormat::set_Indent waarden toe om te laten zien hoe de eerste‑regelinsspringing de lay‑out beïnvloedt.
- Maak een instantie van de Presentation‑klasse.
- Verkrijg de doel‑dia.
- Voeg een rechthoekige IAutoShape toe aan de dia.
- Verkrijg het ITextFrame van de vorm en verwijder de standaardalinea.
- Maak verschillende alinea’s en stel verschillende IParagraphFormat::set_Indent waarden in voor hen.
- Voeg de alinea’s toe aan het tekstframe.
- Sla de gewijzigde presentatie op.
Dit fragment toont hoe je een alinea‑inspringing instelt:
#include <DOM/FillType.h>
#include <DOM/IAutoShape.h>
#include <DOM/IParagraphCollection.h>
#include <DOM/Paragraph.h>
#include <DOM/Presentation.h>
#include <DOM/ShapeType.h>
#include <DOM/TextAutofitType.h>
#include <Export/SaveFormat.h>
#include <drawing/color.h>

using namespace Aspose::Slides;
using namespace Aspose::Slides::Export;
using namespace System;
using namespace System::Drawing;

auto presentation = MakeObject<Presentation>();
auto slide = presentation->get_Slide(0);
auto shape = slide->get_Shapes()->AddAutoShape(ShapeType::Rectangle, 50, 50, 420, 220);
shape->get_FillFormat()->set_FillType(FillType::NoFill);
shape->get_LineFormat()->get_FillFormat()->set_FillType(FillType::Solid);
shape->get_LineFormat()->get_FillFormat()->get_SolidFillColor()->set_Color(Color::get_Gray());

auto textFrame = shape->get_TextFrame();
textFrame->get_TextFrameFormat()->set_AutofitType(TextAutofitType::Shape);
textFrame->get_Paragraphs()->Clear();

auto firstParagraph = MakeObject<Paragraph>();
firstParagraph->set_Text(u"No first-line indent. Wrapped lines start at the same position as the first line.");
firstParagraph->get_ParagraphFormat()->get_DefaultPortionFormat()->get_FillFormat()->set_FillType(FillType::Solid);
firstParagraph->get_ParagraphFormat()->get_DefaultPortionFormat()->get_FillFormat()->get_SolidFillColor()->set_Color(Color::get_Black());
firstParagraph->get_ParagraphFormat()->set_MarginLeft(20);
firstParagraph->get_ParagraphFormat()->set_Indent(0);

auto secondParagraph = MakeObject<Paragraph>();
secondParagraph->set_Text(u"First-line indent of 20 points. The first line moves to the right, while wrapped lines remain aligned to the paragraph body.");
secondParagraph->get_ParagraphFormat()->get_DefaultPortionFormat()->get_FillFormat()->set_FillType(FillType::Solid);
secondParagraph->get_ParagraphFormat()->get_DefaultPortionFormat()->get_FillFormat()->get_SolidFillColor()->set_Color(Color::get_Black());
secondParagraph->get_ParagraphFormat()->set_MarginLeft(20);
secondParagraph->get_ParagraphFormat()->set_Indent(20);

auto thirdParagraph = MakeObject<Paragraph>();
thirdParagraph->set_Text(u"First-line indent of 40 points. This paragraph shows a larger first-line offset to make the effect easier to see.");
thirdParagraph->get_ParagraphFormat()->get_DefaultPortionFormat()->get_FillFormat()->set_FillType(FillType::Solid);
thirdParagraph->get_ParagraphFormat()->get_DefaultPortionFormat()->get_FillFormat()->get_SolidFillColor()->set_Color(Color::get_Black());
thirdParagraph->get_ParagraphFormat()->set_MarginLeft(20);
thirdParagraph->get_ParagraphFormat()->set_Indent(40);

textFrame->get_Paragraphs()->Add(firstParagraph);
textFrame->get_Paragraphs()->Add(secondParagraph);
textFrame->get_Paragraphs()->Add(thirdParagraph);

presentation->Save(u"paragraph_indent.pptx", SaveFormat::Pptx);
presentation->Dispose();
Het resultaat:

Hangende inspringing instellen
Een hangende inspringing is een alinea‑lay‑out waarbij de eerste regel links van de overige regels begint. In Aspose.Slides creëer je dit effect met IParagraphFormat::set_Indent . Stel de inspringing in op een negatieve waarde om de eerste regel naar links te verplaatsen ten opzichte van de alinea‑inhoud.
In de praktijk bepaalt IParagraphFormat::set_MarginLeft de linkermarge van de alinea‑inhoud, en IParagraphFormat::set_Indent de positie van de eerste regel ten opzichte van die marge. Om een hangende inspringing te krijgen, stel je een positieve marge‑links in en een negatieve inspringing.
Deze opmaak is nuttig voor bibliografieën, referenties, woordenlijst‑items en andere alinea’s waarbij ingesprongen regels onder de alinea‑inhoud moeten uitlijnen i.p.v. onder het eerste teken van de eerste regel.
- Maak een instantie van de Presentation‑klasse.
- Verkrijg de doel‑dia.
- Voeg een rechthoekige IAutoShape toe aan de dia.
- Verkrijg het ITextFrame van de vorm en verwijder de standaardalinea.
- Maak alinea’s en stel een positieve IParagraphFormat::set_MarginLeft waarde in voor elke alinea.
- Stel een negatieve IParagraphFormat::set_Indent waarde in om het hangende‑inspringing‑effect te verkrijgen.
- Voeg de alinea’s toe aan het tekstframe.
- Sla de gewijzigde presentatie op.
Dit fragment toont hoe je een hangende inspringing voor een alinea instelt:
#include <DOM/FillType.h>
#include <DOM/IAutoShape.h>
#include <DOM/IParagraphCollection.h>
#include <DOM/Paragraph.h>
#include <DOM/Presentation.h>
#include <DOM/ShapeType.h>
#include <DOM/TextAutofitType.h>
#include <Export/SaveFormat.h>
#include <drawing/color.h>

using namespace Aspose::Slides;
using namespace Aspose::Slides::Export;
using namespace System;
using namespace System::Drawing;

auto presentation = MakeObject<Presentation>();
auto slide = presentation->get_Slide(0);
auto shape = slide->get_Shapes()->AddAutoShape(ShapeType::Rectangle, 50, 50, 420, 220);
shape->get_FillFormat()->set_FillType(FillType::NoFill);
shape->get_LineFormat()->get_FillFormat()->set_FillType(FillType::Solid);
shape->get_LineFormat()->get_FillFormat()->get_SolidFillColor()->set_Color(Color::get_Gray());

auto textFrame = shape->get_TextFrame();
textFrame->get_TextFrameFormat()->set_AutofitType(TextAutofitType::Shape);
textFrame->get_Paragraphs()->Clear();

auto firstParagraph = MakeObject<Paragraph>();
firstParagraph->set_Text(u"A hanging indent is created by combining a positive left margin with a negative indent. The first line starts to the left, while wrapped lines align with the paragraph body.");
firstParagraph->get_ParagraphFormat()->get_DefaultPortionFormat()->get_FillFormat()->set_FillType(FillType::Solid);
firstParagraph->get_ParagraphFormat()->get_DefaultPortionFormat()->get_FillFormat()->get_SolidFillColor()->set_Color(Color::get_Black());
firstParagraph->get_ParagraphFormat()->set_MarginLeft(40);
firstParagraph->get_ParagraphFormat()->set_Indent(-20);

auto secondParagraph = MakeObject<Paragraph>();
secondParagraph->set_Text(u"This second example uses a deeper hanging indent so the difference between the first line and the wrapped lines is easier to compare.");
secondParagraph->get_ParagraphFormat()->get_DefaultPortionFormat()->get_FillFormat()->set_FillType(FillType::Solid);
secondParagraph->get_ParagraphFormat()->get_DefaultPortionFormat()->get_FillFormat()->get_SolidFillColor()->set_Color(Color::get_Black());
secondParagraph->get_ParagraphFormat()->set_MarginLeft(60);
secondParagraph->get_ParagraphFormat()->set_Indent(-30);

textFrame->get_Paragraphs()->Add(firstParagraph);
textFrame->get_Paragraphs()->Add(secondParagraph);

presentation->Save(u"hanging_indent.pptx", SaveFormat::Pptx);
presentation->Dispose();
Het resultaat:

Einde‑alinea‑run‑eigenschappen instellen
IParagraph::set_EndParagraphPortionFormat regelt de opmaak van het alinea‑eindteken. Het volgende voorbeeld kent een lettergrootte en een Latijns lettertype toe aan het eindteken van de tweede alinea:
- Laad een Presentation en verkrijg een dia.
- Voeg een IAutoShape toe en wis de standaardalinea.
- Maak twee alinea’s en voeg tekstporties toe.
- Maak een PortionFormat voor het eindteken van de tweede alinea.
- Stel IBasePortionFormat::set_FontHeight en IBasePortionFormat::set_LatinFont in.
- Wijs het formaat toe met IParagraph::set_EndParagraphPortionFormat en sla de presentatie op.
#include <DOM/Fonts/FontData.h>
#include <DOM/IAutoShape.h>
#include <DOM/IParagraphCollection.h>
#include <DOM/IPortionCollection.h>
#include <DOM/Paragraph.h>
#include <DOM/Portion.h>
#include <DOM/PortionFormat.h>
#include <DOM/Presentation.h>
#include <DOM/ShapeType.h>
#include <Export/SaveFormat.h>

using namespace Aspose::Slides;
using namespace Aspose::Slides::Export;
using namespace System;

auto presentation = MakeObject<Presentation>(u"Test.pptx");
auto slide = presentation->get_Slide(0);
auto shape = slide->get_Shapes()->AddAutoShape(ShapeType::Rectangle, 10, 10, 200, 250);
auto textFrame = shape->get_TextFrame();
textFrame->get_Paragraphs()->Clear();

auto firstParagraph = MakeObject<Paragraph>();
firstParagraph->get_Portions()->Add(MakeObject<Portion>(u"Sample text"));

auto secondParagraph = MakeObject<Paragraph>();
secondParagraph->get_Portions()->Add(MakeObject<Portion>(u"Sample text 2"));

auto endParagraphFormat = MakeObject<PortionFormat>();
endParagraphFormat->set_FontHeight(48);
endParagraphFormat->set_LatinFont(MakeObject<FontData>(u"Times New Roman"));
secondParagraph->set_EndParagraphPortionFormat(endParagraphFormat);

textFrame->get_Paragraphs()->Add(firstParagraph);
textFrame->get_Paragraphs()->Add(secondParagraph);

presentation->Save(u"end_paragraph_format.pptx", SaveFormat::Pptx);
presentation->Dispose();
Aantal gerenderde regels tellen
Voor alinea‑regels die van invloed zijn op automatische regelafbreking en interpunctie aan het einde van regels, zie Control Line Breaking en Control Hanging Punctuation .
Gebruik IParagraph::GetLinesCount om het aantal regels te tellen dat een alinea inneemt na tekst‑lay‑out, inclusief automatische afbreking. Dit is handig bij het controleren van tekengrootte en lay‑out in presentatiesjablonen.
Een alinea is één element in ITextFrame::get_Paragraphs, en kan meerdere gerenderde regels beslaan. Een expliciete regelafbreking binnen een alinea dwingt een nieuwe regel zonder een extra alinea te creëren. Automatische afbreking maakt regels op basis van de beschikbare breedte zonder expliciete afbrekingstekens in de tekst in te voegen. Het tellen van alinea’s of regel‑afbrekings‑tekens levert daarom niet het gerenderde regel‑aantal op.
Het volgende voorbeeld maakt een tekstoppervlak, telt de regels, verkleint de vorm en vervangt vervolgens de tekst door een kortere string. Regelafbreking is ingeschakeld en autofit uitgeschakeld zodat de vorm‑breedte de afbreking bepaalt zonder de tekst automatisch te verkleinen of de vorm te schalen. Vormenafmetingen zijn in punten. Ten slotte voegt het voorbeeld een extra alinea toe en telt de regel‑aantallen van het tekstframe op.
#include <DOM/IAutoShape.h>
#include <DOM/IParagraphCollection.h>
#include <DOM/NullableBool.h>
#include <DOM/Paragraph.h>
#include <DOM/Presentation.h>
#include <DOM/ShapeType.h>
#include <DOM/TextAutofitType.h>
#include <system/console.h>

using namespace Aspose::Slides;
using namespace System;

auto presentation = MakeObject<Presentation>();
auto slide = presentation->get_Slide(0);

auto shape = slide->get_Shapes()->AddAutoShape(ShapeType::Rectangle, 50, 50, 400, 200);
auto textFrame = shape->get_TextFrame();
textFrame->get_TextFrameFormat()->set_WrapText(NullableBool::True);
textFrame->get_TextFrameFormat()->set_AutofitType(TextAutofitType::None);

auto paragraph = textFrame->get_Paragraph(0);
paragraph->get_ParagraphFormat()->get_DefaultPortionFormat()->set_FontHeight(20);
paragraph->set_Text(u"This text demonstrates how automatic wrapping changes the number of rendered lines.");
Console::WriteLine(u"Original width: {0}", paragraph->GetLinesCount());

shape->set_Width(150);
Console::WriteLine(u"Narrower shape: {0}", paragraph->GetLinesCount());

paragraph->set_Text(u"Short text.");
Console::WriteLine(u"Shorter text: {0}", paragraph->GetLinesCount());

auto secondParagraph = MakeObject<Paragraph>();
secondParagraph->set_Text(u"Another paragraph.");
secondParagraph->get_ParagraphFormat()->get_DefaultPortionFormat()->set_FontHeight(20);
textFrame->get_Paragraphs()->Add(secondParagraph);

auto totalLineCount = 0;
for (auto currentParagraph : textFrame->get_Paragraphs())
{
    totalLineCount += currentParagraph->GetLinesCount();
}
Console::WriteLine(u"Total lines in the text frame: {0}", totalLineCount);
presentation->Dispose();
Met deze tekst en afmetingen verhoogt het verkleinen van de vorm het aantal regels, terwijl het vervangen van de tekst door de korte string het aantal verlaagt. Exacte aantallen kunnen variëren door beschikbare lettertypen, substitutie, grootte, marges, inspringing, regelafbreking en autofit‑instellingen. Gebruik de lettertypen en lay‑out‑instellingen die voor de doelomgeving bedoeld zijn bij het testen van een sjabloon.
Het aantal regels alleen bepaalt niet of tekst buiten zijn container stroomt. De beschikbare hoogte, regel‑hoogtes, alinea‑ en regel‑afstand, en het gedrag van autofit zijn eveneens van belang; zelfs één regel kan de beschikbare breedte overschrijden wanneer regelafbreking uitgeschakeld is.
Alinea‑inhoud importeren en exporteren
HTML‑tekst importeren in alinea’s
Gebruik IParagraphCollection::AddFromHtml om HTML‑markup om te zetten in alinea’s en porties in een tekstframe.
- Maak een instantie van de Presentation‑klasse.
- Verkrijg een dia en voeg een IAutoShape toe.
- Verkrijg het ITextFrame van de vorm en wis de standaardalinea.
- Lees het bron‑HTML‑bestand.
- Geef de HTML‑string door aan IParagraphCollection::AddFromHtml .
- Sla de gewijzigde presentatie op.
Dit C++‑voorbeeld importeert HTML in een tekstframe:
#include <DOM/FillType.h>
#include <DOM/IAutoShape.h>
#include <DOM/IParagraphCollection.h>
#include <DOM/ISlideSize.h>
#include <DOM/Presentation.h>
#include <DOM/ShapeType.h>
#include <Export/SaveFormat.h>
#include <system/io/stream_reader.h>

using namespace Aspose::Slides;
using namespace Aspose::Slides::Export;
using namespace System;
using namespace System::IO;

auto presentation = MakeObject<Presentation>();
auto slide = presentation->get_Slide(0);
auto slideSize = presentation->get_SlideSize()->get_Size();
auto shape = slide->get_Shapes()->AddAutoShape(ShapeType::Rectangle, 10, 10, slideSize.get_Width() - 20, slideSize.get_Height() - 20);
shape->get_FillFormat()->set_FillType(FillType::NoFill);
shape->get_TextFrame()->get_Paragraphs()->Clear();

auto reader = MakeObject<StreamReader>(u"file.html");
auto html = reader->ReadToEnd();
reader->Close();
shape->get_TextFrame()->get_Paragraphs()->AddFromHtml(html);

presentation->Save(u"html_text.pptx", SaveFormat::Pptx);
presentation->Dispose();
Alinea‑tekst exporteren naar HTML
Gebruik IParagraphCollection::ExportToHtml om een geselecteerd bereik van alinea’s als HTML te exporteren.
- Maak een instantie van de Presentation‑klasse en laad de gewenste presentatie.
- Verkrijg de dia en zoek de IAutoShape die de tekst bevat.
- Verkrijg het ITextFrame van de vorm.
- Roep IParagraphCollection::ExportToHtml aan met het start‑alinea‑index en het aantal te exporteren alinea’s.
- Schrijf de teruggegeven HTML‑string naar een bestand.
Dit C++‑voorbeeld exporteert alle alinea’s van de eerste tekstvorm:
#include <DOM/IAutoShape.h>
#include <DOM/IParagraphCollection.h>
#include <DOM/Presentation.h>
#include <system/console.h>
#include <system/io/stream_writer.h>
#include <system/object_ext.h>
#include <system/text/encoding.h>

using namespace Aspose::Slides;
using namespace System;
using namespace System::IO;
using namespace System::Text;

auto presentation = MakeObject<Presentation>(u"ExportingHTMLText.pptx");
auto shape = presentation->get_Slide(0)->get_Shape(0);
auto textShape = AsCast<IAutoShape>(shape);

if (textShape != nullptr && textShape->get_TextFrame() != nullptr)
{
    auto paragraphs = textShape->get_TextFrame()->get_Paragraphs();
    auto html = paragraphs->ExportToHtml(0, paragraphs->get_Count(), nullptr);
    auto writer = MakeObject<StreamWriter>(u"paragraphs.html", false, Encoding::get_UTF8());
    writer->Write(html);
    writer->Close();
}
else
{
    Console::WriteLine(u"The first shape is not a text shape.");
}

presentation->Dispose();
Een alinea renderen als afbeelding
IParagraph::GetImage rendert een individuele alinea direct en levert een IImage op. Sla het resultaat op in een bestand of stream met IImage::Save . Je hoeft de omvattende vorm niet te renderen of een bitmap handmatig bij te snijden.
IParagraph::GetImage kan nullptr retourneren als de alinea niet gevonden wordt in de bovenliggende collectie, geen geldige render‑bounds heeft, of niet gerenderd kan worden. Controleer het resultaat vóór het opslaan en maak de geretourneerde afbeelding vrij na gebruik.
Een alinea renderen op de standaardschaal
Stel dat we een presentatiebestand hebben genaamd sample.pptx met één dia, waarbij de eerste vorm een tekstvak met drie alinea’s is.
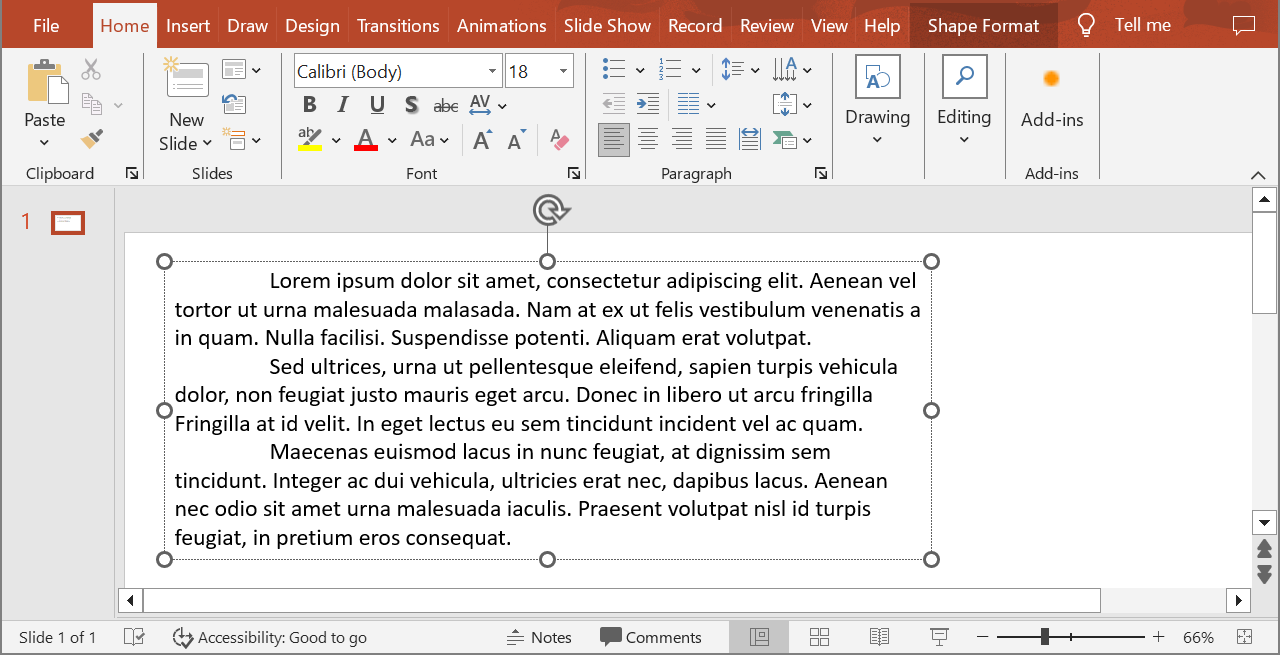
Het volgende voorbeeld rendert de tweede alinea in een regulier tekstvak op de standaardschaal en slaat de geretourneerde afbeelding op in PNG‑formaat.
#include <DOM/IAutoShape.h>
#include <DOM/IParagraph.h>
#include <DOM/Presentation.h>
#include <IImage.h>
#include <ImageFormat.h>
#include <system/console.h>
#include <system/object_ext.h>

using namespace Aspose::Slides;
using namespace System;

auto presentation = MakeObject<Presentation>(u"sample.pptx");
auto shape = presentation->get_Slide(0)->get_Shape(0);
auto textShape = AsCast<IAutoShape>(shape);

if (textShape != nullptr && textShape->get_TextFrame() != nullptr && textShape->get_TextFrame()->get_Paragraphs()->get_Count() > 1)
{
    auto paragraph = textShape->get_TextFrame()->get_Paragraph(1);
    auto paragraphImage = paragraph->GetImage();

    if (paragraphImage != nullptr)
    {
        paragraphImage->Save(u"paragraph.png", ImageFormat::Png);
        paragraphImage->Dispose();
    }
    else
    {
        Console::WriteLine(u"The paragraph could not be rendered.");
    }
}
else
{
    Console::WriteLine(u"The expected text shape or paragraph was not found.");
}

presentation->Dispose();
Het resultaat:

Een alinea renderen in een tabelcel met schaal
Gebruik de overload van IParagraph::GetImage die float scaleX en float scaleY accepteert om de horizontale en verticale schaalfactoren in te stellen. Het volgende voorbeeld maakt een tabel, rendert de alinea in de eerste cel twee keer zo breed en hoog als de standaard, en slaat het resultaat op als PNG‑afbeelding.
#include <DOM/IParagraph.h>
#include <DOM/Presentation.h>
#include <DOM/Table/ITable.h>
#include <IImage.h>
#include <ImageFormat.h>
#include <system/array.h>
#include <system/console.h>

using namespace Aspose::Slides;
using namespace System;

auto scaleX = 2.0f;
auto scaleY = 2.0f;

auto presentation = MakeObject<Presentation>();
auto slide = presentation->get_Slide(0);
auto table = slide->get_Shapes()->AddTable(50, 50, MakeArray<double>({300}), MakeArray<double>({80}));
auto paragraph = table->idx_get(0, 0)->get_TextFrame()->get_Paragraph(0);
paragraph->set_Text(u"Text in a table cell");

auto paragraphImage = paragraph->GetImage(scaleX, scaleY);
if (paragraphImage != nullptr)
{
    paragraphImage->Save(u"table_paragraph.png", ImageFormat::Png);
    paragraphImage->Dispose();
}
else
{
    Console::WriteLine(u"The paragraph could not be rendered.");
}

presentation->Dispose();
Een schaalfactor van 1 houdt die as op de standaardpixelgrootte. Bijvoorbeeld 2 voor beide factoren levert een afbeelding waarvan breedte en hoogte ongeveer het dubbele van de standaardafmetingen zijn, wat vier keer zoveel pixels oplevert. Grotere factoren geven doorgaans scherpere tekst voor inzoomen of hoge resolutie‑uitvoer, maar verhogen ook het geheugen‑ en bestandsgrootte‑verbruik. Factoren onder 1 produceren kleinere afbeeldingen met minder detail. Gebruik gelijke factoren om de beeldverhouding van de alinea te behouden; verschillende horizontale en verticale factoren rekken de uitvoer onafhankelijk.
Het renderen van een volledige vorm met IShape::GetImage blijft nuttig wanneer de uitvoer de vulling, rand of andere visuele context van de vorm moet bevatten. Voor een afbeelding uitsluitend van de alinea, gebruik IParagraph::GetImage .
FAQ
Kan ik het automatisch afbreken van regels in een tekstframe volledig uitschakelen?
Ja. Gebruik ITextFrameFormat::set_WrapText om afbreken uit te schakelen zodat regels niet breken aan de randen van het tekstframe.
Hoe krijg ik de exacte on‑slide‑afmetingen van een specifieke alinea?
Gebruik IParagraph::GetRect om de begrenzende rechthoek van de alinea op te halen. IPortion::GetRect geeft de afmetingen van een individuele portie.
Waar wordt de alinea‑uitlijning (links, rechts, gecentreerd of uitgevuld) geregeld?
IParagraphFormat::set_Alignment is een instelling op alinea‑niveau en wordt toegepast op de hele alinea, ongeacht de opmaak van individuele porties.
Voor verticale uitlijning van porties met verschillende lettergrootten binnen elke regel, zie Lettertypen binnen een regel uitlijnen .
Kan ik de taal voor spelling‑controle voor een deel van een alinea instellen?
Ja. Gebruik IBasePortionFormat::set_LanguageId voor individuele porties, zodat één alinea tekst in meerdere talen kan bevatten.