
在 Python via Java 中建立與套用 WordArt 效果
概觀
WordArt 效果讓您可以使用填充、輪廓、陰影、反射、發光、變形和 3D 格式化來美化文字。本篇說明如何在未安裝 Microsoft Office 的情況下,使用 Aspose.Slides for Python via Java 在 PowerPoint 簡報中建立與自訂這些效果。
建立簡易 WordArt 範本並套用至文字
以下範例透過設定文字、字型、圖案填充與輪廓,建立簡易的 WordArt 風格。
每個範例會建立新簡報並在第一張投影片上新增一個矩形;不需要輸入檔案。第一個範例將文字設為「Aspose.Slides」。形狀的位置與尺寸以點 (point) 為單位:
import jpype
import asposeslides

if not jpype.isJVMStarted():
    jpype.startJVM()

from asposeslides.api import Presentation, ShapeType

presentation = Presentation()
try:
    slide = presentation.getSlides().get_Item(0)

    auto_shape = slide.getShapes().addAutoShape(ShapeType.Rectangle, 20, 20, 400, 200)
    text_frame = auto_shape.getTextFrame()

    portion = text_frame.getParagraphs().get_Item(0).getPortions().get_Item(0)
    portion.setText("Aspose.Slides")
finally:
    presentation.dispose()
將字型設為 36 點的 Arial Black,以便讓格式更明顯:
import jpype
import asposeslides

if not jpype.isJVMStarted():
    jpype.startJVM()

from asposeslides.api import FontData, Presentation, ShapeType

presentation = Presentation()
try:
    slide = presentation.getSlides().get_Item(0)

    auto_shape = slide.getShapes().addAutoShape(ShapeType.Rectangle, 20, 20, 400, 200)

    portion = auto_shape.getTextFrame().getParagraphs().get_Item(0).getPortions().get_Item(0)
    portion.setText("Aspose.Slides")
    font = FontData("Arial Black")
    portion.getPortionFormat().setLatinFont(font)
    portion.getPortionFormat().setFontHeight(36)
finally:
    presentation.dispose()
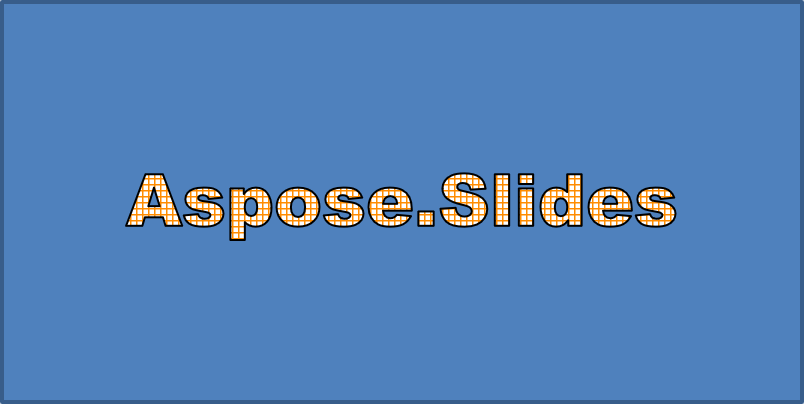
套用具有深橙色前景與白色背景的 SmallGrid 圖案,接著加入寬度為 1 點的黑色文字輪廓:
import jpype
import asposeslides

if not jpype.isJVMStarted():
    jpype.startJVM()

from asposeslides.api import FillType, FontData, PatternStyle, Presentation, ShapeType
from java.awt import Color

presentation = Presentation()
try:
    slide = presentation.getSlides().get_Item(0)

    auto_shape = slide.getShapes().addAutoShape(ShapeType.Rectangle, 20, 20, 400, 200)

    portion = auto_shape.getTextFrame().getParagraphs().get_Item(0).getPortions().get_Item(0)
    portion.setText("Aspose.Slides")
    font = FontData("Arial Black")
    portion.getPortionFormat().setLatinFont(font)
    portion.getPortionFormat().setFontHeight(36)

    portion.getPortionFormat().getFillFormat().setFillType(FillType.Pattern)
    dark_orange = Color(255, 140, 0)
    portion.getPortionFormat().getFillFormat().getPatternFormat().getForeColor().setColor(dark_orange)
    portion.getPortionFormat().getFillFormat().getPatternFormat().getBackColor().setColor(Color.WHITE)
    portion.getPortionFormat().getFillFormat().getPatternFormat().setPatternStyle(PatternStyle.SmallGrid)

    portion.getPortionFormat().getLineFormat().setWidth(1)
    portion.getPortionFormat().getLineFormat().getFillFormat().setFillType(FillType.Solid)
    portion.getPortionFormat().getLineFormat().getFillFormat().getSolidFillColor().setColor(Color.BLACK)
finally:
    presentation.dispose()
產生的文字:
套用其他 WordArt 效果
以下範例示範如何將陰影、反射、發光、變形與 3D 效果套用至文字。
套用外部陰影效果
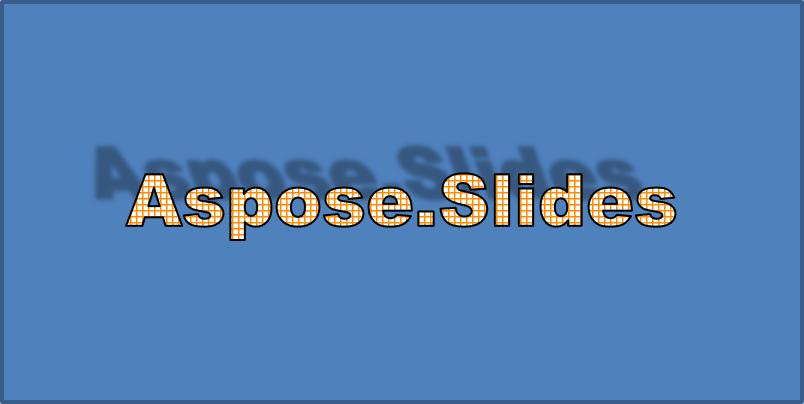
外部陰影透過在文字後方放置陰影來增添深度。您可以自訂其顏色、方向、距離、模糊半徑、比例與斜切。
此範例呼叫 enableOuterShadowEffect 並設定黑色陰影,模糊半徑 4 點、方向 230 度、距離 30 點。比例值 100 保持陰影大小,水平斜切則讓陰影向右傾斜 20 度。alpha 變換將不透明度設定為 32%:
import jpype
import asposeslides

if not jpype.isJVMStarted():
    jpype.startJVM()

from asposeslides.api import ColorTransformOperation, FontData, Presentation, ShapeType
from java.awt import Color

presentation = Presentation()
try:
    slide = presentation.getSlides().get_Item(0)

    auto_shape = slide.getShapes().addAutoShape(ShapeType.Rectangle, 20, 20, 400, 200)

    portion = auto_shape.getTextFrame().getParagraphs().get_Item(0).getPortions().get_Item(0)
    portion.setText("Aspose.Slides")
    font = FontData("Arial Black")
    portion.getPortionFormat().setLatinFont(font)
    portion.getPortionFormat().setFontHeight(36)

    portion.getPortionFormat().getEffectFormat().enableOuterShadowEffect()
    portion.getPortionFormat().getEffectFormat().getOuterShadowEffect().getShadowColor().setColor(Color.BLACK)
    portion.getPortionFormat().getEffectFormat().getOuterShadowEffect().setScaleHorizontal(100)
    portion.getPortionFormat().getEffectFormat().getOuterShadowEffect().setScaleVertical(100)
    portion.getPortionFormat().getEffectFormat().getOuterShadowEffect().setBlurRadius(4)
    portion.getPortionFormat().getEffectFormat().getOuterShadowEffect().setDirection(230)
    portion.getPortionFormat().getEffectFormat().getOuterShadowEffect().setDistance(30)
    portion.getPortionFormat().getEffectFormat().getOuterShadowEffect().setSkewHorizontal(20)
    portion.getPortionFormat().getEffectFormat().getOuterShadowEffect().setSkewVertical(0)
    portion.getPortionFormat().getEffectFormat().getOuterShadowEffect().getShadowColor().getColorTransform().add(ColorTransformOperation.SetAlpha, 0.32)
finally:
    presentation.dispose()
產生的文字:
Note
- 同時使用外部陰影與預設陰影時,僅套用外部陰影。
- 若同時使用外部與內部陰影,最終效果取決於 PowerPoint 版本。例如,在 PowerPoint 2013 中效果會加倍,而在 PowerPoint 2007 中僅套用外部陰影。
套用反射效果
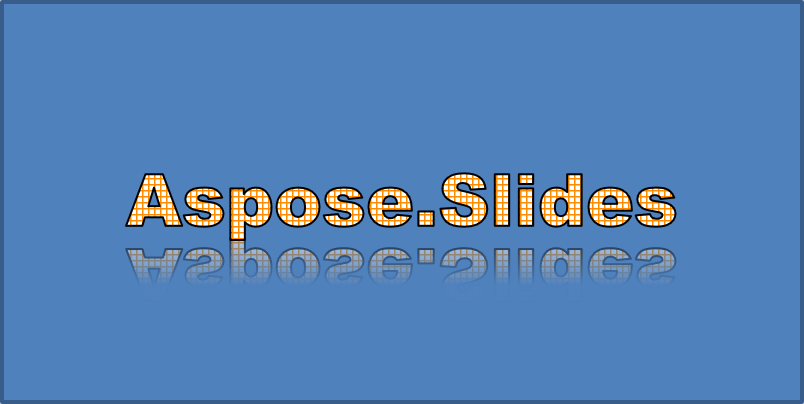
反射會在文字下方產生鏡像副本。您可調整位置、比例、模糊與不透明度以控制外觀。
此範例呼叫 enableReflectionEffect 並將反射垂直翻轉,比例為 -100%。使用 0.5 點的模糊半徑與 4.72 點的距離。從 0% 到 60% 的位置,不透明度由 60% 下降至 0.9%:
import jpype
import asposeslides

if not jpype.isJVMStarted():
    jpype.startJVM()

from asposeslides.api import FontData, Presentation, RectangleAlignment, ShapeType

presentation = Presentation()
try:
    slide = presentation.getSlides().get_Item(0)

    auto_shape = slide.getShapes().addAutoShape(ShapeType.Rectangle, 20, 20, 400, 200)

    portion = auto_shape.getTextFrame().getParagraphs().get_Item(0).getPortions().get_Item(0)
    portion.setText("Aspose.Slides")
    font = FontData("Arial Black")
    portion.getPortionFormat().setLatinFont(font)
    portion.getPortionFormat().setFontHeight(36)

    portion.getPortionFormat().getEffectFormat().enableReflectionEffect()
    portion.getPortionFormat().getEffectFormat().getReflectionEffect().setBlurRadius(0.5)
    portion.getPortionFormat().getEffectFormat().getReflectionEffect().setDistance(4.72)
    portion.getPortionFormat().getEffectFormat().getReflectionEffect().setStartPosAlpha(0)
    portion.getPortionFormat().getEffectFormat().getReflectionEffect().setEndPosAlpha(60)
    portion.getPortionFormat().getEffectFormat().getReflectionEffect().setDirection(90)
    portion.getPortionFormat().getEffectFormat().getReflectionEffect().setScaleHorizontal(100)
    portion.getPortionFormat().getEffectFormat().getReflectionEffect().setScaleVertical(-100)
    portion.getPortionFormat().getEffectFormat().getReflectionEffect().setStartReflectionOpacity(60)
    portion.getPortionFormat().getEffectFormat().getReflectionEffect().setEndReflectionOpacity(0.9)
    portion.getPortionFormat().getEffectFormat().getReflectionEffect().setRectangleAlign(RectangleAlignment.BottomLeft)
finally:
    presentation.dispose()
產生的文字:
套用發光效果
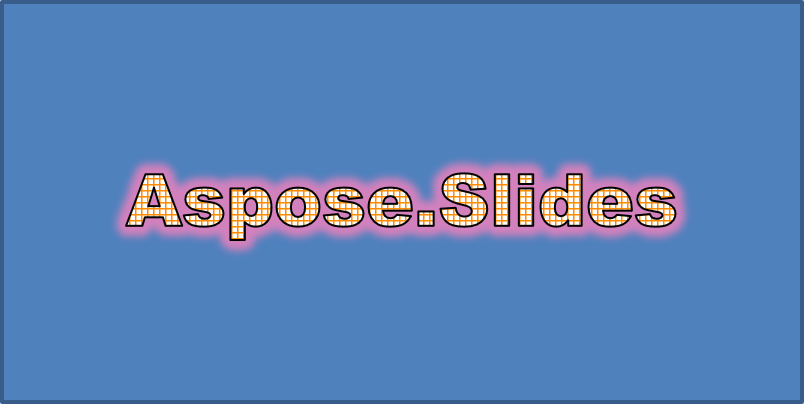
發光會在文字周圍添加柔和的彩色輪廓。您可調整顏色、不透明度與半徑來控制效果。
此範例呼叫 enableGlowEffect 並套用 54% 不透明度、半徑 7 點的紅色發光:
import jpype
import asposeslides

if not jpype.isJVMStarted():
    jpype.startJVM()

from asposeslides.api import ColorTransformOperation, FontData, Presentation, ShapeType
from java.awt import Color

presentation = Presentation()
try:
    slide = presentation.getSlides().get_Item(0)

    auto_shape = slide.getShapes().addAutoShape(ShapeType.Rectangle, 20, 20, 400, 200)

    portion = auto_shape.getTextFrame().getParagraphs().get_Item(0).getPortions().get_Item(0)
    portion.setText("Aspose.Slides")
    font = FontData("Arial Black")
    portion.getPortionFormat().setLatinFont(font)
    portion.getPortionFormat().setFontHeight(36)

    portion.getPortionFormat().getEffectFormat().enableGlowEffect()
    portion.getPortionFormat().getEffectFormat().getGlowEffect().getColor().setColor(Color.RED)
    portion.getPortionFormat().getEffectFormat().getGlowEffect().getColor().getColorTransform().add(ColorTransformOperation.SetAlpha, 0.54)
    portion.getPortionFormat().getEffectFormat().getGlowEffect().setRadius(7)
finally:
    presentation.dispose()
產生的文字:
套用 WordArt 變形
WordArt 變形會彎曲、拉伸或扭曲文字區塊。
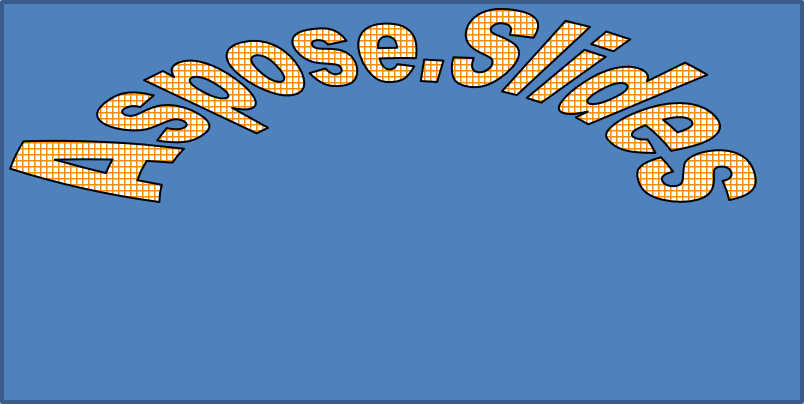
將 setTransform 設為 ArchUpPour 以使整個文字框向上拱形:
import jpype
import asposeslides

if not jpype.isJVMStarted():
    jpype.startJVM()

from asposeslides.api import Presentation, ShapeType, TextShapeType

presentation = Presentation()
try:
    slide = presentation.getSlides().get_Item(0)

    auto_shape = slide.getShapes().addAutoShape(ShapeType.Rectangle, 20, 20, 400, 200)

    text_frame = auto_shape.getTextFrame()
    text_frame.setText("Aspose.Slides")
    text_frame.getTextFrameFormat().setTransform(TextShapeType.ArchUpPour)
finally:
    presentation.dispose()
產生的文字:
Note
Aspose.Slides for Python via Java 提供一組預定義的 transformation types。套用 3D 效果於形狀與文字
您可以將 3D 效果套用於形狀或其文字。斜角、擠出、光源與攝影機設定決定最終外觀。
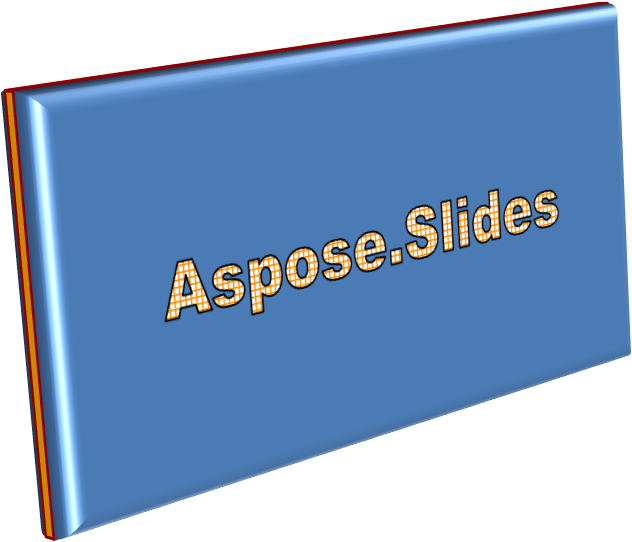
以下範例使用 ThreeDFormat 為矩形加入圓形斜角、橙色擠出與深紅色輪廓。斜角尺寸、擠出高度、輪廓寬度與深度皆以點為單位。使用塑膠材質、旋轉 40 度的平衡光源(繞 Z 軸),以及透視攝影機來定義外觀:
import jpype
import asposeslides

if not jpype.isJVMStarted():
    jpype.startJVM()

from asposeslides.api import BevelPresetType, CameraPresetType, LightRigPresetType, LightingDirection, MaterialPresetType, Presentation, ShapeType
from java.awt import Color

presentation = Presentation()
try:
    slide = presentation.getSlides().get_Item(0)

    auto_shape = slide.getShapes().addAutoShape(ShapeType.Rectangle, 20, 20, 400, 200)
    auto_shape.getTextFrame().setText("Aspose.Slides")

    auto_shape.getThreeDFormat().getBevelBottom().setBevelType(BevelPresetType.Circle)
    auto_shape.getThreeDFormat().getBevelBottom().setHeight(10.5)
    auto_shape.getThreeDFormat().getBevelBottom().setWidth(10.5)

    auto_shape.getThreeDFormat().getBevelTop().setBevelType(BevelPresetType.Circle)
    auto_shape.getThreeDFormat().getBevelTop().setHeight(12.5)
    auto_shape.getThreeDFormat().getBevelTop().setWidth(11)

    orange = Color(255, 165, 0)
    auto_shape.getThreeDFormat().getExtrusionColor().setColor(orange)
    auto_shape.getThreeDFormat().setExtrusionHeight(6)

    dark_red = Color(139, 0, 0)
    auto_shape.getThreeDFormat().getContourColor().setColor(dark_red)
    auto_shape.getThreeDFormat().setContourWidth(1.5)

    auto_shape.getThreeDFormat().setDepth(3)

    auto_shape.getThreeDFormat().setMaterial(MaterialPresetType.Plastic)

    auto_shape.getThreeDFormat().getLightRig().setDirection(LightingDirection.Top)
    auto_shape.getThreeDFormat().getLightRig().setLightType(LightRigPresetType.Balanced)
    auto_shape.getThreeDFormat().getLightRig().setRotation(0, 0, 40)

    auto_shape.getThreeDFormat().getCamera().setCameraType(CameraPresetType.PerspectiveContrastingRightFacing)
finally:
    presentation.dispose()
產生的形狀:
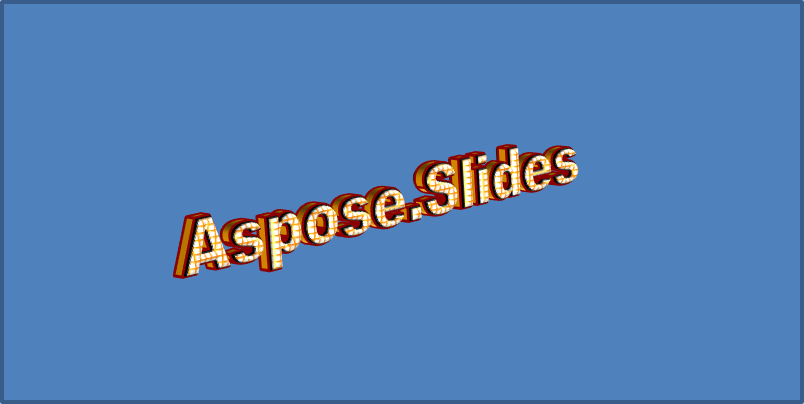
此範例透過 TextFrameFormat.getThreeDFormat 為文字套用相似的 3D 格式。較小的斜角塑造字母邊緣,而擠出與光源則賦予文字深度:
import jpype
import asposeslides

if not jpype.isJVMStarted():
    jpype.startJVM()

from asposeslides.api import BevelPresetType, CameraPresetType, LightRigPresetType, LightingDirection, MaterialPresetType, Presentation, ShapeType
from java.awt import Color

presentation = Presentation()
try:
    slide = presentation.getSlides().get_Item(0)

    auto_shape = slide.getShapes().addAutoShape(ShapeType.Rectangle, 20, 20, 400, 200)
    text_frame = auto_shape.getTextFrame()
    text_frame.setText("Aspose.Slides")

    text_frame.getTextFrameFormat().getThreeDFormat().getBevelBottom().setBevelType(BevelPresetType.Circle)
    text_frame.getTextFrameFormat().getThreeDFormat().getBevelBottom().setHeight(3.5)
    text_frame.getTextFrameFormat().getThreeDFormat().getBevelBottom().setWidth(3.5)

    text_frame.getTextFrameFormat().getThreeDFormat().getBevelTop().setBevelType(BevelPresetType.Circle)
    text_frame.getTextFrameFormat().getThreeDFormat().getBevelTop().setHeight(4)
    text_frame.getTextFrameFormat().getThreeDFormat().getBevelTop().setWidth(4)

    orange = Color(255, 165, 0)
    text_frame.getTextFrameFormat().getThreeDFormat().getExtrusionColor().setColor(orange)
    text_frame.getTextFrameFormat().getThreeDFormat().setExtrusionHeight(6)

    dark_red = Color(139, 0, 0)
    text_frame.getTextFrameFormat().getThreeDFormat().getContourColor().setColor(dark_red)
    text_frame.getTextFrameFormat().getThreeDFormat().setContourWidth(1.5)

    text_frame.getTextFrameFormat().getThreeDFormat().setDepth(3)

    text_frame.getTextFrameFormat().getThreeDFormat().setMaterial(MaterialPresetType.Plastic)

    text_frame.getTextFrameFormat().getThreeDFormat().getLightRig().setDirection(LightingDirection.Top)
    text_frame.getTextFrameFormat().getThreeDFormat().getLightRig().setLightType(LightRigPresetType.Balanced)
    text_frame.getTextFrameFormat().getThreeDFormat().getLightRig().setRotation(0, 0, 40)

    text_frame.getTextFrameFormat().getThreeDFormat().getCamera().setCameraType(CameraPresetType.PerspectiveContrastingRightFacing)
finally:
    presentation.dispose()
產生的文字:
Note
將 3D 效果套用於文字或其形狀——以及這些效果之間的交互——受特定規則管控。考慮同時包含文字與其容納形狀的場景。一個 3D 效果包含物件的 3D 表現以及其所在的場景。
- 若形狀與文字均設定了場景,形狀的場景優先,文字的場景將被忽略。
- 若形狀沒有自己的場景但有 3D 表現,則使用文字的場景。
- 若形狀根本沒有 3D 效果,則視為平面,3D 效果僅套用於文字。
上述行為與 ThreeDFormat.getLightRig 與 ThreeDFormat.getCamera 方法相關。
若要在保持文字可讀的同時保留形狀的 3D 格式,請參考 Keep Text Flat on a 3D Shape 以比較兩種設定並取得完整的 Python 範例。
常見問題
我可以將 WordArt 效果套用於不同字體或文字系統(例如阿拉伯文、中文)嗎?
可以,Aspose.Slides for Python via Java 支援 Unicode,能與所有主要字體與文字系統一同使用。陰影、填充與輪廓等 WordArt 效果不受語言限制,雖然字體的可用性與渲染可能取決於系統安裝的字體。
我可以將 WordArt 效果套用於投影片母版元素嗎?
可以,您可以在母版投影片上(包括標題占位符、頁腳或背景文字)套用 WordArt 效果。對母版版面的變更會自動反映至所有使用該母版的投影片。
WordArt 效果會影響簡報檔案大小嗎?
會略為增加。陰影、發光與漸層填充等效果會因為額外的格式化資訊而稍微提升檔案大小,但差異通常不明顯。
我可以在未儲存簡報的情況下預覽 WordArt 效果的結果嗎?
可以,您可以使用 Slide.getImage 將含有 WordArt 的投影片渲染為影像(例如 PNG、JPEG),或使用 Shape.getImage 渲染單一形狀。這讓您能在記憶體或螢幕上即時預覽結果,然後再決定是否儲存或匯出完整簡報。