
在 Python via Java 中创建和应用 WordArt 效果
概述
WordArt 效果允许您使用填充、轮廓、阴影、反射、发光、变形和 3D 格式来美化文本。本文介绍如何在 PowerPoint 演示文稿中使用 Aspose.Slides for Python via Java 创建和自定义这些效果,且无需安装 Microsoft Office。
创建简易 WordArt 模板并将其应用于文本
以下示例通过设置文本、字体、图案填充和轮廓来构建一个简易的 WordArt 样式。
每个示例都会创建一个新演示文稿并在其第一页添加一个矩形;无需输入文件。第一个示例将文本设置为 “Aspose.Slides”。形状的位置和尺寸以点为单位:
import jpype
import asposeslides

if not jpype.isJVMStarted():
    jpype.startJVM()

from asposeslides.api import Presentation, ShapeType

presentation = Presentation()
try:
    slide = presentation.getSlides().get_Item(0)

    auto_shape = slide.getShapes().addAutoShape(ShapeType.Rectangle, 20, 20, 400, 200)
    text_frame = auto_shape.getTextFrame()

    portion = text_frame.getParagraphs().get_Item(0).getPortions().get_Item(0)
    portion.setText("Aspose.Slides")
finally:
    presentation.dispose()
将字体设置为 36 点的 Arial Black,以便更明显地看到格式:
import jpype
import asposeslides

if not jpype.isJVMStarted():
    jpype.startJVM()

from asposeslides.api import FontData, Presentation, ShapeType

presentation = Presentation()
try:
    slide = presentation.getSlides().get_Item(0)

    auto_shape = slide.getShapes().addAutoShape(ShapeType.Rectangle, 20, 20, 400, 200)

    portion = auto_shape.getTextFrame().getParagraphs().get_Item(0).getPortions().get_Item(0)
    portion.setText("Aspose.Slides")
    font = FontData("Arial Black")
    portion.getPortionFormat().setLatinFont(font)
    portion.getPortionFormat().setFontHeight(36)
finally:
    presentation.dispose()
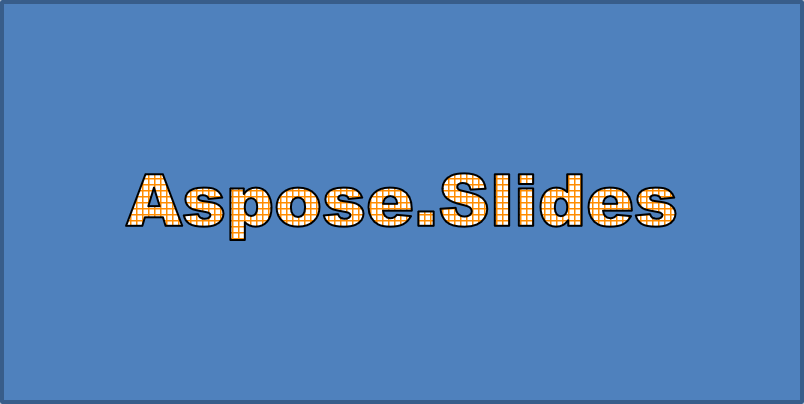
应用带有深橙色前景和白色背景的 SmallGrid 图案,然后添加宽度为 1 点的黑色文本轮廓:
import jpype
import asposeslides

if not jpype.isJVMStarted():
    jpype.startJVM()

from asposeslides.api import FillType, FontData, PatternStyle, Presentation, ShapeType
from java.awt import Color

presentation = Presentation()
try:
    slide = presentation.getSlides().get_Item(0)

    auto_shape = slide.getShapes().addAutoShape(ShapeType.Rectangle, 20, 20, 400, 200)

    portion = auto_shape.getTextFrame().getParagraphs().get_Item(0).getPortions().get_Item(0)
    portion.setText("Aspose.Slides")
    font = FontData("Arial Black")
    portion.getPortionFormat().setLatinFont(font)
    portion.getPortionFormat().setFontHeight(36)

    portion.getPortionFormat().getFillFormat().setFillType(FillType.Pattern)
    dark_orange = Color(255, 140, 0)
    portion.getPortionFormat().getFillFormat().getPatternFormat().getForeColor().setColor(dark_orange)
    portion.getPortionFormat().getFillFormat().getPatternFormat().getBackColor().setColor(Color.WHITE)
    portion.getPortionFormat().getFillFormat().getPatternFormat().setPatternStyle(PatternStyle.SmallGrid)

    portion.getPortionFormat().getLineFormat().setWidth(1)
    portion.getPortionFormat().getLineFormat().getFillFormat().setFillType(FillType.Solid)
    portion.getPortionFormat().getLineFormat().getFillFormat().getSolidFillColor().setColor(Color.BLACK)
finally:
    presentation.dispose()
生成的文本:
应用其他 WordArt 效果
以下示例演示如何对文本应用阴影、反射、发光、变形和 3D 效果。
应用外部阴影效果
外部阴影通过在文本后方放置阴影来增加深度。您可以自定义其颜色、方向、距离、模糊半径、缩放和倾斜。
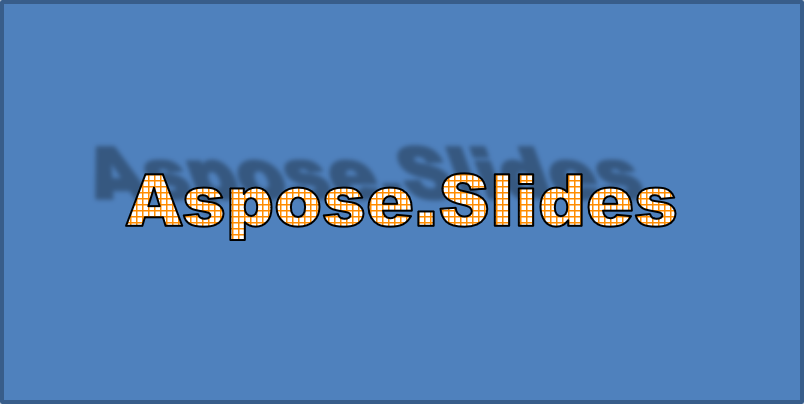
此示例调用 enableOuterShadowEffect 并设置黑色阴影,模糊半径为 4 点,方向为 230 度,距离为 30 点。缩放值 100 保持阴影大小不变,水平倾斜将其倾斜 20 度。alpha 变换将不透明度设为 32%:
import jpype
import asposeslides

if not jpype.isJVMStarted():
    jpype.startJVM()

from asposeslides.api import ColorTransformOperation, FontData, Presentation, ShapeType
from java.awt import Color

presentation = Presentation()
try:
    slide = presentation.getSlides().get_Item(0)

    auto_shape = slide.getShapes().addAutoShape(ShapeType.Rectangle, 20, 20, 400, 200)

    portion = auto_shape.getTextFrame().getParagraphs().get_Item(0).getPortions().get_Item(0)
    portion.setText("Aspose.Slides")
    font = FontData("Arial Black")
    portion.getPortionFormat().setLatinFont(font)
    portion.getPortionFormat().setFontHeight(36)

    portion.getPortionFormat().getEffectFormat().enableOuterShadowEffect()
    portion.getPortionFormat().getEffectFormat().getOuterShadowEffect().getShadowColor().setColor(Color.BLACK)
    portion.getPortionFormat().getEffectFormat().getOuterShadowEffect().setScaleHorizontal(100)
    portion.getPortionFormat().getEffectFormat().getOuterShadowEffect().setScaleVertical(100)
    portion.getPortionFormat().getEffectFormat().getOuterShadowEffect().setBlurRadius(4)
    portion.getPortionFormat().getEffectFormat().getOuterShadowEffect().setDirection(230)
    portion.getPortionFormat().getEffectFormat().getOuterShadowEffect().setDistance(30)
    portion.getPortionFormat().getEffectFormat().getOuterShadowEffect().setSkewHorizontal(20)
    portion.getPortionFormat().getEffectFormat().getOuterShadowEffect().setSkewVertical(0)
    portion.getPortionFormat().getEffectFormat().getOuterShadowEffect().getShadowColor().getColorTransform().add(ColorTransformOperation.SetAlpha, 0.32)
finally:
    presentation.dispose()
生成的文本:
Note
- 当同时使用外部阴影和预设阴影时,仅应用外部阴影。
- 当同时使用外部阴影和内部阴影时,最终效果取决于 PowerPoint 版本。例如,在 PowerPoint 2013 中效果会加倍,而在 PowerPoint 2007 中仅应用外部阴影。
应用反射效果
反射会创建文本的镜像副本。通过调整位置、缩放、模糊和不透明度来控制其外观。
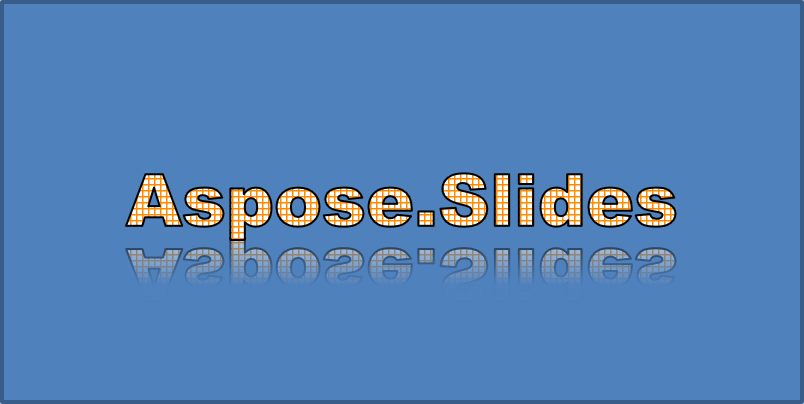
此示例调用 enableReflectionEffect 并将反射垂直翻转,缩放为 -100%。使用 0.5 点的模糊半径和 4.72 点的距离。沿反射方向从 0% 到 60% 的位置,不透明度从 60% 下降至 0.9%:
import jpype
import asposeslides

if not jpype.isJVMStarted():
    jpype.startJVM()

from asposeslides.api import FontData, Presentation, RectangleAlignment, ShapeType

presentation = Presentation()
try:
    slide = presentation.getSlides().get_Item(0)

    auto_shape = slide.getShapes().addAutoShape(ShapeType.Rectangle, 20, 20, 400, 200)

    portion = auto_shape.getTextFrame().getParagraphs().get_Item(0).getPortions().get_Item(0)
    portion.setText("Aspose.Slides")
    font = FontData("Arial Black")
    portion.getPortionFormat().setLatinFont(font)
    portion.getPortionFormat().setFontHeight(36)

    portion.getPortionFormat().getEffectFormat().enableReflectionEffect()
    portion.getPortionFormat().getEffectFormat().getReflectionEffect().setBlurRadius(0.5)
    portion.getPortionFormat().getEffectFormat().getReflectionEffect().setDistance(4.72)
    portion.getPortionFormat().getEffectFormat().getReflectionEffect().setStartPosAlpha(0)
    portion.getPortionFormat().getEffectFormat().getReflectionEffect().setEndPosAlpha(60)
    portion.getPortionFormat().getEffectFormat().getReflectionEffect().setDirection(90)
    portion.getPortionFormat().getEffectFormat().getReflectionEffect().setScaleHorizontal(100)
    portion.getPortionFormat().getEffectFormat().getReflectionEffect().setScaleVertical(-100)
    portion.getPortionFormat().getEffectFormat().getReflectionEffect().setStartReflectionOpacity(60)
    portion.getPortionFormat().getEffectFormat().getReflectionEffect().setEndReflectionOpacity(0.9)
    portion.getPortionFormat().getEffectFormat().getReflectionEffect().setRectangleAlign(RectangleAlignment.BottomLeft)
finally:
    presentation.dispose()
生成的文本:
应用发光效果
发光在文本周围添加柔和的彩色轮廓。通过调整颜色、不透明度和半径来控制效果。
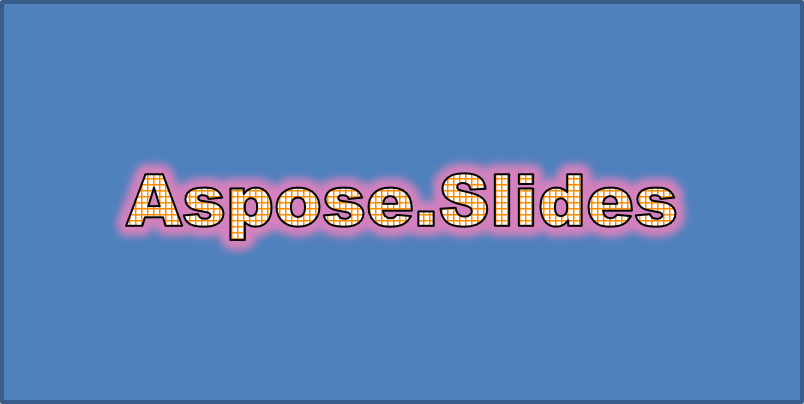
此示例调用 enableGlowEffect 并应用红色发光,透明度为 54%,半径为 7 点:
import jpype
import asposeslides

if not jpype.isJVMStarted():
    jpype.startJVM()

from asposeslides.api import ColorTransformOperation, FontData, Presentation, ShapeType
from java.awt import Color

presentation = Presentation()
try:
    slide = presentation.getSlides().get_Item(0)

    auto_shape = slide.getShapes().addAutoShape(ShapeType.Rectangle, 20, 20, 400, 200)

    portion = auto_shape.getTextFrame().getParagraphs().get_Item(0).getPortions().get_Item(0)
    portion.setText("Aspose.Slides")
    font = FontData("Arial Black")
    portion.getPortionFormat().setLatinFont(font)
    portion.getPortionFormat().setFontHeight(36)

    portion.getPortionFormat().getEffectFormat().enableGlowEffect()
    portion.getPortionFormat().getEffectFormat().getGlowEffect().getColor().setColor(Color.RED)
    portion.getPortionFormat().getEffectFormat().getGlowEffect().getColor().getColorTransform().add(ColorTransformOperation.SetAlpha, 0.54)
    portion.getPortionFormat().getEffectFormat().getGlowEffect().setRadius(7)
finally:
    presentation.dispose()
生成的文本:
应用 WordArt 变形
WordArt 变形会弯曲、拉伸或扭曲一段文本。
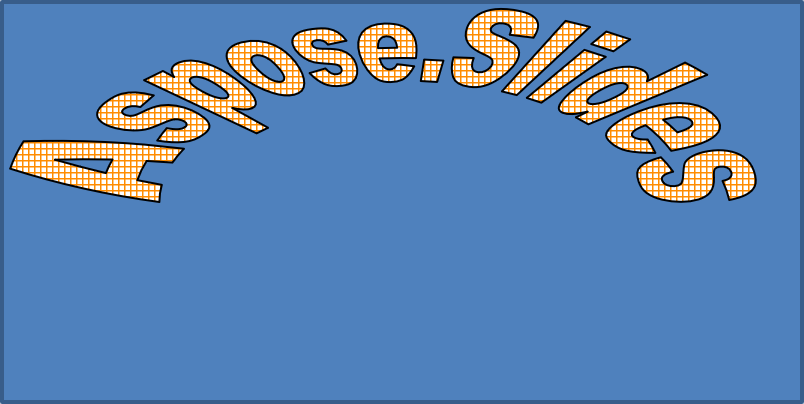
将 setTransform 设置为 ArchUpPour 可使整个文本框向上弧形:
import jpype
import asposeslides

if not jpype.isJVMStarted():
    jpype.startJVM()

from asposeslides.api import Presentation, ShapeType, TextShapeType

presentation = Presentation()
try:
    slide = presentation.getSlides().get_Item(0)

    auto_shape = slide.getShapes().addAutoShape(ShapeType.Rectangle, 20, 20, 400, 200)

    text_frame = auto_shape.getTextFrame()
    text_frame.setText("Aspose.Slides")
    text_frame.getTextFrameFormat().setTransform(TextShapeType.ArchUpPour)
finally:
    presentation.dispose()
生成的文本:
Note
Aspose.Slides for Python via Java 提供了一组预定义的 transformation types。应用 3D 效果于形状和文本
您可以对形状或其文本应用 3D 效果。斜面、挤压、光照和相机设置决定最终外观。
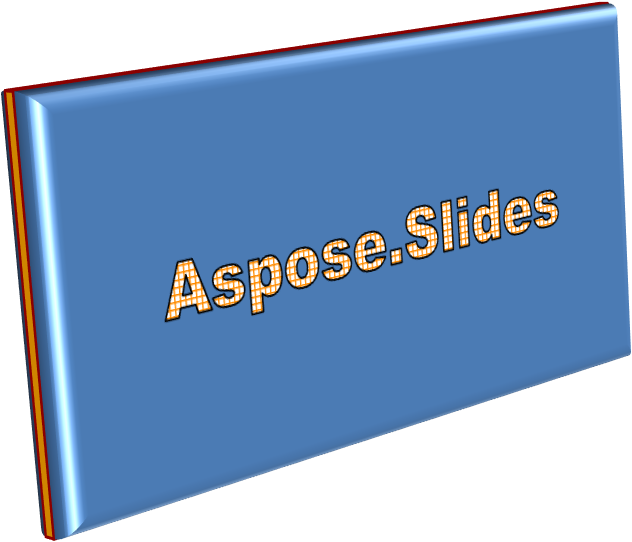
以下示例使用 ThreeDFormat 为矩形添加圆形斜面、橙色挤压和深红色轮廓。斜面尺寸、挤压高度、轮廓宽度和深度均以点为单位。采用塑料材质、围绕 Z 轴旋转 40 度的均衡光照以及透视相机来定义外观:
import jpype
import asposeslides

if not jpype.isJVMStarted():
    jpype.startJVM()

from asposeslides.api import BevelPresetType, CameraPresetType, LightRigPresetType, LightingDirection, MaterialPresetType, Presentation, ShapeType
from java.awt import Color

presentation = Presentation()
try:
    slide = presentation.getSlides().get_Item(0)

    auto_shape = slide.getShapes().addAutoShape(ShapeType.Rectangle, 20, 20, 400, 200)
    auto_shape.getTextFrame().setText("Aspose.Slides")

    auto_shape.getThreeDFormat().getBevelBottom().setBevelType(BevelPresetType.Circle)
    auto_shape.getThreeDFormat().getBevelBottom().setHeight(10.5)
    auto_shape.getThreeDFormat().getBevelBottom().setWidth(10.5)

    auto_shape.getThreeDFormat().getBevelTop().setBevelType(BevelPresetType.Circle)
    auto_shape.getThreeDFormat().getBevelTop().setHeight(12.5)
    auto_shape.getThreeDFormat().getBevelTop().setWidth(11)

    orange = Color(255, 165, 0)
    auto_shape.getThreeDFormat().getExtrusionColor().setColor(orange)
    auto_shape.getThreeDFormat().setExtrusionHeight(6)

    dark_red = Color(139, 0, 0)
    auto_shape.getThreeDFormat().getContourColor().setColor(dark_red)
    auto_shape.getThreeDFormat().setContourWidth(1.5)

    auto_shape.getThreeDFormat().setDepth(3)

    auto_shape.getThreeDFormat().setMaterial(MaterialPresetType.Plastic)

    auto_shape.getThreeDFormat().getLightRig().setDirection(LightingDirection.Top)
    auto_shape.getThreeDFormat().getLightRig().setLightType(LightRigPresetType.Balanced)
    auto_shape.getThreeDFormat().getLightRig().setRotation(0, 0, 40)

    auto_shape.getThreeDFormat().getCamera().setCameraType(CameraPresetType.PerspectiveContrastingRightFacing)
finally:
    presentation.dispose()
生成的形状:
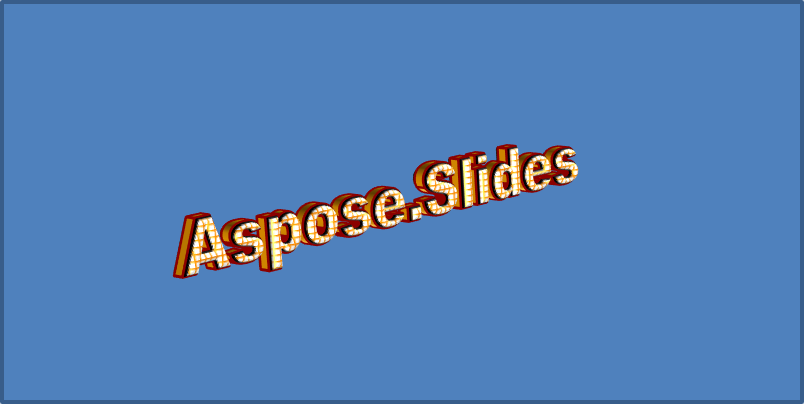
此示例通过 TextFrameFormat.getThreeDFormat 对文本应用类似的 3D 格式。较小的斜面塑造字母边缘,挤压和光照赋予文本深度:
import jpype
import asposeslides

if not jpype.isJVMStarted():
    jpype.startJVM()

from asposeslides.api import BevelPresetType, CameraPresetType, LightRigPresetType, LightingDirection, MaterialPresetType, Presentation, ShapeType
from java.awt import Color

presentation = Presentation()
try:
    slide = presentation.getSlides().get_Item(0)

    auto_shape = slide.getShapes().addAutoShape(ShapeType.Rectangle, 20, 20, 400, 200)
    text_frame = auto_shape.getTextFrame()
    text_frame.setText("Aspose.Slides")

    text_frame.getTextFrameFormat().getThreeDFormat().getBevelBottom().setBevelType(BevelPresetType.Circle)
    text_frame.getTextFrameFormat().getThreeDFormat().getBevelBottom().setHeight(3.5)
    text_frame.getTextFrameFormat().getThreeDFormat().getBevelBottom().setWidth(3.5)

    text_frame.getTextFrameFormat().getThreeDFormat().getBevelTop().setBevelType(BevelPresetType.Circle)
    text_frame.getTextFrameFormat().getThreeDFormat().getBevelTop().setHeight(4)
    text_frame.getTextFrameFormat().getThreeDFormat().getBevelTop().setWidth(4)

    orange = Color(255, 165, 0)
    text_frame.getTextFrameFormat().getThreeDFormat().getExtrusionColor().setColor(orange)
    text_frame.getTextFrameFormat().getThreeDFormat().setExtrusionHeight(6)

    dark_red = Color(139, 0, 0)
    text_frame.getTextFrameFormat().getThreeDFormat().getContourColor().setColor(dark_red)
    text_frame.getTextFrameFormat().getThreeDFormat().setContourWidth(1.5)

    text_frame.getTextFrameFormat().getThreeDFormat().setDepth(3)

    text_frame.getTextFrameFormat().getThreeDFormat().setMaterial(MaterialPresetType.Plastic)

    text_frame.getTextFrameFormat().getThreeDFormat().getLightRig().setDirection(LightingDirection.Top)
    text_frame.getTextFrameFormat().getThreeDFormat().getLightRig().setLightType(LightRigPresetType.Balanced)
    text_frame.getTextFrameFormat().getThreeDFormat().getLightRig().setRotation(0, 0, 40)

    text_frame.getTextFrameFormat().getThreeDFormat().getCamera().setCameraType(CameraPresetType.PerspectiveContrastingRightFacing)
finally:
    presentation.dispose()
生成的文本:
Note
对文本或其形状应用 3D 效果以及这些效果之间的交互遵循特定规则。考虑一个同时包含文本和其所在形状的场景。3D 效果包括对象的 3D 表现以及其所在的场景。
- 如果形状和文本都设置了场景,则以形状的场景为主,文本的场景被忽略。
- 如果形状没有自己的场景但具备 3D 表现,则使用文本的场景。
- 如果形状根本没有 3D 效果,则视为平面,仅对文本应用 3D 效果。
这些行为与 ThreeDFormat.getLightRig 和 ThreeDFormat.getCamera 方法相关。
若希望在保持形状的 3D 格式的同时让文本保持平面可读,请参阅 Keep Text Flat on a 3D Shape 了解两种设置的对比以及完整的 Python 示例。
常见问题
我可以将 WordArt 效果用于不同的字体或文字系统(例如阿拉伯语、中文)吗?
可以,Aspose.Slides for Python via Java 支持 Unicode,能够处理所有主流字体和文字系统。无论语言如何,都可以应用阴影、填充和轮廓等 WordArt 效果,不过具体的字体可用性和渲染效果可能取决于系统安装的字体。
我可以将 WordArt 效果应用于母版幻灯片的元素吗?
可以,您可以在母版幻灯片上的形状(如标题占位符、页脚或背景文字)上应用 WordArt 效果。对母版布局的更改会同步到所有使用该母版的幻灯片。
WordArt 效果会影响演示文稿的文件大小吗?
会有轻微影响。阴影、发光和渐变填充等效果会增加少量格式元数据,从而略微增大文件大小,但通常可以忽略不计。
我可以在不保存演示文稿的情况下预览 WordArt 效果的结果吗?
可以,您可以使用 Slide.getImage 将包含 WordArt 的幻灯片渲染为图像(如 PNG、JPEG),或使用 Shape.getImage 单独渲染形状。这样即可在内存中或屏幕上预览效果,而无需保存或导出完整的演示文稿。