
Python via Java에서 WordArt 효과 만들기 및 적용
개요
WordArt 효과를 사용하면 채우기, 윤곽선, 그림자, 반사, 글로우, 변환 및 3D 서식을 통해 텍스트를 스타일링할 수 있습니다. 이 문서에서는 Microsoft Office 없이 Aspose.Slides for Python via Java를 사용하여 PowerPoint 프레젠테이션에서 이러한 효과를 만들고 사용자 지정하는 방법을 설명합니다.
간단한 WordArt 템플릿 만들기 및 텍스트에 적용
다음 예제들은 텍스트, 글꼴, 패턴 채우기 및 윤곽선을 설정하여 간단한 WordArt 스타일을 구축합니다.
각 예제는 새 프레젠테이션을 만들고 첫 번째 슬라이드에 사각형을 추가합니다; 입력 파일이 필요하지 않습니다. 첫 번째 예제는 텍스트를 “Aspose.Slides”로 설정합니다. 도형의 위치와 크기는 포인트 단위로 측정됩니다:
import jpype
import asposeslides

if not jpype.isJVMStarted():
    jpype.startJVM()

from asposeslides.api import Presentation, ShapeType

presentation = Presentation()
try:
    slide = presentation.getSlides().get_Item(0)

    auto_shape = slide.getShapes().addAutoShape(ShapeType.Rectangle, 20, 20, 400, 200)
    text_frame = auto_shape.getTextFrame()

    portion = text_frame.getParagraphs().get_Item(0).getPortions().get_Item(0)
    portion.setText("Aspose.Slides")
finally:
    presentation.dispose()
글꼴을 36포인트 Arial Black으로 설정하여 서식을 더 눈에 띄게 합니다:
import jpype
import asposeslides

if not jpype.isJVMStarted():
    jpype.startJVM()

from asposeslides.api import FontData, Presentation, ShapeType

presentation = Presentation()
try:
    slide = presentation.getSlides().get_Item(0)

    auto_shape = slide.getShapes().addAutoShape(ShapeType.Rectangle, 20, 20, 400, 200)

    portion = auto_shape.getTextFrame().getParagraphs().get_Item(0).getPortions().get_Item(0)
    portion.setText("Aspose.Slides")
    font = FontData("Arial Black")
    portion.getPortionFormat().setLatinFont(font)
    portion.getPortionFormat().setFontHeight(36)
finally:
    presentation.dispose()
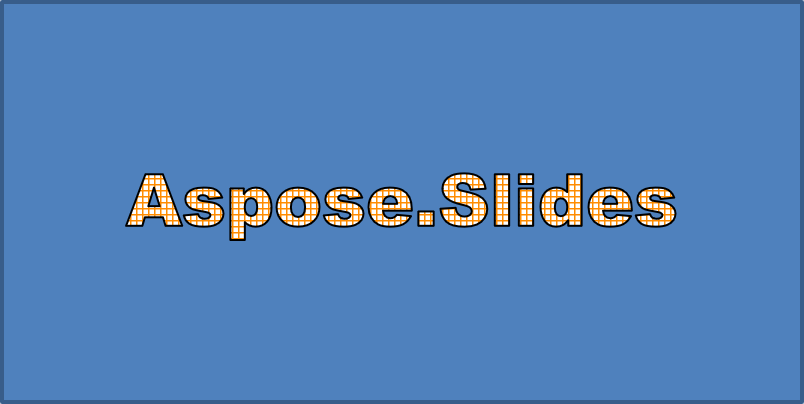
다크 오렌지 전경색과 흰색 배경을 사용한 SmallGrid 패턴을 적용하고, 너비 1포인트의 검은색 텍스트 윤곽선을 추가합니다:
import jpype
import asposeslides

if not jpype.isJVMStarted():
    jpype.startJVM()

from asposeslides.api import FillType, FontData, PatternStyle, Presentation, ShapeType
from java.awt import Color

presentation = Presentation()
try:
    slide = presentation.getSlides().get_Item(0)

    auto_shape = slide.getShapes().addAutoShape(ShapeType.Rectangle, 20, 20, 400, 200)

    portion = auto_shape.getTextFrame().getParagraphs().get_Item(0).getPortions().get_Item(0)
    portion.setText("Aspose.Slides")
    font = FontData("Arial Black")
    portion.getPortionFormat().setLatinFont(font)
    portion.getPortionFormat().setFontHeight(36)

    portion.getPortionFormat().getFillFormat().setFillType(FillType.Pattern)
    dark_orange = Color(255, 140, 0)
    portion.getPortionFormat().getFillFormat().getPatternFormat().getForeColor().setColor(dark_orange)
    portion.getPortionFormat().getFillFormat().getPatternFormat().getBackColor().setColor(Color.WHITE)
    portion.getPortionFormat().getFillFormat().getPatternFormat().setPatternStyle(PatternStyle.SmallGrid)

    portion.getPortionFormat().getLineFormat().setWidth(1)
    portion.getPortionFormat().getLineFormat().getFillFormat().setFillType(FillType.Solid)
    portion.getPortionFormat().getLineFormat().getFillFormat().getSolidFillColor().setColor(Color.BLACK)
finally:
    presentation.dispose()
결과 텍스트:
다른 WordArt 효과 적용
다음 예제는 그림자, 반사, 글로우, 변환 및 3D 효과를 텍스트에 적용하는 방법을 보여줍니다.
외부 그림자 효과 적용
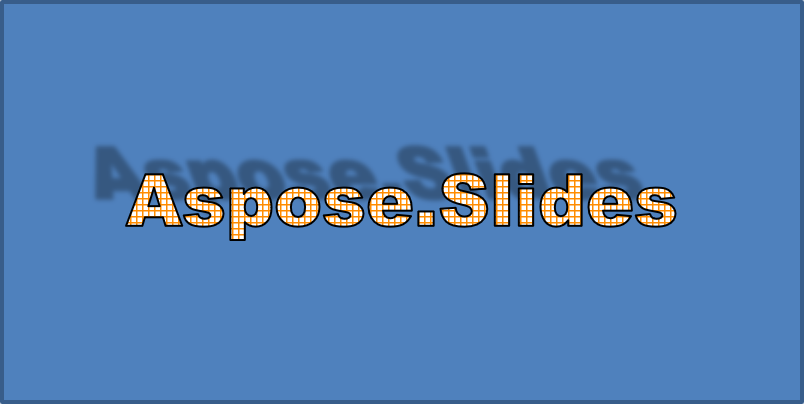
외부 그림자는 텍스트 뒤에 그림자를 배치하여 깊이를 추가합니다. 색상, 방향, 거리, 흐림 반경, 스케일 및 기울기를 사용자 지정할 수 있습니다.
이 예제는 enableOuterShadowEffect를 호출하고 흐림 반경 4포인트, 방향 230도, 거리 30포인트인 검은색 그림자를 설정합니다. 스케일 값 100은 그림자 크기를 유지하고, 수평 기울기는 20도로 기울입니다. 알파 변환은 불투명도를 32%로 설정합니다:
import jpype
import asposeslides

if not jpype.isJVMStarted():
    jpype.startJVM()

from asposeslides.api import ColorTransformOperation, FontData, Presentation, ShapeType
from java.awt import Color

presentation = Presentation()
try:
    slide = presentation.getSlides().get_Item(0)

    auto_shape = slide.getShapes().addAutoShape(ShapeType.Rectangle, 20, 20, 400, 200)

    portion = auto_shape.getTextFrame().getParagraphs().get_Item(0).getPortions().get_Item(0)
    portion.setText("Aspose.Slides")
    font = FontData("Arial Black")
    portion.getPortionFormat().setLatinFont(font)
    portion.getPortionFormat().setFontHeight(36)

    portion.getPortionFormat().getEffectFormat().enableOuterShadowEffect()
    portion.getPortionFormat().getEffectFormat().getOuterShadowEffect().getShadowColor().setColor(Color.BLACK)
    portion.getPortionFormat().getEffectFormat().getOuterShadowEffect().setScaleHorizontal(100)
    portion.getPortionFormat().getEffectFormat().getOuterShadowEffect().setScaleVertical(100)
    portion.getPortionFormat().getEffectFormat().getOuterShadowEffect().setBlurRadius(4)
    portion.getPortionFormat().getEffectFormat().getOuterShadowEffect().setDirection(230)
    portion.getPortionFormat().getEffectFormat().getOuterShadowEffect().setDistance(30)
    portion.getPortionFormat().getEffectFormat().getOuterShadowEffect().setSkewHorizontal(20)
    portion.getPortionFormat().getEffectFormat().getOuterShadowEffect().setSkewVertical(0)
    portion.getPortionFormat().getEffectFormat().getOuterShadowEffect().getShadowColor().getColorTransform().add(ColorTransformOperation.SetAlpha, 0.32)
finally:
    presentation.dispose()
결과 텍스트:
Note
- 외부 그림자와 사전 설정 그림자를 함께 사용할 경우 외부 그림자만 적용됩니다.
- 외부 그림자와 내부 그림자를 동시에 사용할 경우 결과 효과는 PowerPoint 버전에 따라 다릅니다. 예를 들어 PowerPoint 2013에서는 효과가 두 배가 되지만 PowerPoint 2007에서는 외부 그림자만 적용됩니다.
반사 효과 적용
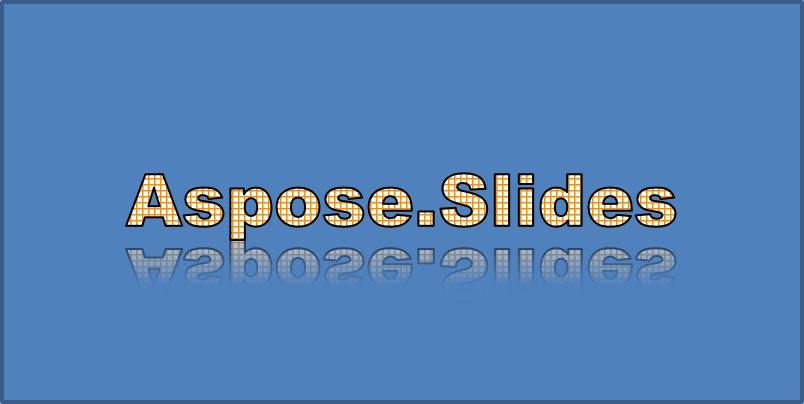
반사는 텍스트의 거울 복사본을 생성합니다. 위치, 스케일, 흐림 및 불투명도를 조정하여 모양을 제어합니다.
이 예제는 enableReflectionEffect를 호출하고 스케일 -100%로 반사를 수직으로 뒤집습니다. 흐림 반경은 0.5포인트, 거리 4.72포인트를 사용합니다. 불투명도는 반사 위치 0%에서 60% 사이에 60%에서 0.9%로 감소합니다:
import jpype
import asposeslides

if not jpype.isJVMStarted():
    jpype.startJVM()

from asposeslides.api import FontData, Presentation, RectangleAlignment, ShapeType

presentation = Presentation()
try:
    slide = presentation.getSlides().get_Item(0)

    auto_shape = slide.getShapes().addAutoShape(ShapeType.Rectangle, 20, 20, 400, 200)

    portion = auto_shape.getTextFrame().getParagraphs().get_Item(0).getPortions().get_Item(0)
    portion.setText("Aspose.Slides")
    font = FontData("Arial Black")
    portion.getPortionFormat().setLatinFont(font)
    portion.getPortionFormat().setFontHeight(36)

    portion.getPortionFormat().getEffectFormat().enableReflectionEffect()
    portion.getPortionFormat().getEffectFormat().getReflectionEffect().setBlurRadius(0.5)
    portion.getPortionFormat().getEffectFormat().getReflectionEffect().setDistance(4.72)
    portion.getPortionFormat().getEffectFormat().getReflectionEffect().setStartPosAlpha(0)
    portion.getPortionFormat().getEffectFormat().getReflectionEffect().setEndPosAlpha(60)
    portion.getPortionFormat().getEffectFormat().getReflectionEffect().setDirection(90)
    portion.getPortionFormat().getEffectFormat().getReflectionEffect().setScaleHorizontal(100)
    portion.getPortionFormat().getEffectFormat().getReflectionEffect().setScaleVertical(-100)
    portion.getPortionFormat().getEffectFormat().getReflectionEffect().setStartReflectionOpacity(60)
    portion.getPortionFormat().getEffectFormat().getReflectionEffect().setEndReflectionOpacity(0.9)
    portion.getPortionFormat().getEffectFormat().getReflectionEffect().setRectangleAlign(RectangleAlignment.BottomLeft)
finally:
    presentation.dispose()
결과 텍스트:
글로우 효과 적용
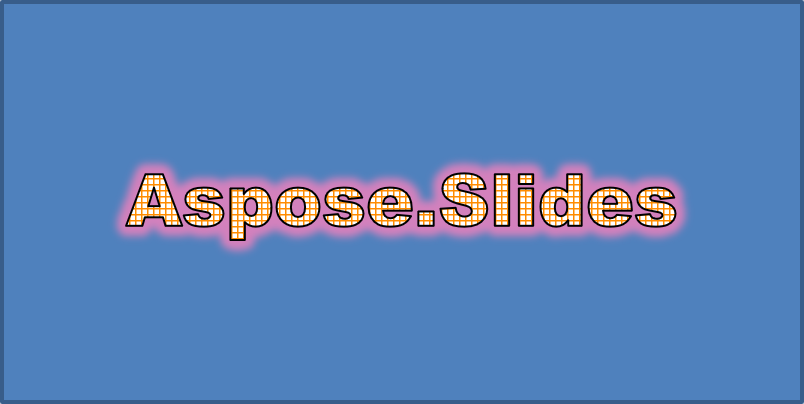
글로우는 텍스트 주변에 부드러운 색상 윤곽선을 추가합니다. 색상, 불투명도 및 반경을 조정하여 효과를 제어합니다.
이 예제는 enableGlowEffect를 호출하고 불투명도 54%와 반경 7포인트인 빨간색 글로우를 적용합니다:
import jpype
import asposeslides

if not jpype.isJVMStarted():
    jpype.startJVM()

from asposeslides.api import ColorTransformOperation, FontData, Presentation, ShapeType
from java.awt import Color

presentation = Presentation()
try:
    slide = presentation.getSlides().get_Item(0)

    auto_shape = slide.getShapes().addAutoShape(ShapeType.Rectangle, 20, 20, 400, 200)

    portion = auto_shape.getTextFrame().getParagraphs().get_Item(0).getPortions().get_Item(0)
    portion.setText("Aspose.Slides")
    font = FontData("Arial Black")
    portion.getPortionFormat().setLatinFont(font)
    portion.getPortionFormat().setFontHeight(36)

    portion.getPortionFormat().getEffectFormat().enableGlowEffect()
    portion.getPortionFormat().getEffectFormat().getGlowEffect().getColor().setColor(Color.RED)
    portion.getPortionFormat().getEffectFormat().getGlowEffect().getColor().getColorTransform().add(ColorTransformOperation.SetAlpha, 0.54)
    portion.getPortionFormat().getEffectFormat().getGlowEffect().setRadius(7)
finally:
    presentation.dispose()
결과 텍스트:
WordArt 변환 적용
WordArt 변환은 텍스트 블록을 굽히거나 늘리거나 왜곡합니다.
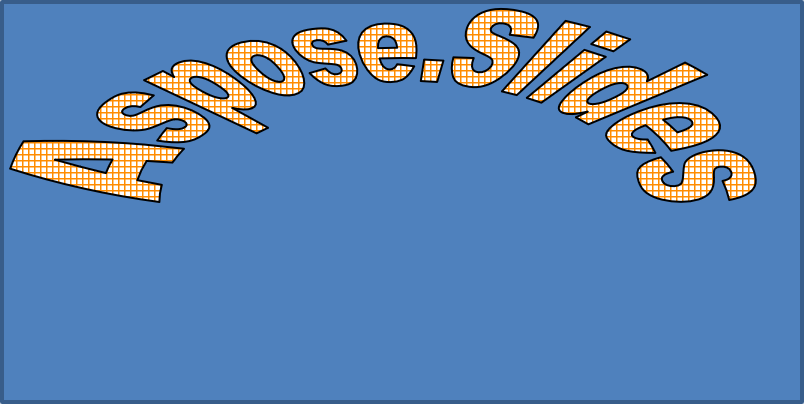
setTransform을 ArchUpPour으로 설정하여 전체 텍스트 프레임을 위로 굽습니다:
import jpype
import asposeslides

if not jpype.isJVMStarted():
    jpype.startJVM()

from asposeslides.api import Presentation, ShapeType, TextShapeType

presentation = Presentation()
try:
    slide = presentation.getSlides().get_Item(0)

    auto_shape = slide.getShapes().addAutoShape(ShapeType.Rectangle, 20, 20, 400, 200)

    text_frame = auto_shape.getTextFrame()
    text_frame.setText("Aspose.Slides")
    text_frame.getTextFrameFormat().setTransform(TextShapeType.ArchUpPour)
finally:
    presentation.dispose()
결과 텍스트:
Note
Aspose.Slides for Python via Java는 미리 정의된 transformation types을 제공합니다.모양 및 텍스트에 3D 효과 적용
도형이나 텍스트에 3D 효과를 적용할 수 있습니다. 베벨, 압출, 조명 및 카메라 설정이 최종 모양을 제어합니다.
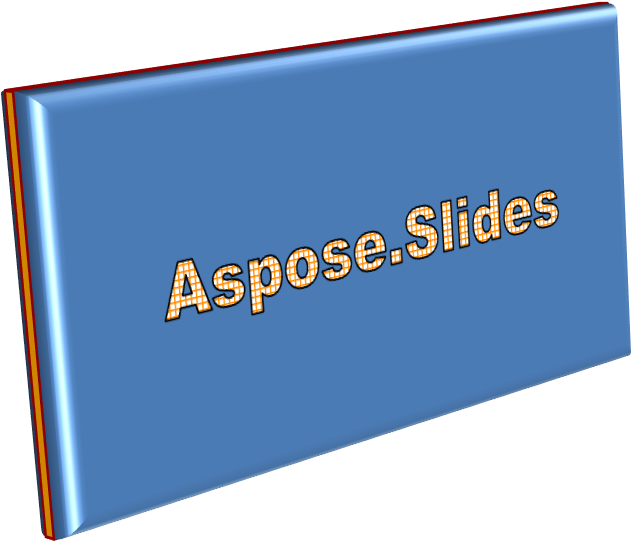
다음 예제는 ThreeDFormat을 사용하여 사각형에 원형 베벨, 오렌지 색 압출 및 짙은 빨간색 외곽선을 추가합니다. 베벨 치수, 압출 높이, 외곽선 너비 및 깊이는 포인트 단위로 측정됩니다. 플라스틱 재질, Z축을 기준으로 40도 회전된 균형 조명 및 원근 카메라가 외관을 정의합니다:
import jpype
import asposeslides

if not jpype.isJVMStarted():
    jpype.startJVM()

from asposeslides.api import BevelPresetType, CameraPresetType, LightRigPresetType, LightingDirection, MaterialPresetType, Presentation, ShapeType
from java.awt import Color

presentation = Presentation()
try:
    slide = presentation.getSlides().get_Item(0)

    auto_shape = slide.getShapes().addAutoShape(ShapeType.Rectangle, 20, 20, 400, 200)
    auto_shape.getTextFrame().setText("Aspose.Slides")

    auto_shape.getThreeDFormat().getBevelBottom().setBevelType(BevelPresetType.Circle)
    auto_shape.getThreeDFormat().getBevelBottom().setHeight(10.5)
    auto_shape.getThreeDFormat().getBevelBottom().setWidth(10.5)

    auto_shape.getThreeDFormat().getBevelTop().setBevelType(BevelPresetType.Circle)
    auto_shape.getThreeDFormat().getBevelTop().setHeight(12.5)
    auto_shape.getThreeDFormat().getBevelTop().setWidth(11)

    orange = Color(255, 165, 0)
    auto_shape.getThreeDFormat().getExtrusionColor().setColor(orange)
    auto_shape.getThreeDFormat().setExtrusionHeight(6)

    dark_red = Color(139, 0, 0)
    auto_shape.getThreeDFormat().getContourColor().setColor(dark_red)
    auto_shape.getThreeDFormat().setContourWidth(1.5)

    auto_shape.getThreeDFormat().setDepth(3)

    auto_shape.getThreeDFormat().setMaterial(MaterialPresetType.Plastic)

    auto_shape.getThreeDFormat().getLightRig().setDirection(LightingDirection.Top)
    auto_shape.getThreeDFormat().getLightRig().setLightType(LightRigPresetType.Balanced)
    auto_shape.getThreeDFormat().getLightRig().setRotation(0, 0, 40)

    auto_shape.getThreeDFormat().getCamera().setCameraType(CameraPresetType.PerspectiveContrastingRightFacing)
finally:
    presentation.dispose()
결과 도형:
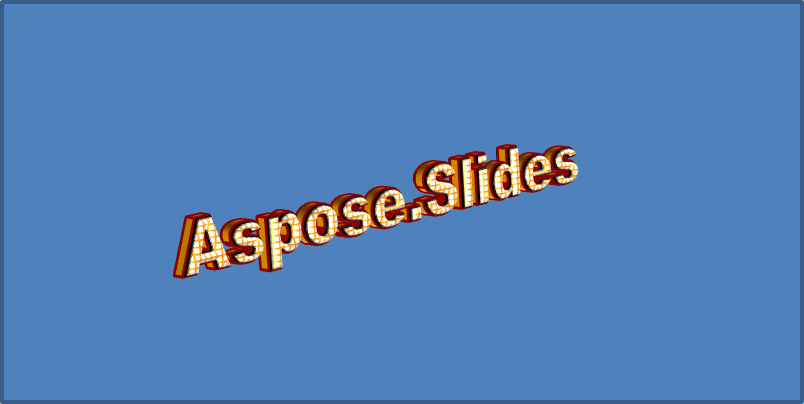
이 예제는 TextFrameFormat.getThreeDFormat를 통해 텍스트에도 유사한 3D 서식을 적용합니다. 작은 베벨이 문자 가장자리를 형성하고, 압출과 조명이 텍스트에 깊이를 제공합니다:
import jpype
import asposeslides

if not jpype.isJVMStarted():
    jpype.startJVM()

from asposeslides.api import BevelPresetType, CameraPresetType, LightRigPresetType, LightingDirection, MaterialPresetType, Presentation, ShapeType
from java.awt import Color

presentation = Presentation()
try:
    slide = presentation.getSlides().get_Item(0)

    auto_shape = slide.getShapes().addAutoShape(ShapeType.Rectangle, 20, 20, 400, 200)
    text_frame = auto_shape.getTextFrame()
    text_frame.setText("Aspose.Slides")

    text_frame.getTextFrameFormat().getThreeDFormat().getBevelBottom().setBevelType(BevelPresetType.Circle)
    text_frame.getTextFrameFormat().getThreeDFormat().getBevelBottom().setHeight(3.5)
    text_frame.getTextFrameFormat().getThreeDFormat().getBevelBottom().setWidth(3.5)

    text_frame.getTextFrameFormat().getThreeDFormat().getBevelTop().setBevelType(BevelPresetType.Circle)
    text_frame.getTextFrameFormat().getThreeDFormat().getBevelTop().setHeight(4)
    text_frame.getTextFrameFormat().getThreeDFormat().getBevelTop().setWidth(4)

    orange = Color(255, 165, 0)
    text_frame.getTextFrameFormat().getThreeDFormat().getExtrusionColor().setColor(orange)
    text_frame.getTextFrameFormat().getThreeDFormat().setExtrusionHeight(6)

    dark_red = Color(139, 0, 0)
    text_frame.getTextFrameFormat().getThreeDFormat().getContourColor().setColor(dark_red)
    text_frame.getTextFrameFormat().getThreeDFormat().setContourWidth(1.5)

    text_frame.getTextFrameFormat().getThreeDFormat().setDepth(3)

    text_frame.getTextFrameFormat().getThreeDFormat().setMaterial(MaterialPresetType.Plastic)

    text_frame.getTextFrameFormat().getThreeDFormat().getLightRig().setDirection(LightingDirection.Top)
    text_frame.getTextFrameFormat().getThreeDFormat().getLightRig().setLightType(LightRigPresetType.Balanced)
    text_frame.getTextFrameFormat().getThreeDFormat().getLightRig().setRotation(0, 0, 40)

    text_frame.getTextFrameFormat().getThreeDFormat().getCamera().setCameraType(CameraPresetType.PerspectiveContrastingRightFacing)
finally:
    presentation.dispose()
결과 텍스트:
Note
텍스트 또는 도형에 3D 효과를 적용하고 이들 효과 간의 상호 작용은 특정 규칙에 따라 관리됩니다. 텍스트와 해당 텍스트를 포함하는 도형이 모두 존재하는 장면을 고려하십시오. 3D 효과에는 객체의 3D 표현과 그 객체가 배치되는 장면이 포함됩니다.
- 도형과 텍스트 모두에 장면이 지정된 경우, 도형의 장면이 우선하고 텍스트의 장면은 무시됩니다.
- 도형에 자체 장면은 없지만 3D 표현이 있는 경우 텍스트의 장면이 사용됩니다.
- 도형에 3D 효과가 전혀 없는 경우, 도형은 평면으로 처리되며 3D 효과는 텍스트에만 적용됩니다.
이 동작은 ThreeDFormat.getLightRig 및 ThreeDFormat.getCamera 메서드와 관련됩니다.
텍스트를 평면으로 유지하면서 도형의 3D 서식을 유지하려면 Keep Text Flat on a 3D Shape를 참조하여 두 설정을 비교하고 전체 Python 예제를 확인하십시오.
FAQ
다른 글꼴이나 스크립트(예: 아라비아어, 중국어)에서 WordArt 효과를 사용할 수 있나요?
예, Aspose.Slides for Python via Java는 유니코드를 지원하며 모든 주요 글꼴 및 스크립트와 함께 작동합니다. 그림자, 채우기, 윤곽선 등의 WordArt 효과는 언어와 관계없이 적용할 수 있지만, 글꼴 가용성 및 렌더링은 시스템에 설치된 글꼴에 따라 달라질 수 있습니다.
슬라이드 마스터 요소에 WordArt 효과를 적용할 수 있나요?
예, 마스터 슬라이드의 도형(제목 자리표시자, 바닥글, 배경 텍스트 등)에 WordArt 효과를 적용할 수 있습니다. 마스터 레이아웃에 변경을 하면 해당 레이아웃을 사용하는 모든 슬라이드에 자동으로 반영됩니다.
WordArt 효과가 프레젠테이션 파일 크기에 영향을 미치나요?
약간 영향을 미칩니다. 그림자, 글로우 및 그라디언트 채우기와 같은 WordArt 효과는 추가 서식 메타데이터를 포함하므로 파일 크기가 약간 증가할 수 있지만, 차이는 일반적으로 무시할 수준입니다.
프레젠테이션을 저장하지 않고 WordArt 효과 결과를 미리 볼 수 있나요?
예, Slide.getImage 또는 Shape.getImage를 사용하여 WordArt가 포함된 슬라이드 또는 개별 도형을 이미지(PNG, JPEG 등)로 렌더링하면 메모리 또는 화면에서 저장 없이 결과를 미리 확인할 수 있습니다.