
Crea e applica effetti WordArt in Python tramite Java
Panoramica
Gli effetti WordArt consentono di formattare il testo con riempimenti, contorni, ombre, riflessi, bagliori, trasformazioni e formattazione 3D. Questo articolo spiega come creare e personalizzare questi effetti nelle presentazioni PowerPoint usando Aspose.Slides per Python tramite Java, senza avere Microsoft Office installato.
Creare un modello WordArt semplice e applicarlo al testo
Gli esempi seguenti costruiscono uno stile WordArt semplice impostando il testo, il carattere, il riempimento a motivo e il contorno.
Ogni esempio crea una nuova presentazione e aggiunge un rettangolo alla prima diapositiva; non è necessario alcun file di input. Il primo esempio imposta il testo su “Aspose.Slides”. La posizione e le dimensioni della forma sono misurate in punti:
import jpype
import asposeslides

if not jpype.isJVMStarted():
    jpype.startJVM()

from asposeslides.api import Presentation, ShapeType

presentation = Presentation()
try:
    slide = presentation.getSlides().get_Item(0)

    auto_shape = slide.getShapes().addAutoShape(ShapeType.Rectangle, 20, 20, 400, 200)
    text_frame = auto_shape.getTextFrame()

    portion = text_frame.getParagraphs().get_Item(0).getPortions().get_Item(0)
    portion.setText("Aspose.Slides")
finally:
    presentation.dispose()
Imposta il carattere su Arial Black a 36 punti per rendere la formattazione più evidente:
import jpype
import asposeslides

if not jpype.isJVMStarted():
    jpime.startJVM()

from asposeslides.api import FontData, Presentation, ShapeType

presentation = Presentation()
try:
    slide = presentation.getSlides().get_Item(0)

    auto_shape = slide.getShapes().addAutoShape(ShapeType.Rectangle, 20, 20, 400, 200)

    portion = auto_shape.getTextFrame().getParagraphs().get_Item(0).getPortions().get_Item(0)
    portion.setText("Aspose.Slides")
    font = FontData("Arial Black")
    portion.getPortionFormat().setLatinFont(font)
    portion.getPortionFormat().setFontHeight(36)
finally:
    presentation.dispose()
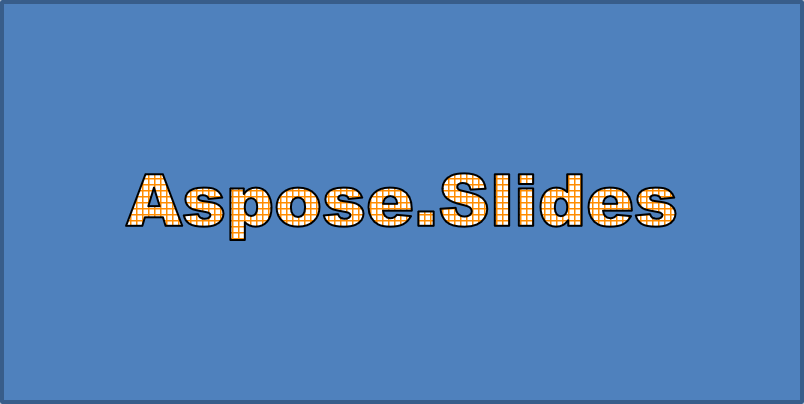
Applica un motivo SmallGrid con un primo piano arancione scuro e uno sfondo bianco, quindi aggiungi un contorno del testo nero con spessore di 1 punto:
import jpype
import asposeslides

if not jpype.isJVMStarted():
    jpype.startJVM()

from asposeslides.api import FillType, FontData, PatternStyle, Presentation, ShapeType
from java.awt import Color

presentation = Presentation()
try:
    slide = presentation.getSlides().get_Item(0)

    auto_shape = slide.getShapes().addAutoShape(ShapeType.Rectangle, 20, 20, 400, 200)

    portion = auto_shape.getTextFrame().getParagraphs().get_Item(0).getPortions().get_Item(0)
    portion.setText("Aspose.Slides")
    font = FontData("Arial Black")
    portion.getPortionFormat().setLatinFont(font)
    portion.getPortionFormat().setFontHeight(36)

    portion.getPortionFormat().getFillFormat().setFillType(FillType.Pattern)
    dark_orange = Color(255, 140, 0)
    portion.getPortionFormat().getFillFormat().getPatternFormat().getForeColor().setColor(dark_orange)
    portion.getPortionFormat().getFillFormat().getPatternFormat().getBackColor().setColor(Color.WHITE)
    portion.getPortionFormat().getFillFormat().getPatternFormat().setPatternStyle(PatternStyle.SmallGrid)

    portion.getPortionFormat().getLineFormat().setWidth(1)
    portion.getPortionFormat().getLineFormat().getFillFormat().setFillType(FillType.Solid)
    portion.getPortionFormat().getLineFormat().getFillFormat().getSolidFillColor().setColor(Color.BLACK)
finally:
    presentation.dispose()
Il testo risultante:
Applicare altri effetti WordArt
Gli esempi seguenti dimostrano come applicare ombre, riflessi, bagliori, trasformazioni ed effetti 3D al testo.
Applicare effetti di ombra esterna
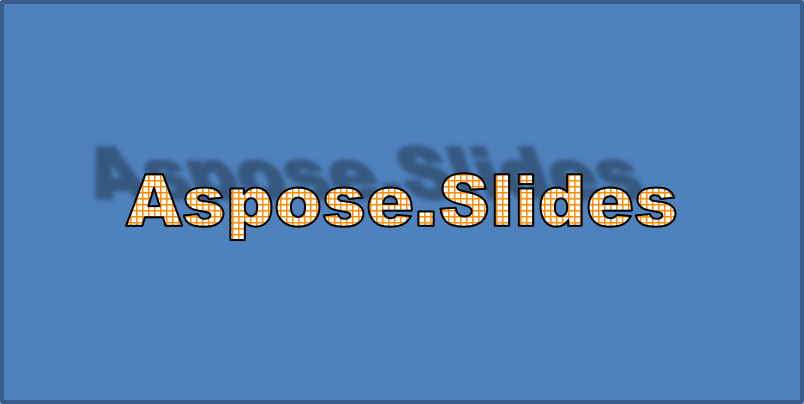
Un’ombra esterna aggiunge profondità posizionando un’ombra dietro il testo. È possibile personalizzare colore, direzione, distanza, raggio di sfocatura, scala e inclinazione.
Questo esempio chiama enableOuterShadowEffect e imposta un’ombra nera con raggio di sfocatura di 4 punti, direzione di 230 gradi e distanza di 30 punti. I valori di scala 100 mantengono le dimensioni dell’ombra, mentre l’inclinazione orizzontale la inclina di 20 gradi. La trasformazione alfa imposta l’opacità al 32%:
import jpype
import asposeslides

if not jpype.isJVMStarted():
    jpype.startJVM()

from asposeslides.api import ColorTransformOperation, FontData, Presentation, ShapeType
from java.awt import Color

presentation = Presentation()
try:
    slide = presentation.getSlides().get_Item(0)

    auto_shape = slide.getShapes().addAutoShape(ShapeType.Rectangle, 20, 20, 400, 200)

    portion = auto_shape.getTextFrame().getParagraphs().get_Item(0).getPortions().get_Item(0)
    portion.setText("Aspose.Slides")
    font = FontData("Arial Black")
    portion.getPortionFormat().setLatinFont(font)
    portion.getPortionFormat().setFontHeight(36)

    portion.getPortionFormat().getEffectFormat().enableOuterShadowEffect()
    portion.getPortionFormat().getEffectFormat().getOuterShadowEffect().getShadowColor().setColor(Color.BLACK)
    portion.getPortionFormat().getEffectFormat().getOuterShadowEffect().setScaleHorizontal(100)
    portion.getPortionFormat().getEffectFormat().getOuterShadowEffect().setScaleVertical(100)
    portion.getPortionFormat().getEffectFormat().getOuterShadowEffect().setBlurRadius(4)
    portion.getPortionFormat().getEffectFormat().getOuterShadowEffect().setDirection(230)
    portion.getPortionFormat().getEffectFormat().getOuterShadowEffect().setDistance(30)
    portion.getPortionFormat().getEffectFormat().getOuterShadowEffect().setSkewHorizontal(20)
    portion.getPortionFormat().getEffectFormat().getOuterShadowEffect().setSkewVertical(0)
    portion.getPortionFormat().getEffectFormat().getOuterShadowEffect().getShadowColor().getColorTransform().add(ColorTransformOperation.SetAlpha, 0.32)
finally:
    presentation.dispose()
Il testo risultante:
Note
- Quando ombre esterne e predefinite sono usate insieme, viene applicata solo l’ombra esterna.
- Se ombre esterne e interne sono usate simultaneamente, l’effetto risultante dipende dalla versione di PowerPoint. Per esempio, in PowerPoint 2013 l’effetto è raddoppiato, mentre in PowerPoint 2007 è applicata solo l’ombra esterna.
Applicare effetti di riflesso
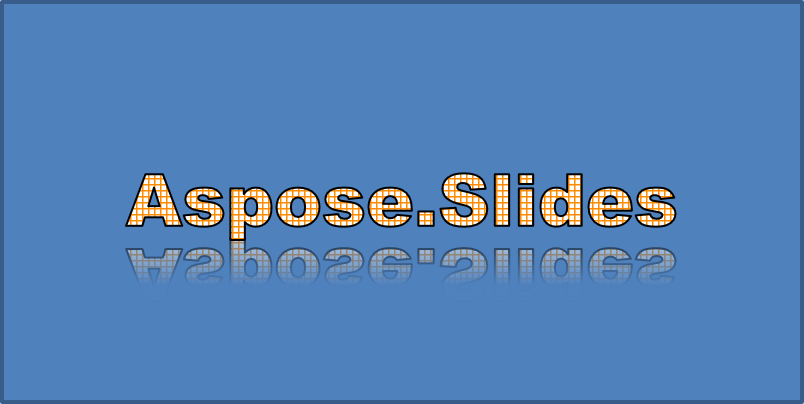
Un riflesso crea una copia speculare del testo. Regola posizione, scala, sfocatura e opacità per controllarne l’aspetto.
Questo esempio chiama enableReflectionEffect e capovolge verticalmente il riflesso con una scala del -100%. Usa un raggio di sfocatura di 0,5 punti e una distanza di 4,72 punti. L’opacità diminuisce dal 60% allo 0,9% tra le posizioni 0% e 60% lungo il riflesso:
import jpype
import asposeslides

if not jpype.isJVMStarted():
    jpype.startJVM()

from asposeslides.api import FontData, Presentation, RectangleAlignment, ShapeType

presentation = Presentation()
try:
    slide = presentation.getSlides().get_Item(0)

    auto_shape = slide.getShapes().addAutoShape(ShapeType.Rectangle, 20, 20, 400, 200)

    portion = auto_shape.getTextFrame().getParagraphs().get_Item(0).getPortions().get_Item(0)
    portion.setText("Aspose.Slides")
    font = FontData("Arial Black")
    portion.getPortionFormat().setLatinFont(font)
    portion.getPortionFormat().setFontHeight(36)

    portion.getPortionFormat().getEffectFormat().enableReflectionEffect()
    portion.getPortionFormat().getEffectFormat().getReflectionEffect().setBlurRadius(0.5)
    portion.getPortionFormat().getEffectFormat().getReflectionEffect().setDistance(4.72)
    portion.getPortionFormat().getEffectFormat().getReflectionEffect().setStartPosAlpha(0)
    portion.getPortionFormat().getEffectFormat().getReflectionEffect().setEndPosAlpha(60)
    portion.getPortionFormat().getEffectFormat().getReflectionEffect().setDirection(90)
    portion.getPortionFormat().getEffectFormat().getReflectionEffect().setScaleHorizontal(100)
    portion.getPortionFormat().getEffectFormat().getReflectionEffect().setScaleVertical(-100)
    portion.getPortionFormat().getEffectFormat().getReflectionEffect().setStartReflectionOpacity(60)
    portion.getPortionFormat().getEffectFormat().getReflectionEffect().setEndReflectionOpacity(0.9)
    portion.getPortionFormat().getEffectFormat().getReflectionEffect().setRectangleAlign(RectangleAlignment.BottomLeft)
finally:
    presentation.dispose()
Il testo risultante:
Applicare effetti di bagliore
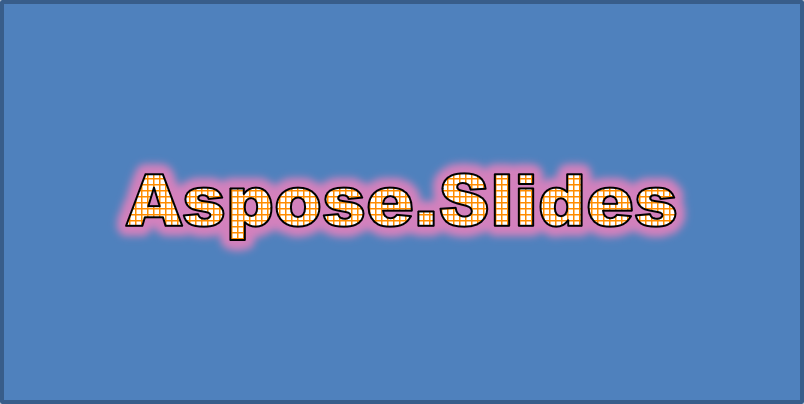
Un bagliore aggiunge un delicato contorno colorato attorno al testo. Regola colore, opacità e raggio per controllare l’effetto.
Questo esempio chiama enableGlowEffect e applica un bagliore rosso con opacità del 54% e raggio di 7 punti:
import jpype
import asposeslides

if not jpype.isJVMStarted():
    jpype.startJVM()

from asposeslides.api import ColorTransformOperation, FontData, Presentation, ShapeType
from java.awt import Color

presentation = Presentation()
try:
    slide = presentation.getSlides().get_Item(0)

    auto_shape = slide.getShapes().addAutoShape(ShapeType.Rectangle, 20, 20, 400, 200)

    portion = auto_shape.getTextFrame().getParagraphs().get_Item(0).getPortions().get_Item(0)
    portion.setText("Aspose.Slides")
    font = FontData("Arial Black")
    portion.getPortionFormat().setLatinFont(font)
    portion.getPortionFormat().setFontHeight(36)

    portion.getPortionFormat().getEffectFormat().enableGlowEffect()
    portion.getPortionFormat().getEffectFormat().getGlowEffect().getColor().setColor(Color.RED)
    portion.getPortionFormat().getEffectFormat().getGlowEffect().getColor().getColorTransform().add(ColorTransformOperation.SetAlpha, 0.54)
    portion.getPortionFormat().getEffectFormat().getGlowEffect().setRadius(7)
finally:
    presentation.dispose()
Il testo risultante:
Applicare trasformazioni WordArt
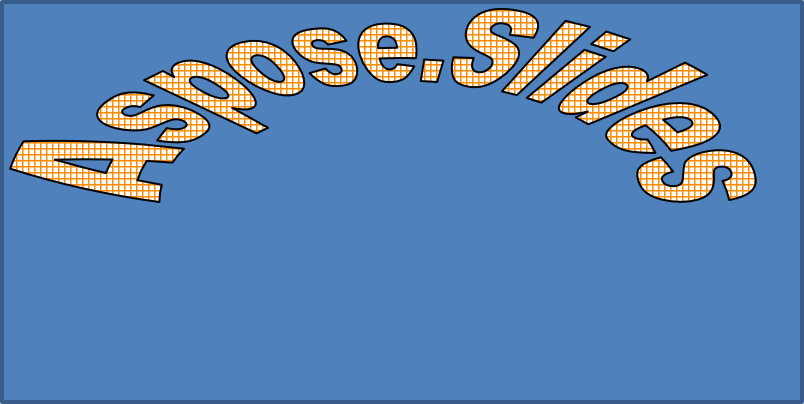
Le trasformazioni WordArt curvano, allungano o deformano un blocco di testo.
Imposta setTransform su ArchUpPour per curvare l’intero riquadro di testo verso l’alto:
import jpype
import asposeslides

if not jpype.isJVMStarted():
    jpype.startJVM()

from asposeslides.api import Presentation, ShapeType, TextShapeType

presentation = Presentation()
try:
    slide = presentation.getSlides().get_Item(0)

    auto_shape = slide.getShapes().addAutoShape(ShapeType.Rectangle, 20, 20, 400, 200)

    text_frame = auto_shape.getTextFrame()
    text_frame.setText("Aspose.Slides")
    text_frame.getTextFrameFormat().setTransform(TextShapeType.ArchUpPour)
finally:
    presentation.dispose()
Il testo risultante:
Note
Aspose.Slides per Python tramite Java fornisce un insieme di tipi di trasformazione predefiniti.Applicare effetti 3D a forme e testo
È possibile applicare effetti 3D a una forma o al suo testo. Smussi, estrusione, illuminazione e impostazioni della telecamera controllano l’aspetto finale.
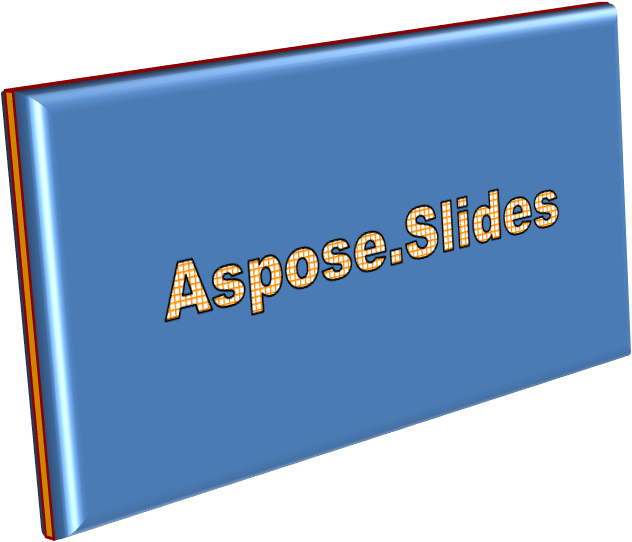
L’esempio seguente utilizza ThreeDFormat per aggiungere smussi circolari, estrusione arancione e un contorno rosso scuro al rettangolo. Le dimensioni degli smussi, l’altezza dell’estrusione, la larghezza del contorno e la profondità sono misurate in punti. Un materiale plastico, illuminazione bilanciata ruotata di 40 gradi attorno all’asse Z e una telecamera prospettica ne definiscono l’aspetto:
import jpype
import asposeslides

if not jpype.isJVMStarted():
    jpype.startJVM()

from asposeslides.api import BevelPresetType, CameraPresetType, LightRigPresetType, LightingDirection, MaterialPresetType, Presentation, ShapeType
from java.awt import Color

presentation = Presentation()
try:
    slide = presentation.getSlides().get_Item(0)

    auto_shape = slide.getShapes().addAutoShape(ShapeType.Rectangle, 20, 20, 400, 200)
    auto_shape.getTextFrame().setText("Aspose.Slides")

    auto_shape.getThreeDFormat().getBevelBottom().setBevelType(BevelPresetType.Circle)
    auto_shape.getThreeDFormat().getBevelBottom().setHeight(10.5)
    auto_shape.getThreeDFormat().getBevelBottom().setWidth(10.5)

    auto_shape.getThreeDFormat().getBevelTop().setBevelType(BevelPresetType.Circle)
    auto_shape.getThreeDFormat().getBevelTop().setHeight(12.5)
    auto_shape.getThreeDFormat().getBevelTop().setWidth(11)

    orange = Color(255, 165, 0)
    auto_shape.getThreeDFormat().getExtrusionColor().setColor(orange)
    auto_shape.getThreeDFormat().setExtrusionHeight(6)

    dark_red = Color(139, 0, 0)
    auto_shape.getThreeDFormat().getContourColor().setColor(dark_red)
    auto_shape.getThreeDFormat().setContourWidth(1.5)

    auto_shape.getThreeDFormat().setDepth(3)

    auto_shape.getThreeDFormat().setMaterial(MaterialPresetType.Plastic)

    auto_shape.getThreeDFormat().getLightRig().setDirection(LightingDirection.Top)
    auto_shape.getThreeDFormat().getLightRig().setLightType(LightRigPresetType.Balanced)
    auto_shape.getThreeDFormat().getLightRig().setRotation(0, 0, 40)

    auto_shape.getThreeDFormat().getCamera().setCameraType(CameraPresetType.PerspectiveContrastingRightFacing)
finally:
    presentation.dispose()
La forma risultante:
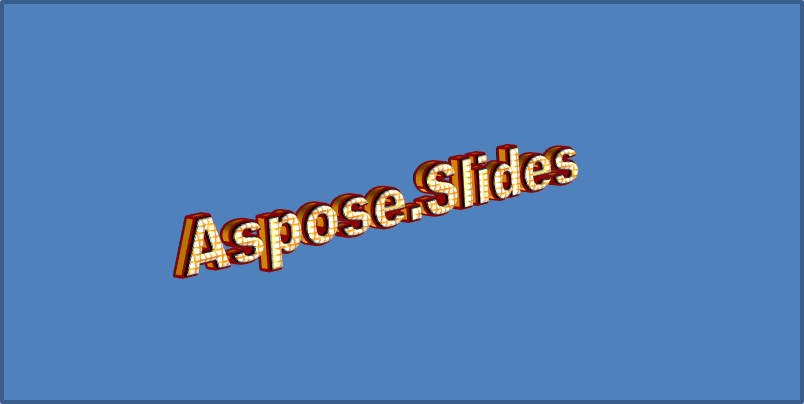
Questo esempio applica una formattazione 3D simile al testo tramite TextFrameFormat.getThreeDFormat. Smussi più piccoli modellano i bordi delle lettere, mentre estrusione e illuminazione conferiscono profondità al testo:
import jpype
import asposeslides

if not jpype.isJVMStarted():
    jpype.startJVM()

from asposeslides.api import BevelPresetType, CameraPresetType, LightRigPresetType, LightingDirection, MaterialPresetType, Presentation, ShapeType
from java.awt import Color

presentation = Presentation()
try:
    slide = presentation.getSlides().get_Item(0)

    auto_shape = slide.getShapes().addAutoShape(ShapeType.Rectangle, 20, 20, 400, 200)
    text_frame = auto_shape.getTextFrame()
    text_frame.setText("Aspose.Slides")

    text_frame.getTextFrameFormat().getThreeDFormat().getBevelBottom().setBevelType(BevelPresetType.Circle)
    text_frame.getTextFrameFormat().getThreeDFormat().getBevelBottom().setHeight(3.5)
    text_frame.getTextFrameFormat().getThreeDFormat().getBevelBottom().setWidth(3.5)

    text_frame.getTextFrameFormat().getThreeDFormat().getBevelTop().setBevelType(BevelPresetType.Circle)
    text_frame.getTextFrameFormat().getThreeDFormat().getBevelTop().setHeight(4)
    text_frame.getTextFrameFormat().getThreeDFormat().getBevelTop().setWidth(4)

    orange = Color(255, 165, 0)
    text_frame.getTextFrameFormat().getThreeDFormat().getExtrusionColor().setColor(orange)
    text_frame.getTextFrameFormat().getThreeDFormat().setExtrusionHeight(6)

    dark_red = Color(139, 0, 0)
    text_frame.getTextFrameFormat().getThreeDFormat().getContourColor().setColor(dark_red)
    text_frame.getTextFrameFormat().getThreeDFormat().setContourWidth(1.5)

    text_frame.getTextFrameFormat().getThreeDFormat().setDepth(3)

    text_frame.getTextFrameFormat().getThreeDFormat().setMaterial(MaterialPresetType.Plastic)

    text_frame.getTextFrameFormat().getThreeDFormat().getLightRig().setDirection(LightingDirection.Top)
    text_frame.getTextFrameFormat().getThreeDFormat().getLightRig().setLightType(LightRigPresetType.Balanced)
    text_frame.getTextFrameFormat().getThreeDFormat().getLightRig().setRotation(0, 0, 40)

    text_frame.getTextFrameFormat().getThreeDFormat().getCamera().setCameraType(CameraPresetType.PerspectiveContrastingRightFacing)
finally:
    presentation.dispose()
Il testo risultante:
Note
L’applicazione di effetti 3D al testo o alle loro forme—e l’interazione tra questi effetti—è regolata da regole specifiche. Considera una scena che coinvolge sia il testo sia la forma che lo contiene. Un effetto 3D include la rappresentazione 3D dell’oggetto e la scena in cui è inserito.
- Se una scena è impostata sia per la forma sia per il testo, la scena della forma ha la priorità e quella del testo è ignorata.
- Se la forma non ha una propria scena ma possiede una rappresentazione 3D, viene utilizzata la scena del testo.
- Se la forma non ha alcun effetto 3D, è trattata come piatta e l’effetto 3D viene applicato solo al testo.
Questi comportamenti riguardano i metodi ThreeDFormat.getLightRig e ThreeDFormat.getCamera.
Per mantenere il testo piatto e leggibile mantenendo la formattazione 3D della forma, vedi Keep Text Flat on a 3D Shape per un confronto tra le impostazioni e un esempio Python completo.
FAQ
Posso usare gli effetti WordArt con caratteri o script diversi (ad es., arabo, cinese)?
Sì, Aspose.Slides per Python tramite Java supporta Unicode e funziona con tutti i principali caratteri e script. Gli effetti WordArt come ombra, riempimento e contorno possono essere applicati indipendentemente dalla lingua, sebbene la disponibilità dei caratteri e il rendering possano dipendere dai caratteri di sistema.
Posso applicare gli effetti WordArt agli elementi del master delle diapositive?
Sì, è possibile applicare gli effetti WordArt alle forme nei master delle diapositive, inclusi i segnaposto del titolo, i piè di pagina o il testo di sfondo. Le modifiche apportate al layout master si rifletteranno su tutte le diapositive associate.
Gli effetti WordArt influiscono sulla dimensione del file della presentazione?
Leggermente. Effetti come ombre, bagliori e riempimenti sfumati possono aumentare marginalmente la dimensione del file a causa dei metadati di formattazione aggiunti, ma la differenza è solitamente trascurabile.
Posso visualizzare in anteprima il risultato degli effetti WordArt senza salvare la presentazione?
Sì, è possibile renderizzare le diapositive contenenti WordArt in immagini (ad es., PNG, JPEG) usando Slide.getImage, oppure renderizzare forme individuali con Shape.getImage. Questo consente di visualizzare l’anteprima in memoria o sullo schermo prima di salvare o esportare l’intera presentazione.