
สร้างและประยุกต์ใช้เอฟเฟ็กต์ WordArt ใน Python ผ่าน Java
ภาพรวม
เอฟเฟกต์ WordArt ช่วยให้คุณจัดรูปแบบข้อความด้วยการเติมสี, ขอบ, เงา, การสะท้อน, แสงเรืองแสง, การแปลงรูป, และการจัดรูปแบบ 3D บทความนี้อธิบายวิธีสร้างและปรับแต่งเอฟเฟกต์เหล่านี้ในงานนำเสนอ PowerPoint โดยใช้ Aspose.Slides for Python via Java โดยไม่ต้องติดตั้ง Microsoft Office
สร้างเทมเพลต WordArt แบบง่ายและนำไปใช้กับข้อความ
ตัวอย่างต่อไปนี้สร้างสไตล์ WordArt แบบง่ายโดยกำหนดข้อความ, ฟอนต์, การเติมลวดลาย, และขอบ
แต่ละตัวอย่างสร้างงานนำเสนอใหม่และเพิ่มสี่เหลี่ยมผืนผ้าลงในสไลด์แรก; ไม่ต้องใช้ไฟล์อินพุต ตัวอย่างแรกตั้งค่าข้อความเป็น “Aspose.Slides” ตำแหน่งและขนาดของรูปร่างวัดเป็นจุด:
import jpype
import asposeslides

if not jpype.isJVMStarted():
    jpype.startJVM()

from asposeslides.api import Presentation, ShapeType

presentation = Presentation()
try:
    slide = presentation.getSlides().get_Item(0)

    auto_shape = slide.getShapes().addAutoShape(ShapeType.Rectangle, 20, 20, 400, 200)
    text_frame = auto_shape.getTextFrame()

    portion = text_frame.getParagraphs().get_Item(0).getPortions().get_Item(0)
    portion.setText("Aspose.Slides")
finally:
    presentation.dispose()
ตั้งค่าฟอนต์เป็น Arial Black ขนาด 36 จุดเพื่อให้การจัดรูปแบบเด่นชัดขึ้น:
import jpype
import asposeslides

if not jpype.isJVMStarted():
    jpype.startJVM()

from asposeslides.api import FontData, Presentation, ShapeType

presentation = Presentation()
try:
    slide = presentation.getSlides().get_Item(0)

    auto_shape = slide.getShapes().addAutoShape(ShapeType.Rectangle, 20, 20, 400, 200)

    portion = auto_shape.getTextFrame().getParagraphs().get_Item(0).getPortions().get_Item(0)
    portion.setText("Aspose.Slides")
    font = FontData("Arial Black")
    portion.getPortionFormat().setLatinFont(font)
    portion.getPortionFormat().setFontHeight(36)
finally:
    presentation.dispose()
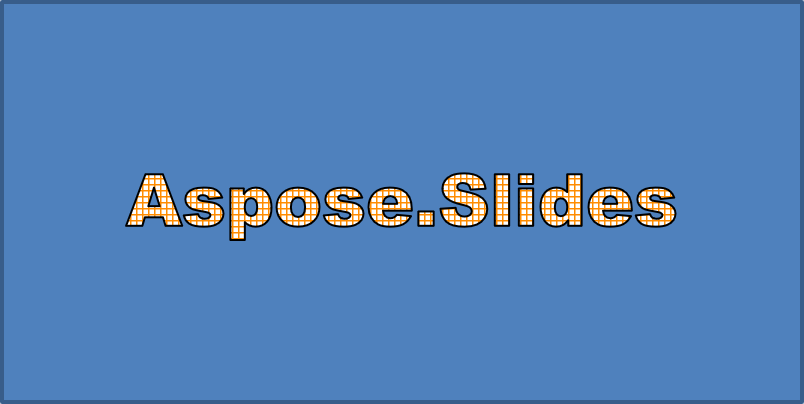
ใช้ลวดลาย SmallGrid ด้วยสีส้มเข้มเป็นสีพื้นหน้าและพื้นหลังสีขาว จากนั้นเพิ่มขอบข้อความสีดำที่มีความกว้าง 1 จุด:
import jpype
import asposeslides

if not jpype.isJVMStarted():
    jpype.startJVM()

from asposeslides.api import FillType, FontData, PatternStyle, Presentation, ShapeType
from java.awt import Color

presentation = Presentation()
try:
    slide = presentation.getSlides().get_Item(0)

    auto_shape = slide.getShapes().addAutoShape(ShapeType.Rectangle, 20, 20, 400, 200)

    portion = auto_shape.getTextFrame().getParagraphs().get_Item(0).getPortions().get_Item(0)
    portion.setText("Aspose.Slides")
    font = FontData("Arial Black")
    portion.getPortionFormat().setLatinFont(font)
    portion.getPortionFormat().setFontHeight(36)

    portion.getPortionFormat().getFillFormat().setFillType(FillType.Pattern)
    dark_orange = Color(255, 140, 0)
    portion.getPortionFormat().getFillFormat().getPatternFormat().getForeColor().setColor(dark_orange)
    portion.getPortionFormat().getFillFormat().getPatternFormat().getBackColor().setColor(Color.WHITE)
    portion.getPortionFormat().getFillFormat().getPatternFormat().setPatternStyle(PatternStyle.SmallGrid)

    portion.getPortionFormat().getLineFormat().setWidth(1)
    portion.getPortionFormat().getLineFormat().getFillFormat().setFillType(FillType.Solid)
    portion.getPortionFormat().getLineFormat().getFillFormat().getSolidFillColor().setColor(Color.BLACK)
finally:
    presentation.dispose()
ข้อความที่ได้:
ใช้เอฟเฟกต์ WordArt อื่น ๆ
ตัวอย่างต่อไปนี้แสดงวิธีใช้เงา, การสะท้อน, แสงเรืองแสง, การแปลงรูป, และเอฟเฟกต์ 3D กับข้อความ
ใช้เอฟเฟกต์เงานอก
เงานอกช่วยเพิ่มความลึกโดยวางเงาไว้ด้านหลังข้อความ คุณสามารถกำหนดสี, ทิศทาง, ระยะ, รัศมีเบลอร์, สเกล, และการบิดเอฟเฟกต์ได้
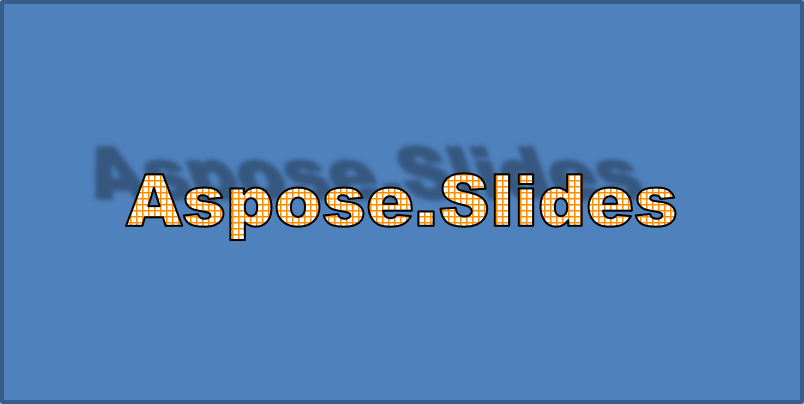
ตัวอย่างนี้เรียกใช้ enableOuterShadowEffect และตั้งค่าเงาสีดำที่มีรัศมีเบลอร์ 4 จุด, ทิศทาง 230 องศา, ระยะ 30 จุด ค่าสเกล 100 จะรักษาขนาดเงาไว้, ส่วนการบิดแบบแนวนอนทำให้เงาเอียง 20 องศา การแปลงอัลฟ่าตั้งค่าความทึบเป็น 32%:
import jpype
import asposeslides

if not jpade.isJVMStarted():
    jpade.startJVM()

from asposeslides.api import ColorTransformOperation, FontData, Presentation, ShapeType
from java.awt import Color

presentation = Presentation()
try:
    slide = presentation.getSlides().get_Item(0)

    auto_shape = slide.getShapes().addAutoShape(ShapeType.Rectangle, 20, 20, 400, 200)

    portion = auto_shape.getTextFrame().getParagraphs().get_Item(0).getPortions().get_Item(0)
    portion.setText("Aspose.Slides")
    font = FontData("Arial Black")
    portion.getPortionFormat().setLatinFont(font)
    portion.getPortionFormat().setFontHeight(36)

    portion.getPortionFormat().getEffectFormat().enableOuterShadowEffect()
    portion.getPortionFormat().getEffectFormat().getOuterShadowEffect().getShadowColor().setColor(Color.BLACK)
    portion.getPortionFormat().getEffectFormat().getOuterShadowEffect().setScaleHorizontal(100)
    portion.getPortionFormat().getEffectFormat().getOuterShadowEffect().setScaleVertical(100)
    portion.getPortionFormat().getEffectFormat().getOuterShadowEffect().setBlurRadius(4)
    portion.getPortionFormat().getEffectFormat().getOuterShadowEffect().setDirection(230)
    portion.getPortionFormat().getEffectFormat().getOuterShadowEffect().setDistance(30)
    portion.getPortionFormat().getEffectFormat().getOuterShadowEffect().setSkewHorizontal(20)
    portion.getPortionFormat().getEffectFormat().getOuterShadowEffect().setSkewVertical(0)
    portion.getPortionFormat().getEffectFormat().getOuterShadowEffect().getShadowColor().getColorTransform().add(ColorTransformOperation.SetAlpha, 0.32)
finally:
    presentation.dispose()
ข้อความที่ได้:
Note
- เมื่อใช้เงานอกและเงาที่ตั้งล่วงหน้าพร้อมกัน จะใช้เฉพาะเงานอกเท่านั้น
- หากใช้เงานอกและเงาภายในพร้อมกัน ผลลัพธ์จะแตกต่างตามรุ่น PowerPoint เช่น ใน PowerPoint 2013 เอฟเฟกต์จะเพิ่มเป็นสองเท่า ในขณะที่ใน PowerPoint 2007 จะใช้เฉพาะเงานอก
ใช้เอฟเฟกต์การสะท้อน
การสะท้อนสร้างสำเนาที่สะท้อนของข้อความ ปรับตำแหน่ง, สเกล, เบลอร์, และความทึบเพื่อควบคุมรูปลักษณ์
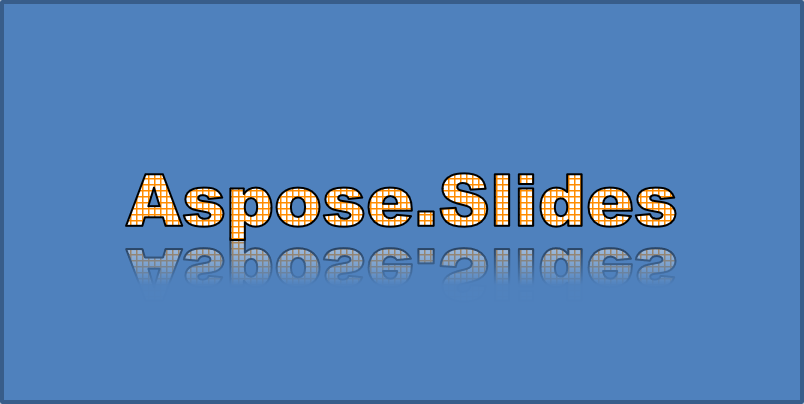
ตัวอย่างนี้เรียกใช้ enableReflectionEffect และพลิกการสะท้อนในแนวตั้งด้วยสเกล -100% ใช้รัศมีเบลอร์ 0.5 จุดและระยะ 4.72 จุด ความทึบลดจาก 60% ไปเป็น 0.9% ระหว่างตำแหน่ง 0% ถึง 60% ตลอดการสะท้อน:
import jpype
import asposeslides

if not jpype.isJVMStarted():
    jpype.startJVM()

from asposeslides.api import FontData, Presentation, RectangleAlignment, ShapeType

presentation = Presentation()
try:
    slide = presentation.getSlides().get_Item(0)

    auto_shape = slide.getShapes().addAutoShape(ShapeType.Rectangle, 20, 20, 400, 200)

    portion = auto_shape.getTextFrame().getParagraphs().get_Item(0).getPortions().get_Item(0)
    portion.setText("Aspose.Slides")
    font = FontData("Arial Black")
    portion.getPortionFormat().setLatinFont(font)
    portion.getPortionFormat().setFontHeight(36)

    portion.getPortionFormat().getEffectFormat().enableReflectionEffect()
    portion.getPortionFormat().getEffectFormat().getReflectionEffect().setBlurRadius(0.5)
    portion.getPortionFormat().getEffectFormat().getReflectionEffect().setDistance(4.72)
    portion.getPortionFormat().getEffectFormat().getReflectionEffect().setStartPosAlpha(0)
    portion.getPortionFormat().getEffectFormat().getReflectionEffect().setEndPosAlpha(60)
    portion.getPortionFormat().getEffectFormat().getReflectionEffect().setDirection(90)
    portion.getPortionFormat().getEffectFormat().getReflectionEffect().setScaleHorizontal(100)
    portion.getPortionFormat().getEffectFormat().getReflectionEffect().setScaleVertical(-100)
    portion.getPortionFormat().getEffectFormat().getReflectionEffect().setStartReflectionOpacity(60)
    portion.getPortionFormat().getEffectFormat().getReflectionEffect().setEndReflectionOpacity(0.9)
    portion.getPortionFormat().getEffectFormat().getReflectionEffect().setRectangleAlign(RectangleAlignment.BottomLeft)
finally:
    presentation.dispose()
ข้อความที่ได้:
ใช้เอฟเฟกต์แสงเรืองแสง
แสงเรืองแสงเพิ่มขอบสีอ่อนรอบข้อความ ปรับสี, ความทึบ, และรัศมีเพื่อควบคุมเอฟเฟกต์
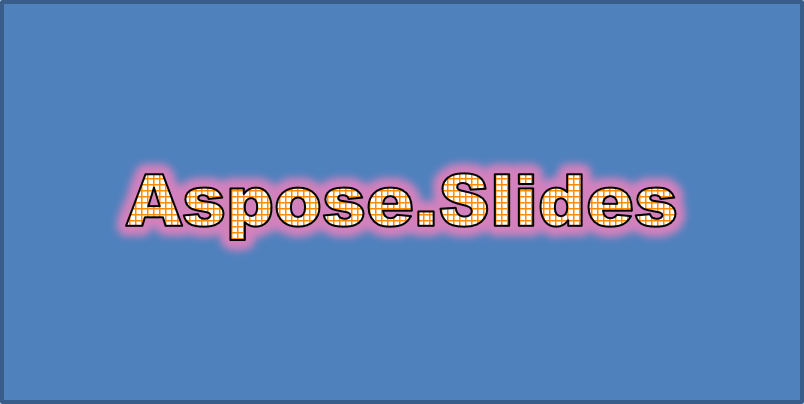
ตัวอย่างนี้เรียกใช้ enableGlowEffect และใช้แสงเรืองแสงสีแดงที่ความทึบ 54% และรัศมี 7 จุด:
import jpype
import asposeslides

if not jpype.isJVMStarted():
    jpype.startJVM()

from asposeslides.api import ColorTransformOperation, FontData, Presentation, ShapeType
from java.awt import Color

presentation = Presentation()
try:
    slide = presentation.getSlides().get_Item(0)

    auto_shape = slide.getShapes().addAutoShape(ShapeType.Rectangle, 20, 20, 400, 200)

    portion = auto_shape.getTextFrame().getParagraphs().get_Item(0).getPortions().get_Item(0)
    portion.setText("Aspose.Slides")
    font = FontData("Arial Black")
    portion.getPortionFormat().setLatinFont(font)
    portion.getPortionFormat().setFontHeight(36)

    portion.getPortionFormat().getEffectFormat().enableGlowEffect()
    portion.getPortionFormat().getEffectFormat().getGlowEffect().getColor().setColor(Color.RED)
    portion.getPortionFormat().getEffectFormat().getGlowEffect().getColor().getColorTransform().add(ColorTransformOperation.SetAlpha, 0.54)
    portion.getPortionFormat().getEffectFormat().getGlowEffect().setRadius(7)
finally:
    presentation.dispose()
ข้อความที่ได้:
ใช้การแปลง WordArt
การแปลง WordArt ทำให้ข้อความโค้ง, ยืด, หรือบิด
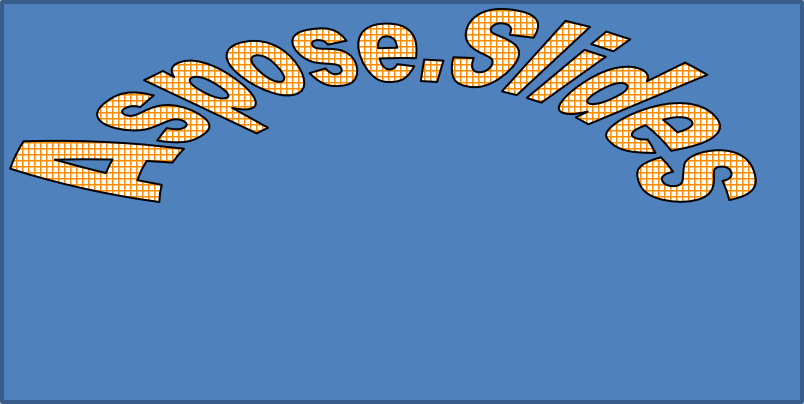
ตั้งค่า setTransform เป็น ArchUpPour เพื่อนำกรอบข้อความทั้งหมดโค้งขึ้น:
import jpype
import asposeslides

if not jpype.isJVMStarted():
    jpype.startJVM()

from asposeslides.api import Presentation, ShapeType, TextShapeType

presentation = Presentation()
try:
    slide = presentation.getSlides().get_Item(0)

    auto_shape = slide.getShapes().addAutoShape(ShapeType.Rectangle, 20, 20, 400, 200)

    text_frame = auto_shape.getTextFrame()
    text_frame.setText("Aspose.Slides")
    text_frame.getTextFrameFormat().setTransform(TextShapeType.ArchUpPour)
finally:
    presentation.dispose()
ข้อความที่ได้:
Note
Aspose.Slides for Python via Java มีชุดของ ประเภทการแปลงที่กำหนดไว้ล่วงหน้า ให้เลือกใช้ใช้เอฟเฟกต์ 3D กับรูปร่างและข้อความ
คุณสามารถใช้เอฟเฟกต์ 3D กับรูปร่างหรือกับข้อความของมันได้ เบเวล, การดันออก, แสงสว่าง, และการตั้งค่ากล้องควบคุมลักษณะสุดท้าย
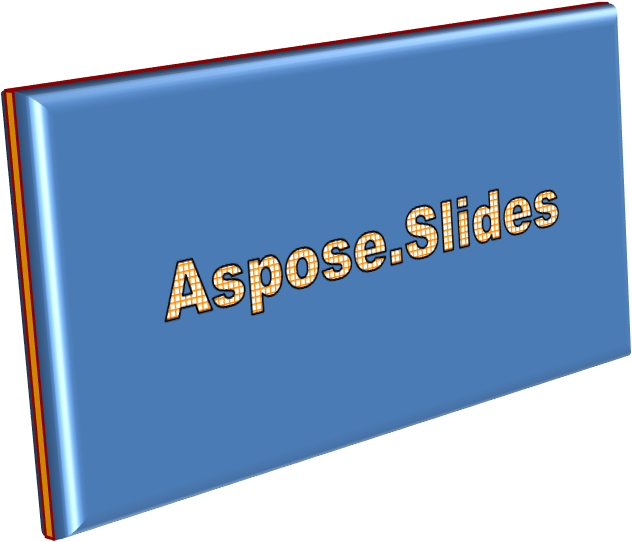
ตัวอย่างต่อไปนี้ใช้ ThreeDFormat เพื่อเพิ่มเบเวลเป็นรูปวงกลม, การดันสีส้ม, และขอบสีแดงเข้มให้กับสี่เหลี่ยมมิติ การวัดเบเวล, ความสูงการดัน, ความกว้างขอบ, และความลึกทั้งหมดเป็นจุด วัสดุพลาสติก, แสงสว่างสมดุลที่หมุน 40 องศารอบแกน Z, และกล้องแบบมุมมองกำหนดลักษณะสุดท้าย:
import jpype
import asposeslides

if not jpype.isJVMStarted():
    jpype.startJVM()

from asposeslides.api import BevelPresetType, CameraPresetType, LightRigPresetType, LightingDirection, MaterialPresetType, Presentation, ShapeType
from java.awt import Color

presentation = Presentation()
try:
    slide = presentation.getSlides().get_Item(0)

    auto_shape = slide.getShapes().addAutoShape(ShapeType.Rectangle, 20, 20, 400, 200)
    auto_shape.getTextFrame().setText("Aspose.Slides")

    auto_shape.getThreeDFormat().getBevelBottom().setBevelType(BevelPresetType.Circle)
    auto_shape.getThreeDFormat().getBevelBottom().setHeight(10.5)
    auto_shape.getThreeDFormat().getBevelBottom().setWidth(10.5)

    auto_shape.getThreeDFormat().getBevelTop().setBevelType(BevelPresetType.Circle)
    auto_shape.getThreeDFormat().getBevelTop().setHeight(12.5)
    auto_shape.getThreeDFormat().getBevelTop().setWidth(11)

    orange = Color(255, 165, 0)
    auto_shape.getThreeDFormat().getExtrusionColor().setColor(orange)
    auto_shape.getThreeDFormat().setExtrusionHeight(6)

    dark_red = Color(139, 0, 0)
    auto_shape.getThreeDFormat().getContourColor().setColor(dark_red)
    auto_shape.getThreeDFormat().setContourWidth(1.5)

    auto_shape.getThreeDFormat().setDepth(3)

    auto_shape.getThreeDFormat().setMaterial(MaterialPresetType.Plastic)

    auto_shape.getThreeDFormat().getLightRig().setDirection(LightingDirection.Top)
    auto_shape.getThreeDFormat().getLightRig().setLightType(LightRigPresetType.Balanced)
    auto_shape.getThreeDFormat().getLightRig().setRotation(0, 0, 40)

    auto_shape.getThreeDFormat().getCamera().setCameraType(CameraPresetType.PerspectiveContrastingRightFacing)
finally:
    presentation.dispose()
รูปร่างที่ได้:
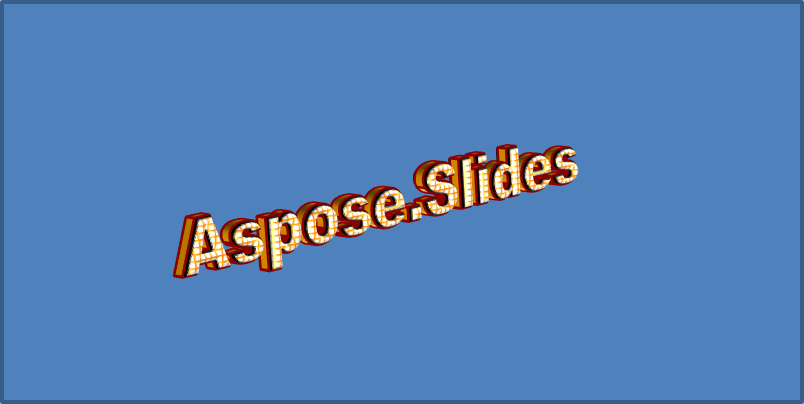
ตัวอย่างนี้ใช้การจัดรูปแบบ 3D แบบเดียวกันกับข้อความผ่าน TextFrameFormat.getThreeDFormat เบเวลขนาดเล็กทำให้ขอบตัวอักษรบิด, ส่วนการดันและแสงสว่างให้ความลึกกับข้อความ:
import jpype
import asposeslides

if not jpype.isJVMStarted():
    jpype.startJVM()

from asposeslides.api import BevelPresetType, CameraPresetType, LightRigPresetType, LightingDirection, MaterialPresetType, Presentation, ShapeType
from java.awt import Color

presentation = Presentation()
try:
    slide = presentation.getSlides().get_Item(0)

    auto_shape = slide.getShapes().addAutoShape(ShapeType.Rectangle, 20, 20, 400, 200)
    text_frame = auto_shape.getTextFrame()
    text_frame.setText("Aspose.Slides")

    text_frame.getTextFrameFormat().getThreeDFormat().getBevelBottom().setBevelType(BevelPresetType.Circle)
    text_frame.getTextFrameFormat().getThreeDFormat().getBevelBottom().setHeight(3.5)
    text_frame.getTextFrameFormat().getThreeDFormat().getBevelBottom().setWidth(3.5)

    text_frame.getTextFrameFormat().getThreeDFormat().getBevelTop().setBevelType(BevelPresetType.Circle)
    text_frame.getTextFrameFormat().getThreeDFormat().getBevelTop().setHeight(4)
    text_frame.getTextFrameFormat().getThreeDFormat().getBevelTop().setWidth(4)

    orange = Color(255, 165, 0)
    text_frame.getTextFrameFormat().getThreeDFormat().getExtrusionColor().setColor(orange)
    text_frame.getTextFrameFormat().getThreeDFormat().setExtrusionHeight(6)

    dark_red = Color(139, 0, 0)
    text_frame.getTextFrameFormat().getThreeDFormat().getContourColor().setColor(dark_red)
    text_frame.getTextFrameFormat().getThreeDFormat().setContourWidth(1.5)

    text_frame.getTextFrameFormat().getThreeDFormat().setDepth(3)

    text_frame.getTextFrameFormat().getThreeDFormat().setMaterial(MaterialPresetType.Plastic)

    text_frame.getTextFrameFormat().getThreeDFormat().getLightRig().setDirection(LightingDirection.Top)
    text_frame.getTextFrameFormat().getThreeDFormat().getLightRig().setLightType(LightRigPresetType.Balanced)
    text_frame.getTextFrameFormat().getThreeDFormat().getLightRig().setRotation(0, 0, 40)

    text_frame.getTextFrameFormat().getThreeDFormat().getCamera().setCameraType(CameraPresetType.PerspectiveContrastingRightFacing)
finally:
    presentation.dispose()
ข้อความที่ได้:
Note
การใช้เอฟเฟกต์ 3D กับข้อความหรือรูปร่างของมัน—และการโต้ตอบระหว่างเอฟเฟกต์เหล่านี้—ถูกกำหนดโดยกฎเฉพาะ พิจารณาฉากที่มีทั้งข้อความและรูปร่างที่บรรจุข้อความอยู่ เอฟเฟกต์ 3D ประกอบด้วยการแสดงผล 3D ของวัตถุและฉากที่วางอยู่
- หากมีการตั้งค่าฉากทั้งสำหรับรูปร่างและข้อความ ฉากของรูปร่างจะมีลำดับความสำคัญและฉากของข้อความจะถูกละเว้น
- หากรูปร่างไม่มีฉากของตนเองแต่มีการแสดงผล 3D จะใช้ฉากของข้อความ
- หากรูปร่างไม่มีเอฟเฟกต์ 3D เลย จะถือว่าเป็นแบนและเอฟเฟกต์ 3D จะใช้กับข้อความเท่านั้น
พฤติกรรมเหล่านี้สัมพันธ์กับเมธอด ThreeDFormat.getLightRig และ ThreeDFormat.getCamera
เพื่อให้ข้อความอยู่ในรูปแบบแบนและอ่านง่ายพร้อมยังคงรักษาการจัดรูปแบบ 3D ของรูปร่าง ดูที่ Keep Text Flat on a 3D Shape เพื่อเปรียบเทียบการตั้งค่าทั้งสองและตัวอย่าง Python ฉบับเต็ม
คำถามที่พบบ่อย
ฉันสามารถใช้เอฟเฟกต์ WordArt กับฟอนต์หรือสคริปต์ที่แตกต่างกัน (เช่น Arabic, Chinese) ได้หรือไม่?
ได้, Aspose.Slides for Python via Java รองรับ Unicode และทำงานกับฟอนต์และสคริปต์หลักทั้งหมด เอฟเฟกต์ WordArt เช่น เงา, การเติม, และขอบสามารถใช้ได้โดยไม่คำนึงถึงภาษา แม้ว่าความพร้อมใช้งานของฟอนต์และการเรนเดอร์อาจขึ้นอยู่กับฟอนต์ของระบบ
ฉันสามารถใช้เอฟเฟกต์ WordArt กับองค์ประกอบในสไลด์มาสเตอร์ได้หรือไม่?
ได้, คุณสามารถใช้เอฟเฟกต์ WordArt กับรูปร่างบนสไลด์มาสเตอร์ รวมถึงตัวเขียนหัวเรื่อง, ส่วนท้าย, หรือข้อความพื้นหลัง การเปลี่ยนแปลงในเลเอาต์มาสเตอร์จะสะท้อนไปทั่วสไลด์ที่เชื่อมโยง
เอฟเฟกต์ WordArt มีผลต่อขนาดไฟล์งานนำเสนอหรือไม่?
เล็กน้อย, เอฟเฟกต์ WordArt เช่น เงา, แสงเรืองแสง, และการเติมไล่สีอาจเพิ่มขนาดไฟล์เล็กน้อยเนื่องจากเมตาดาต้าเพิ่มขึ้น แต่ความแตกต่างมักไม่สำคัญ
ฉันสามารถดูตัวอย่างผลของเอฟเฟกต์ WordArt โดยไม่ต้องบันทึกงานนำเสนอได้หรือไม่?
ได้, คุณสามารถแปลงสไลด์ที่มี WordArt เป็นภาพ (เช่น PNG, JPEG) ด้วย Slide.getImage หรือแปลงรูปร่างเดี่ยวด้วย Shape.getImage ทำให้คุณสามารถดูผลลัพธ์ในหน่วยความจำหรือบนหน้าจอก่อนบันทึกหรือส่งออกงานนำเสนอเต็มรูปแบบ