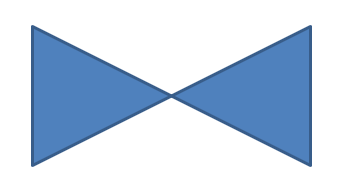
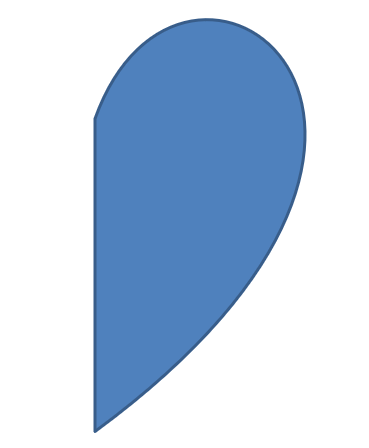
Custom Shape
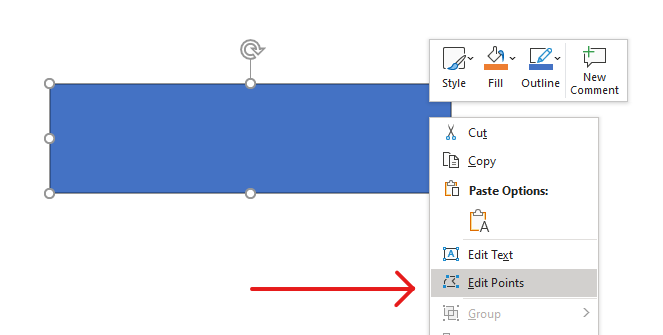
Change a Shape Using Edit Points
Consider a square. In PowerPoint, using edit points, you can
- move the square’s corner in or out
- specify the curvature for a corner or point
- add new points to the square
- manipulate points on the square, etc.
Essentially, you can perform the described tasks on any shape. Using edit points, you get to change a shape or create a new shape from an existing shape.
Shape Editing Tips

Before you start editing PowerPoint shapes through edit points, you might want to consider these points about shapes:
- A shape (or its path) can either be closed or open.
- All shapes consist of at least 2 anchor points linked to each other by lines
- A line is either straight or curved. Anchor points determine the nature of the line.
- Anchor points exist as corner points, straight points, or smooth points:
- A corner point is a point where 2 straight lines join at an angle.
- A smooth point is a point where 2 handles exist in a straight line and the line’s segments join in a smooth curve. In this case, all handles are separated from the anchor point by an equal distance.
- A straight point is a point where 2 handles exist in a straight line and that line’s line segments joins in a smooth curve. In this case, the handles don’t have to be separated from the anchor point by an equal distance.
- By moving or editing anchor points (which changes the angle of lines), you can change the way a shape looks.
To edit PowerPoint shapes through edit points, Aspose.Slides provides the GeometryPath class and IGeometryPath interface.
- A GeometryPath instance represents a geometry path of the IGeometryShape object.
- To retrieve the
GeometryPathfrom theIGeometryShapeinstance, you can use the IGeometryShape.GetGeometryPaths method. - To set the
GeometryPathfor a shape, you can use these methods: IGeometryShape.SetGeometryPath for solid shapes and IGeometryShape.SetGeometryPaths for composite shapes. - To add segments, you can use the methods under IGeometryPath.
- Using the IGeometryPath.Stroke and IGeometryPath.FillMode properties, you can set the appearance for a geometry path.
- Using the IGeometryPath.PathData property, you can retrieve the geometry path of a
GeometryShapeas an array of path segments. - To access additional shape geometry customization options, you can convert GeometryPath to GraphicsPath
- Use GeometryPathToGraphicsPath and GraphicsPathToGeometryPath methods (from the ShapeUtil class) to convert GeometryPath to GraphicsPath back and forth.
Simple Editing Operations
This C# code shows you how to
Add a line to the end of a path
void LineTo(PointF point);
void LineTo(float x, float y);
Add a line to a specified position on a path:
void LineTo(PointF point, uint index);
void LineTo(float x, float y, uint index);
Add a cubic Bezier curve at the end of a path:
void CubicBezierTo(PointF point1, PointF point2, PointF point3);
void CubicBezierTo(float x1, float y1, float x2, float y2, float x3, float y3);
Add a cubic Bezier curve to the specified position on a path:
void CubicBezierTo(PointF point1, PointF point2, PointF point3, uint index);
void CubicBezierTo(float x1, float y1, float x2, float y2, float x3, float y3, uint index);
Add a quadratic Bezier curve at the end of a path:
void QuadraticBezierTo(PointF point1, PointF point2);
void QuadraticBezierTo(float x1, float y1, float x2, float y2);
Add quadratic Bezier curve to a specified position on a path:
void QuadraticBezierTo(PointF point1, PointF point2, uint index);
void QuadraticBezierTo(float x1, float y1, float x2, float y2, uint index);
Append a given arc to a path:
void ArcTo(float width, float heigth, float startAngle, float sweepAngle);
Close the current figure of a path:
void CloseFigure();
Set the position for the next point:
void MoveTo(PointF point);
void MoveTo(float x, float y);
Remove the path segment at a given index:
void RemoveAt(int index);
Add Custom Points to Shape
- Create an instance of the GeometryShape class and set the ShapeType.Rectangle type.
- Get an instance of the GeometryPath class from the shape.
- Add a new point between the two top points on the path.
- Add a new point between the two bottom points on the path.
- Apply the path to the shape.
This C# code shows you how to add custom points to a shape:
using (Presentation pres = new Presentation())
{
GeometryShape shape = pres.Slides[0].Shapes.AddAutoShape(ShapeType.Rectangle, 100, 100, 200, 100) as GeometryShape;
IGeometryPath geometryPath = shape.GetGeometryPaths()[0];
geometryPath.LineTo(100, 50, 1);
geometryPath.LineTo(100, 50, 4);
shape.SetGeometryPath(geometryPath);
}

Remove Points from Shape
- Create an instance of GeometryShape class and set the ShapeType.Heart type.
- Get an instance of the GeometryPath class from the shape.
- Remove the segment for the path.
- Apply the path to the shape.
This C# code shows you how to remove points from a shape:
using (Presentation pres = new Presentation())
{
GeometryShape shape = pres.Slides[0].Shapes.AddAutoShape(ShapeType.Heart, 100, 100, 300, 300) as GeometryShape;
IGeometryPath path = shape.GetGeometryPaths()[0];
path.RemoveAt(2);
shape.SetGeometryPath(path);
}

Create Custom Shape
- Calculate the points for the shape.
- Create an instance of the GeometryPath class.
- Fill the path with the points.
- Create an instance of the GeometryShape class.
- Apply the path to the shape.
This C# shows you how to create a custom shape:
List<PointF> points = new List<PointF>();
float R = 100, r = 50;
int step = 72;
for (int angle = -90; angle < 270; angle += step)
{
double radians = angle * (Math.PI / 180f);
double x = R * Math.Cos(radians);
double y = R * Math.Sin(radians);
points.Add(new PointF((float)x + R, (float)y + R));
radians = Math.PI * (angle + step / 2) / 180.0;
x = r * Math.Cos(radians);
y = r * Math.Sin(radians);
points.Add(new PointF((float)x + R, (float)y + R));
}
GeometryPath starPath = new GeometryPath();
starPath.MoveTo(points[0]);
for (int i = 1; i < points.Count; i++)
{
starPath.LineTo(points[i]);
}
starPath.CloseFigure();
using (Presentation pres = new Presentation())
{
GeometryShape shape = pres.Slides[0].Shapes.AddAutoShape(ShapeType.Rectangle, 100, 100, R * 2, R * 2) as GeometryShape;
shape.SetGeometryPath(starPath);
}

Create Composite Custom Shape
- Create an instance of the GeometryShape class.
- Create a first instance of the GeometryPath class.
- Create a second instance of the GeometryPath class.
- Apply the paths to the shape.
This C# code shows you to create a composite custom shape:
using (Presentation pres = new Presentation())
{
GeometryShape shape = pres.Slides[0].Shapes.AddAutoShape(ShapeType.Rectangle, 100, 100, 200, 100) as GeometryShape;
GeometryPath geometryPath0 = new GeometryPath();
geometryPath0.MoveTo(0, 0);
geometryPath0.LineTo(shape.Width, 0);
geometryPath0.LineTo(shape.Width, shape.Height/3);
geometryPath0.LineTo(0, shape.Height / 3);
geometryPath0.CloseFigure();
GeometryPath geometryPath1 = new GeometryPath();
geometryPath1.MoveTo(0, shape.Height/3 * 2);
geometryPath1.LineTo(shape.Width, shape.Height / 3 * 2);
geometryPath1.LineTo(shape.Width, shape.Height);
geometryPath1.LineTo(0, shape.Height);
geometryPath1.CloseFigure();
shape.SetGeometryPaths(new GeometryPath[] { geometryPath0, geometryPath1});
}

Create Custom Shape with Curved Corners
This C# code shows you how to create a custom shape with curved corners (inwards);
var shapeX = 20f;
var shapeY = 20f;
var shapeWidth = 300f;
var shapeHeight = 200f;
var leftTopSize = 50f;
var rightTopSize = 20f;
var rightBottomSize = 40f;
var leftBottomSize = 10f;
using (var presentation = new Presentation())
{
var childShape = presentation.Slides[0].Shapes.AddAutoShape(
ShapeType.Custom, shapeX, shapeY, shapeWidth, shapeHeight);
var geometryPath = new GeometryPath();
var point1 = new PointF(leftTopSize, 0);
var point2 = new PointF(shapeWidth - rightTopSize, 0);
var point3 = new PointF(shapeWidth, shapeHeight - rightBottomSize);
var point4 = new PointF(leftBottomSize, shapeHeight);
var point5 = new PointF(0, leftTopSize);
geometryPath.MoveTo(point1);
geometryPath.LineTo(point2);
geometryPath.ArcTo(rightTopSize, rightTopSize, 180, -90);
geometryPath.LineTo(point3);
geometryPath.ArcTo(rightBottomSize, rightBottomSize, -90, -90);
geometryPath.LineTo(point4);
geometryPath.ArcTo(leftBottomSize, leftBottomSize, 0, -90);
geometryPath.LineTo(point5);
geometryPath.ArcTo(leftTopSize, leftTopSize, 90, -90);
geometryPath.CloseFigure();
childShape.SetGeometryPath(geometryPath);
presentation.Save("output.pptx", SaveFormat.Pptx);
}
Find Out If a Shape Geometry Is Closed
A closed shape is defined as one where all its sides connect, forming a single boundary without gaps. Such a shape can be a simple geometric form or a complex custom outline. The following code example shows how to check if a shape geometry is closed:
bool IsGeometryClosed(IGeometryShape geometryShape)
{
bool? isClosed = null;
foreach (var geometryPath in geometryShape.GetGeometryPaths())
{
var dataLength = geometryPath.PathData.Length;
if (dataLength == 0)
continue;
var lastSegment = geometryPath.PathData[dataLength - 1];
isClosed = lastSegment.PathCommand == PathCommandType.Close;
if (isClosed == false)
return false;
}
return isClosed == true;
}
Convert GeometryPath to GraphicsPath (System.Drawing.Drawing2D)
- Create an instance of the GeometryShape class.
- Create an instance of the GraphicsPath class of the System.Drawing.Drawing2D namespace.
- Convert the GraphicsPath instance to the GeometryPath instance using ShapeUtil.
- Apply the paths to the shape.
This C# code—an implementation of the steps above—demonstrates the GeometryPath to GraphicsPath conversion process:
using (Presentation pres = new Presentation())
{
GeometryShape shape = pres.Slides[0].Shapes.AddAutoShape(ShapeType.Rectangle, 100, 100, 300, 100) as GeometryShape;
IGeometryPath originalPath = shape.GetGeometryPaths()[0];
originalPath.FillMode = PathFillModeType.None;
GraphicsPath gPath = new GraphicsPath();
gPath.AddString("Text in shape", new FontFamily("Arial"), 1, 40, new PointF(10, 10), StringFormat.GenericDefault);
IGeometryPath textPath = ShapeUtil.GraphicsPathToGeometryPath(gPath);
textPath.FillMode = PathFillModeType.Normal;
shape.SetGeometryPaths(new[] {originalPath, textPath}) ;
}
