
파이썬(Java)에서 프레젠테이션 도형 사용자 지정
개요
이 문서에서는 편집 포인트와 기하 경로를 사용하여 Aspose.Slides에서 도형의 기하 형상을 편집함으로써 프레젠테이션 도형을 사용자 지정하는 방법을 설명합니다. 기존 도형을 수정하고 기본 경로 편집 작업을 수행하며 포인트를 추가·제거하고, 업데이트된 기하 형상을 도형에 적용하기 위해 GeometryPath를 사용하는 방법을 보여줍니다.
또한 사용자 정의 및 복합 도형을 만들고, 곡선 모서리를 가진 도형을 구축하며, 도형 기하 형상이 닫혀 있는지 확인하고, 추가 기하 사용자 지정 시나리오를 위해 GeometryPath와 java.awt.Shape 간 변환 방법을 시연합니다.
편집 포인트를 사용한 도형 변경
정사각형을 생각해 보십시오. PowerPoint에서 편집 포인트를 사용하면
- 정사각형의 모서리를 안쪽이나 바깥쪽으로 이동
- 모서리 또는 포인트의 곡률 지정
- 정사각형에 새 포인트 추가
- 정사각형의 포인트를 조작 등 을 수행할 수 있습니다.
본질적으로 이러한 작업은 모든 도형에 대해 수행할 수 있습니다. 편집 포인트를 사용하면 기존 도형을 변경하거나 기존 도형에서 새 도형을 만들 수 있습니다.
도형 편집 팁
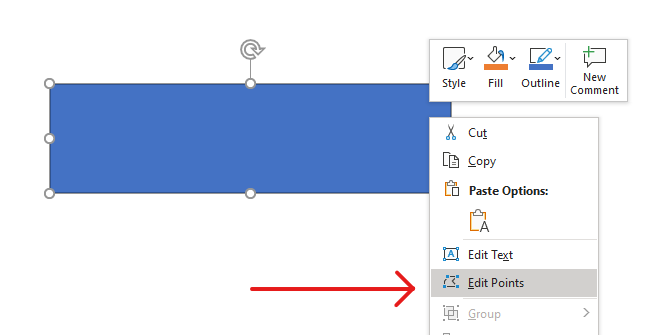
PowerPoint 도형을 편집 포인트를 통해 수정하기 전에 다음 사항을 고려하십시오.
- 도형(또는 그 경로)은 닫힌 형태일 수도, 열린 형태일 수도 있습니다.
- 도형이 닫힌 경우 시작점이나 끝점이 없습니다. 도형이 열린 경우 시작점과 끝점이 존재합니다.
- 모든 도형은 최소 2개의 앵커 포인트가 선으로 연결되어 있습니다.
- 선은 직선이거나 곡선일 수 있습니다. 앵커 포인트가 선의 형태를 결정합니다.
- 앵커 포인트는 코너 포인트, 직선 포인트, 부드러운 포인트 중 하나입니다:
- 코너 포인트는 두 개의 직선이 각도에서 만나는 지점입니다.
- 부드러운 포인트는 두 개의 핸들이 일직선에 위치하고 선분이 부드러운 곡선으로 이어지는 지점이며, 이 경우 모든 핸들은 앵커 포인트로부터 동일한 거리만큼 떨어져 있습니다.
- 직선 포인트는 두 개의 핸들이 일직선에 위치하고 선분이 부드러운 곡선으로 이어지는 지점이지만, 이 경우 핸들이 앵커 포인트와 동일한 거리를 유지할 필요는 없습니다.
- 앵커 포인트를 이동하거나 편집하여(선의 각도가 변함) 도형의 모양을 바꿀 수 있습니다.
PowerPoint 도형을 편집 포인트로 수정하려면 Aspose.Slides가 GeometryPath 클래스를 제공합니다.
- GeometryPath 인스턴스는 GeometryShape 객체의 기하 경로를 나타냅니다.
- GeometryShape 인스턴스에서 GeometryPath를 가져오려면 GeometryShape.getGeometryPaths 메서드를 사용합니다.
- 도형에 GeometryPath를 설정하려면 단일 도형의 경우 GeometryShape.setGeometryPath 메서드를, 복합 도형의 경우 GeometryShape.setGeometryPaths 메서드를 사용합니다.
- 세그먼트를 추가하려면 GeometryPath 아래의 메서드를 사용합니다.
- GeometryPath.setStroke 및 GeometryPath.setFillMode 메서드를 이용해 기하 경로의 외형을 지정할 수 있습니다.
- GeometryPath.getPathData 메서드를 사용하면 GeometryShape의 기하 경로를 경로 세그먼트 배열로 가져올 수 있습니다.
- 추가 도형 기하 사용자 지정 옵션에 접근하려면 GeometryPath를 java.awt.Shape으로 변환할 수 있습니다.
- ShapeUtil 클래스의 geometryPathToGraphicsPath 및 graphicsPathToGeometryPath 메서드를 사용하면 GeometryPath와 java.awt.Shape 간을 양방향으로 변환할 수 있습니다.
간단한 편집 작업
다음 서명은 기본 편집 작업을 보여줍니다.
경로 끝에 선을 추가:
geometry_path.lineTo(point)geometry_path.lineTo(x, y)
경로의 지정된 위치에 선을 추가:
geometry_path.lineTo(point, index)geometry_path.lineTo(x, y, index)
경로 끝에 3차 베지어 곡선을 추가:
geometry_path.cubicBezierTo(point1, point2, point3)geometry_path.cubicBezierTo(x1, y1, x2, y2, x3, y3)
경로의 지정된 위치에 3차 베지어 곡선을 추가:
geometry_path.cubicBezierTo(point1, point2, point3, index)geometry_path.cubicBezierTo(x1, y1, x2, y2, x3, y3, index)
경로 끝에 2차 베지어 곡선을 추가:
geometry_path.quadraticBezierTo(point1, point2)geometry_path.quadraticBezierTo(x1, y1, x2, y2)
경로의 지정된 위치에 2차 베지어 곡선을 추가:
geometry_path.quadraticBezierTo(point1, point2, index)geometry_path.quadraticBezierTo(x1, y1, x2, y2, index)
주어진 호를 경로에 추가:
geometry_path.arcTo(width, height, start_angle, sweep_angle)
현재 피규어를 닫음:
geometry_path.closeFigure()
다음 포인트 위치 지정:
geometry_path.moveTo(point)geometry_path.moveTo(x, y)
지정된 인덱스의 경로 세그먼트 제거:
geometry_path.removeAt(index)
도형에 사용자 정의 포인트 추가
- GeometryShape 클래스의 인스턴스를 생성하고 ShapeType.Rectangle 유형을 설정합니다.
- 도형에서 GeometryPath 클래스의 인스턴스를 가져옵니다.
- 경로 상의 두 상단 포인트 사이에 새 포인트를 추가합니다.
- 경로 상의 두 하단 포인트 사이에 새 포인트를 추가합니다.
- 경로를 도형에 적용합니다.
다음 Python 코드는 도형에 사용자 정의 포인트를 추가하는 방법을 보여줍니다:
import jpype
import asposeslides

if not jpype.isJVMStarted():
    jpype.startJVM()

from asposeslides.api import Presentation, ShapeType

presentation = Presentation()
try:
    shape = presentation.getSlides().get_Item(0).getShapes().addAutoShape(ShapeType.Rectangle, 100, 100, 200, 100)
    geometry_path = shape.getGeometryPaths()[0]
    geometry_path.lineTo(100, 50, 1)
    geometry_path.lineTo(100, 50, 4)
    shape.setGeometryPath(geometry_path)
finally:
    presentation.dispose()

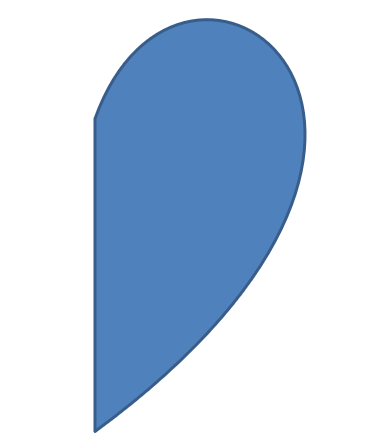
도형에서 포인트 제거
- GeometryShape 클래스의 인스턴스를 생성하고 ShapeType.Heart 유형을 설정합니다.
- 도형에서 GeometryPath 클래스의 인스턴스를 가져옵니다.
- 경로의 세그먼트를 제거합니다.
- 경로를 도형에 적용합니다.
다음 Python 코드는 도형에서 포인트를 제거하는 방법을 보여줍니다:
import jpype
import asposeslides

if not jpype.isJVMStarted():
    jpype.startJVM()

from asposeslides.api import Presentation, ShapeType

presentation = Presentation()
try:
    shape = presentation.getSlides().get_Item(0).getShapes().addAutoShape(ShapeType.Heart, 100, 100, 300, 300)
    geometry_path = shape.getGeometryPaths()[0]
    geometry_path.removeAt(2)
    shape.setGeometryPath(geometry_path)
finally:
    presentation.dispose()
사용자 정의 도형 만들기
- 도형의 포인트를 계산합니다.
- GeometryPath 클래스의 인스턴스를 생성합니다.
- 포인트로 경로를 채웁니다.
- GeometryShape 클래스의 인스턴스를 생성합니다.
- 경로를 도형에 적용합니다.
다음 Python 코드는 사용자 정의 도형을 만드는 방법을 보여줍니다:
import jpype
import asposeslides

if not jpype.isJVMStarted():
    jpype.startJVM()

from asposeslides.api import Presentation, ShapeType, GeometryPath

import math

points = []
outer_radius = 100
inner_radius = 50
step = 72

for angle in range(-90, 270, step):
    radians = math.radians(angle)
    x = outer_radius * math.cos(radians)
    y = outer_radius * math.sin(radians)
    points.append((x + outer_radius, y + outer_radius))

    radians = math.radians(angle + step / 2)
    x = inner_radius * math.cos(radians)
    y = inner_radius * math.sin(radians)
    points.append((x + outer_radius, y + outer_radius))

star_path = GeometryPath()
star_path.moveTo(*points[0])
for point in points[1:]:
    star_path.lineTo(*point)
star_path.closeFigure()

presentation = Presentation()
try:
    shape = presentation.getSlides().get_Item(0).getShapes().addAutoShape(ShapeType.Rectangle, 100, 100, outer_radius * 2, outer_radius * 2)
    shape.setGeometryPath(star_path)
finally:
    presentation.dispose()

복합 사용자 정의 도형 만들기
- GeometryShape 클래스의 인스턴스를 생성합니다.
- 첫 번째 GeometryPath 클래스의 인스턴스를 생성합니다.
- 두 번째 GeometryPath 클래스의 인스턴스를 생성합니다.
- 경로들을 도형에 적용합니다.
다음 Python 코드는 복합 사용자 정의 도형을 만드는 방법을 보여줍니다:
import jpype
import asposeslides

if not jpype.isJVMStarted():
    jpype.startJVM()

from asposeslides.api import Presentation, ShapeType, GeometryPath

presentation = Presentation()
try:
    shape = presentation.getSlides().get_Item(0).getShapes().addAutoShape(ShapeType.Rectangle, 100, 100, 200, 100)

    top_path = GeometryPath()
    top_path.moveTo(0, 0)
    top_path.lineTo(shape.getWidth(), 0)
    top_path.lineTo(shape.getWidth(), shape.getHeight() / 3)
    top_path.lineTo(0, shape.getHeight() / 3)
    top_path.closeFigure()

    bottom_path = GeometryPath()
    bottom_path.moveTo(0, shape.getHeight() / 3 * 2)
    bottom_path.lineTo(shape.getWidth(), shape.getHeight() / 3 * 2)
    bottom_path.lineTo(shape.getWidth(), shape.getHeight())
    bottom_path.lineTo(0, shape.getHeight())
    bottom_path.closeFigure()

    shape.setGeometryPaths([top_path, bottom_path])
finally:
    presentation.dispose()

곡선 모서리를 가진 사용자 정의 도형 만들기
다음 Python 코드는 곡선 모서리(안쪽) 사용자 정의 도형을 만드는 방법을 보여줍니다:
import jpype
import asposeslides

if not jpype.isJVMStarted():
    jpype.startJVM()

from asposeslides.api import Presentation, ShapeType, GeometryPath, SaveFormat

shape_x = 20
shape_y = 20
shape_width = 300
shape_height = 200

left_top_size = 50
right_top_size = 20
right_bottom_size = 40
left_bottom_size = 10

presentation = Presentation()
try:
    shape = presentation.getSlides().get_Item(0).getShapes().addAutoShape(ShapeType.Custom, shape_x, shape_y, shape_width, shape_height)
    geometry_path = GeometryPath()
    geometry_path.moveTo(left_top_size, 0)
    geometry_path.lineTo(shape_width - right_top_size, 0)
    geometry_path.arcTo(right_top_size, right_top_size, 180, -90)
    geometry_path.lineTo(shape_width, shape_height - right_bottom_size)
    geometry_path.arcTo(right_bottom_size, right_bottom_size, -90, -90)
    geometry_path.lineTo(left_bottom_size, shape_height)
    geometry_path.arcTo(left_bottom_size, left_bottom_size, 0, -90)
    geometry_path.lineTo(0, left_top_size)
    geometry_path.arcTo(left_top_size, left_top_size, 90, -90)
    geometry_path.closeFigure()
    shape.setGeometryPath(geometry_path)
    presentation.save("output.pptx", SaveFormat.Pptx)
finally:
    presentation.dispose()
도형 기하가 닫혀 있는지 확인
닫힌 도형이란 모든 면이 연결되어 틈이 없는 단일 경계를 형성하는 경우를 말합니다. 이러한 도형은 단순한 기하 형태이거나 복잡한 사용자 정의 외곽선일 수 있습니다. 아래 코드 예제는 도형 기하가 닫혀 있는지 확인하는 방법을 보여줍니다:
import jpype
import asposeslides

if not jpype.isJVMStarted():
    jpype.startJVM()

from asposeslides.api import PathCommandType

def is_geometry_closed(geometry_shape):
    is_closed = False
    for geometry_path in geometry_shape.getGeometryPaths():
        path_data = geometry_path.getPathData()
        if len(path_data) == 0:
            continue
        last_segment = path_data[-1]
        is_closed = last_segment.getPathCommand() == PathCommandType.Close
        if not is_closed:
            return False
    return is_closed
GeometryPath를 java.awt.Shape로 변환
- GeometryShape 클래스의 인스턴스를 생성합니다.
- java.awt.Shape 클래스의 인스턴스를 생성합니다.
- PathIterator를 따라가면서 각 세그먼트를 경로에 재생하여 java.awt.Shape 인스턴스를 GeometryPath 인스턴스로 변환합니다.
- 경로들을 도형에 적용합니다.
다음 Python 코드는 그래픽 경로를 기하 경로로 변환하는 단계를 구현합니다:
import jpype
import asposeslides

if not jpype.isJVMStarted():
    jpype.startJVM()

from asposeslides.api import Presentation, ShapeType, GeometryPath, PathFillModeType

from java.awt import Font
from java.awt.geom import PathIterator
from java.awt.image import BufferedImage

presentation = Presentation()
try:
    # 새로운 도형을 생성합니다.
    shape = presentation.getSlides().get_Item(0).getShapes().addAutoShape(ShapeType.Rectangle, 100, 100, 300, 100)

    # 도형의 기하 경로를 가져옵니다.
    original_path = shape.getGeometryPaths()[0]
    original_path.setFillMode(PathFillModeType.None_)

    # 텍스트가 포함된 새로운 그래픽 경로를 생성합니다.
    font = Font("Arial", Font.PLAIN, 40)
    text = "Text in shape"
    image = BufferedImage(100, 100, BufferedImage.TYPE_INT_ARGB)
    graphics = image.createGraphics()
    try:
        glyph_vector = font.createGlyphVector(graphics.getFontRenderContext(), text)
        graphics_path = glyph_vector.getOutline(20.0, -glyph_vector.getVisualBounds().getY() + 10)
    finally:
        graphics.dispose()

    # 그래픽 경로를 기하 경로로 변환합니다.
    text_path = GeometryPath()
    path_iterator = graphics_path.getPathIterator(None)
    points = jpype.JArray(jpype.JFloat)(6)
    while not path_iterator.isDone():
        segment_type = path_iterator.currentSegment(points)
        if segment_type == PathIterator.SEG_MOVETO:
            text_path.moveTo(points[0], points[1])
        elif segment_type == PathIterator.SEG_LINETO:
            text_path.lineTo(points[0], points[1])
        elif segment_type == PathIterator.SEG_QUADTO:
            text_path.quadraticBezierTo(points[0], points[1], points[2], points[3])
        elif segment_type == PathIterator.SEG_CUBICTO:
            text_path.cubicBezierTo(points[0], points[1], points[2], points[3], points[4], points[5])
        elif segment_type == PathIterator.SEG_CLOSE:
            text_path.closeFigure()
        path_iterator.next()
    text_path.setFillMode(PathFillModeType.Normal)

    # 원본 기하 경로와 함께 텍스트 경로를 적용합니다.
    shape.setGeometryPaths([original_path, text_path])
finally:
    presentation.dispose()

FAQ
기하를 교체한 후 채우기와 외곽선은 어떻게 됩니까?
스타일은 도형에 그대로 남으며, 윤곽선만 변경됩니다. 채우기와 외곽선은 새 기하에 자동으로 적용됩니다.
기하와 함께 사용자 정의 도형을 올바르게 회전하려면 어떻게 해야 합니까?
도형의 setRotation 메서드를 사용하십시오; 기하가 도형에 연결되어 있기 때문에 도형과 함께 회전됩니다.
사용자 정의 도형을 이미지로 변환하여 결과를 “잠그” 수 있나요?
예. 필요한 slide 영역이나 shape 자체를 래스터 형식으로 내보내면 복잡한 기하를 다루는 작업이 간소화됩니다.